
I usually avoid April Fools' pranks. In my mind, they're usually mean spirited and not much fun. But this year, I just had to do it.
When the Eldest got off the bus this afternoon, I had the video camera ready and all the doors locked. He got to the front door and was told to say "I love Justin Bieber" in order to be allowed in the house. As expected, he refused and ran to the garage door. It was locked as well. So he ran to the back of the house. Locked. He then had the brilliant idea to try and pick the lock with the handle of a lollipop. Um. Yeah. Didn't work. :)
He finally caved and said it. :) I have it all recorded now for blackmail.
Have a great weekend! I'll be spending mine knitting.
Friday, April 01, 2011
Thursday, March 31, 2011
The Butter Thief
There's a butter thief in the house. Here's how the thief did the job:
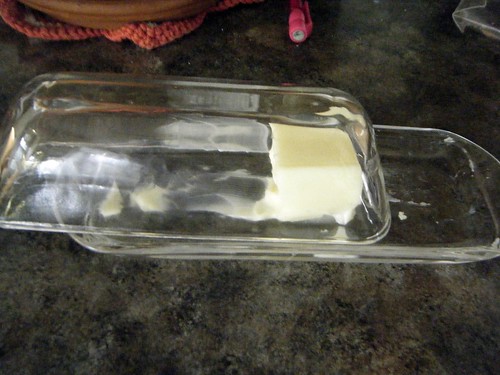
At approximately 6:45 am the butter was left on the counter in it's covered dish. Between 6:45 and 7:00 am the thief shoved the lid out of the way and consumed a good amount of the butter she could get to. At 7:01 the thief was remanded into custody and a mug shot was taken.
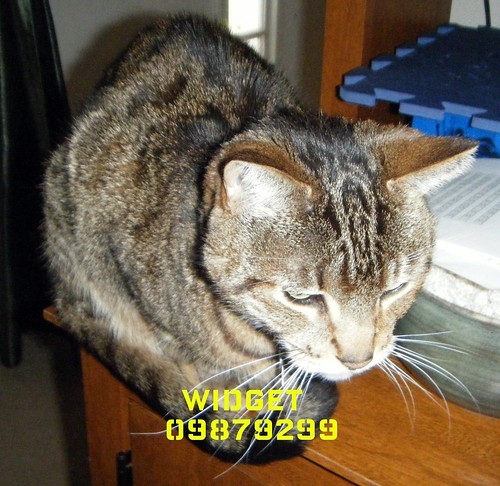
The thief showed no remorse to the judge and will be given the harshest of penalties. Or at least as soon as the judge can figure an appropriate one out. :)
At approximately 6:45 am the butter was left on the counter in it's covered dish. Between 6:45 and 7:00 am the thief shoved the lid out of the way and consumed a good amount of the butter she could get to. At 7:01 the thief was remanded into custody and a mug shot was taken.
The thief showed no remorse to the judge and will be given the harshest of penalties. Or at least as soon as the judge can figure an appropriate one out. :)
Thursday, March 24, 2011
It Ought To Be A Sin
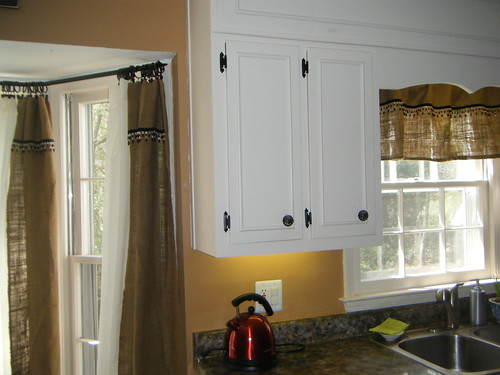
Giving in to the overwhelming desire to avoid knitting, I made a valance to go above my kitchen window today. And ya know what? Having so much fun with burlap, beaded trim and hot glue ought to be a sin.
Here it is laying out. This is where I realized that I had hemmed it (with hot glue) all wrong. Once again proving that every project I touch goes wrong somewhere.
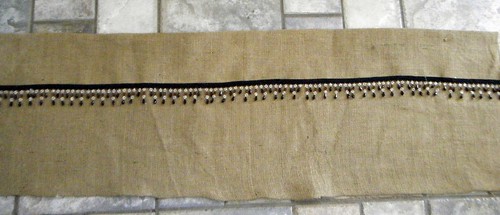
The hem on the bottom was made my folding over the burlap about one inch and hot gluing it down. The top was folded over on the opposite side and glued straight down with no hem. The bottom edge of that was hidden with some more hot glue and the beaded trim. So incredibly easy to do. It was then hung on a simple cafe curtain rod.
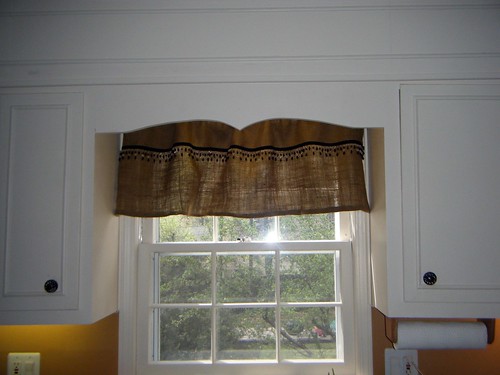
Here it is hanging in the window after the fixing of the hem:
And here's the side view so that you can see how it echos what was done in the bay window:

Another angle:
I'm still fiddling with how I want it to ruffle. I can't seem to get it quite the way I want it, but it'll come.
This kitchen has come such a long way over the past two years. I should have had this valance finished about a year ago, but life got in my way and it just wasn't a priority. However, the sun is now streaming in the window in the late afternoon and it makes the kitchen unbearably hot and bright and I think this small valance is just what the doctor ordered, don't you?
Here it is laying out. This is where I realized that I had hemmed it (with hot glue) all wrong. Once again proving that every project I touch goes wrong somewhere.
The hem on the bottom was made my folding over the burlap about one inch and hot gluing it down. The top was folded over on the opposite side and glued straight down with no hem. The bottom edge of that was hidden with some more hot glue and the beaded trim. So incredibly easy to do. It was then hung on a simple cafe curtain rod.
Here it is hanging in the window after the fixing of the hem:
And here's the side view so that you can see how it echos what was done in the bay window:
Another angle:
I'm still fiddling with how I want it to ruffle. I can't seem to get it quite the way I want it, but it'll come.
This kitchen has come such a long way over the past two years. I should have had this valance finished about a year ago, but life got in my way and it just wasn't a priority. However, the sun is now streaming in the window in the late afternoon and it makes the kitchen unbearably hot and bright and I think this small valance is just what the doctor ordered, don't you?
Wednesday, March 23, 2011
Kefir?
A month ago, I had no idea what Kefir was. I have just recently started researching and making my own kefir and thought I would share with you what I've been doing. There are tons and tons of sites that talk about kefir and it's health benefits. You can see one here and a really good one here. Google has many more fantastic sites that can give you in-depth information on kefir.
Basically, kefir is a probiotic and a complete food. Where most of the yogurt that you purchase in the store has 4 of the "good" bacteria, kefir (home made) has around 30. Kefir is not a new "flash in the pan" product, it's been around for thousands of years. It's a fermented milk product that in my opinion, is far superior to yogurt and is way easier to make at home. It's reported healing properties are nothing short of miraculous as well. It's especially good for people with Irritable Bowel Syndrome and other stomach ailments, but beyond that it can help with allergies, skin and hair problems and has even been shown to help with problems related to cancer. It can also help avoid the major stomach ailments that travelers get when they go to foreign countries. Oh, and don't forget the weight loss! It speeds up your metabolism and you can use it as a meal replacement since it's a complete food. Don't take my word about all this, read up on it and you'll see.
So, since my little family deals with IBS on a daily basis, I thought (in true diy fashion) that I would try making my own. As I said, this is so much easier to make than yogurt and so much better for you.
To start off you need to get some kefir grains. You can get starter cultures from health food stores, but these won't last. You'll just have to replace them over time. I purchased my kefir grains from www.culturesforhealth.com. I am not affiliated with this company, it's just where I decided to make my purchase. You can find many more places online that sell the grains. This is a one time purchase as kefir can last forever. Literally. As you use the grains to make kefir, over time they will grow larger and produce more.
Kefir grains do not, in fact, look like grains at all. They more closely resemble cauliflower. Here's an example:
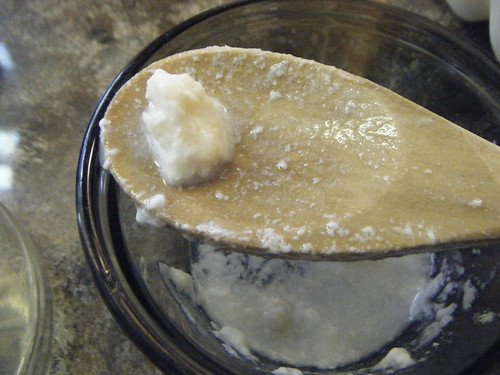
At this point you must ignore the fact that it looks like baby spit-up and bravely forge on. :)
Next add your milk. You can use any type of milk, even soy milk products to make your kefir. I have used both skim and 2% and this summer plan on using heavy cream and using it to make ice cream with. When I add my milk, I don't measure, I just fill up the whole jar. I also add about 1 tsp of sugar to it, but it's probably not needed. Then cover it with a coffee filter or a towel and let it sit overnight.
In it's plain state, it looks like a cross between yogurt and buttermilk and tastes like it too. BThe longer it sits on the counter, the more strong the sour taste. Mine is a little sweeter because of the 1 tsp of sugar that I add at the beginning of the fermentation process. It really tastes pretty good and can be consumed as is. I prefer to turn it into smoothies myself though.
You can use it in place of buttermilk or yogurt in recipes. Smoothies, pancakes, ice cream, cheese, the possibilities are endless. Heat will kill off the good bacteria that you need, so be aware of that.
So is it working? So far so good. It's only been about two weeks and I think it will take more time to get into our systems to truly see a difference. I'll have to let you know. I figure that any step that I can take to make my family more healthy will be absolutely worth it!
Basically, kefir is a probiotic and a complete food. Where most of the yogurt that you purchase in the store has 4 of the "good" bacteria, kefir (home made) has around 30. Kefir is not a new "flash in the pan" product, it's been around for thousands of years. It's a fermented milk product that in my opinion, is far superior to yogurt and is way easier to make at home. It's reported healing properties are nothing short of miraculous as well. It's especially good for people with Irritable Bowel Syndrome and other stomach ailments, but beyond that it can help with allergies, skin and hair problems and has even been shown to help with problems related to cancer. It can also help avoid the major stomach ailments that travelers get when they go to foreign countries. Oh, and don't forget the weight loss! It speeds up your metabolism and you can use it as a meal replacement since it's a complete food. Don't take my word about all this, read up on it and you'll see.
So, since my little family deals with IBS on a daily basis, I thought (in true diy fashion) that I would try making my own. As I said, this is so much easier to make than yogurt and so much better for you.
To start off you need to get some kefir grains. You can get starter cultures from health food stores, but these won't last. You'll just have to replace them over time. I purchased my kefir grains from www.culturesforhealth.com. I am not affiliated with this company, it's just where I decided to make my purchase. You can find many more places online that sell the grains. This is a one time purchase as kefir can last forever. Literally. As you use the grains to make kefir, over time they will grow larger and produce more.
Kefir grains do not, in fact, look like grains at all. They more closely resemble cauliflower. Here's an example:
Looks gross doesn't it?
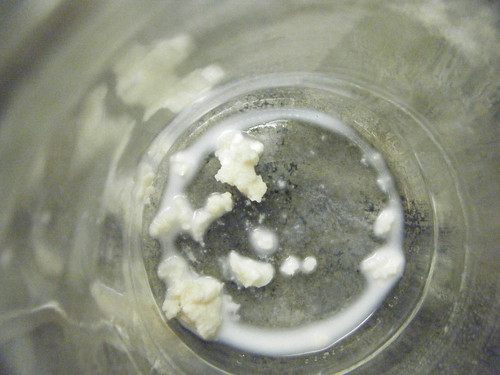
Here's how simple it is to make. Take a clean glass jar and put your kefir grains into it.
At this point you must ignore the fact that it looks like baby spit-up and bravely forge on. :)
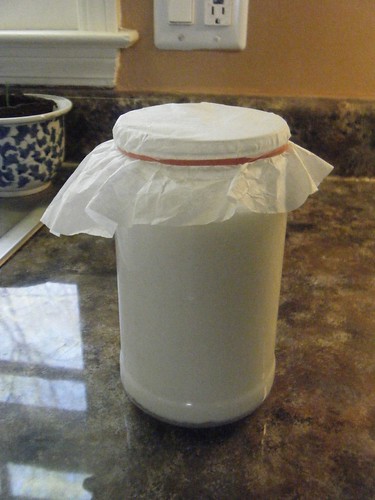
Next add your milk. You can use any type of milk, even soy milk products to make your kefir. I have used both skim and 2% and this summer plan on using heavy cream and using it to make ice cream with. When I add my milk, I don't measure, I just fill up the whole jar. I also add about 1 tsp of sugar to it, but it's probably not needed. Then cover it with a coffee filter or a towel and let it sit overnight.
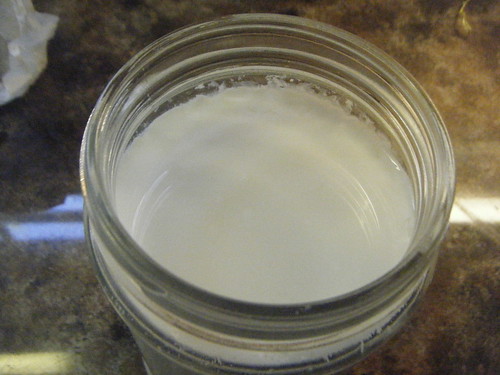
After the 24 hours (or less in my case) is up, your milk will have thickened considerably. The picture below shows it in it's finished state, but the pic doesn't really capture the thickness.
Once the milk has "kefir-ed" you need to strain out the grains and separate them from the kefir product. Most people say not to use a metal strainer, but since that's all I have, that's what I use. You know what? It hasn't affected the grains or the final product one little bit. So use what you have folks.
Now the next big question is what the heck do you do with it once it's made?
In it's plain state, it looks like a cross between yogurt and buttermilk and tastes like it too. BThe longer it sits on the counter, the more strong the sour taste. Mine is a little sweeter because of the 1 tsp of sugar that I add at the beginning of the fermentation process. It really tastes pretty good and can be consumed as is. I prefer to turn it into smoothies myself though.
You can use it in place of buttermilk or yogurt in recipes. Smoothies, pancakes, ice cream, cheese, the possibilities are endless. Heat will kill off the good bacteria that you need, so be aware of that.
So is it working? So far so good. It's only been about two weeks and I think it will take more time to get into our systems to truly see a difference. I'll have to let you know. I figure that any step that I can take to make my family more healthy will be absolutely worth it!
Monday, March 21, 2011
Frothy Knitting
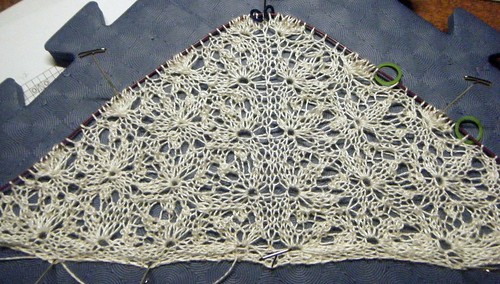
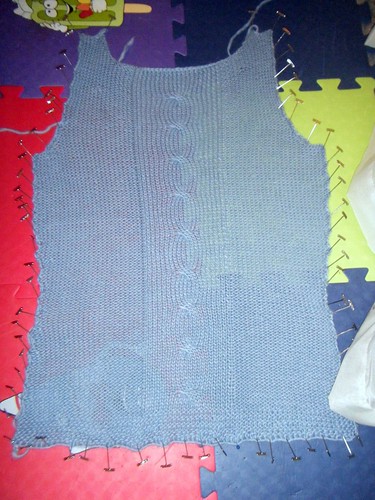
The Echo Flower Shawl is coming along well so far. I've been knitting like a mad woman, but I'm only getting about 1 repeat per day now, where at the beginning I was averaging two repeats. I've finished nine of the thirteen repeats before the border and edging are applied. It's growing exponentially now, but it's difficult to see it when you lay it out. See?
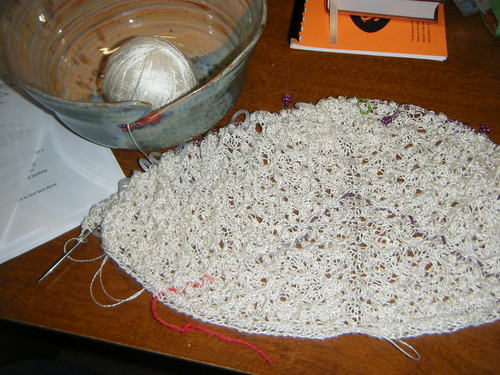
It has a bubbly, frothy milk kind of look to it. What's cool is when you spread out a few of the bubbles and see what they turn into:
It has a bubbly, frothy milk kind of look to it. What's cool is when you spread out a few of the bubbles and see what they turn into:
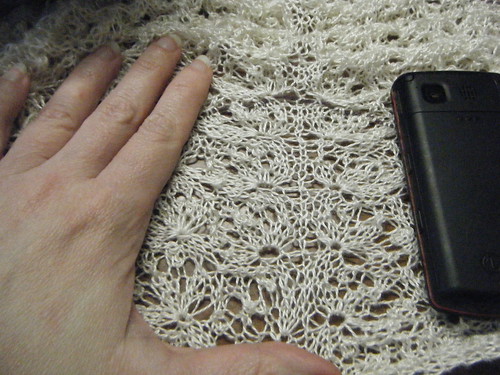
Can you see the flowers now? It's very difficult to stretch the knitting out and still take a picture. My thumb distorted one of the flowers quite badly, didn't it?
The magic of blocking will show off those flowers nicely. However, I'm kind of scared to block it. I'm having some major "What IF?" doubts. What if I've screwed something up royally and just can't see it now? What if I finish the shawl, block it and find HUGE unforgivable mistakes? What if the Bride hates it?
You know, those kind of What Ifs. I'm not sure why I'm worried about it. It's not like it has to be finished in about 2.5 weeks. It's not like there's going to be time to fix any mistakes. It's not like it's for an important occasion or anything, you know, like a WEDDING! Jeez, why do I put myself into stressful situations?
Monday, March 14, 2011
Can't You See I'm Counting?
I know for a fact that there's a mistake in here, but for the life of me I can't find it and to top it off, the stitch count on either side is correct. Go figure. No time to find it, moving on.
Everyone in my life is now forbidden to talk to me for the next three weeks. Shush, Mommy's counting. I said, hush, I'm counting. For the love of Pete, SHUT UP, CAN'T YOU SEE I'M COUNTING HERE? Unless you've knit lace, you can never really understand the humor in the above counting statements.
Everyone in my life is now forbidden to talk to me for the next three weeks. Shush, Mommy's counting. I said, hush, I'm counting. For the love of Pete, SHUT UP, CAN'T YOU SEE I'M COUNTING HERE? Unless you've knit lace, you can never really understand the humor in the above counting statements.
Friday, March 11, 2011
Winding On
I'm exhausted. I'm not exaggerating either. I'm plum tuckered out. This past week has been filled with clothes, toys, infant crap, etc. I've been spending all my time co-chairing a huge children's consignment sale. So if you've wondered (yet again) I'd wandered off to, there's your answer.
In knitting news, I finally started my cousin's wedding shawl. I now have three weeks to get it finished. Starting on Sunday, that's all I'll be doing for the foreseeable future. I might take time out to eat and sleep, but we'll have to see about that.
When I start a new project, I always like take the hank and wind it into a nice tight little ball. None of those fancy center pull balls for me, they always eventually collapse and turn into yarn barf. So I started winding away while watching Top Gear the other night (the British version) while sitting in my favorite chair. You really don't want to know how long it took me to wind that thousand yards of yarn. You just don't. I'll tell you anyway: 1.5 hours. HOURS. My hand was aching from holding that stupid ball.
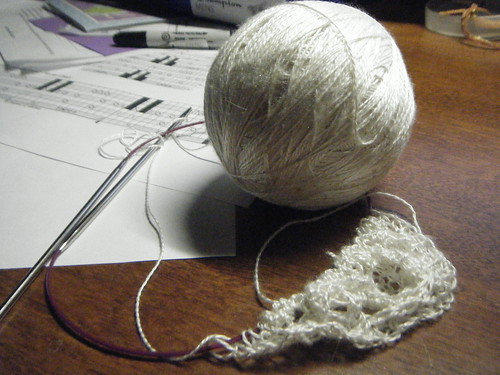
On the other hand, it was pure pleasure. This may be the softest yarn I've ever worked with. It's going to be incredible when all knit up. Notice my confidence that I'm going to get this project finished in three weeks. :)
Have a great weekend!
In knitting news, I finally started my cousin's wedding shawl. I now have three weeks to get it finished. Starting on Sunday, that's all I'll be doing for the foreseeable future. I might take time out to eat and sleep, but we'll have to see about that.
When I start a new project, I always like take the hank and wind it into a nice tight little ball. None of those fancy center pull balls for me, they always eventually collapse and turn into yarn barf. So I started winding away while watching Top Gear the other night (the British version) while sitting in my favorite chair. You really don't want to know how long it took me to wind that thousand yards of yarn. You just don't. I'll tell you anyway: 1.5 hours. HOURS. My hand was aching from holding that stupid ball.
On the other hand, it was pure pleasure. This may be the softest yarn I've ever worked with. It's going to be incredible when all knit up. Notice my confidence that I'm going to get this project finished in three weeks. :)
Have a great weekend!
Friday, March 04, 2011
Thursday, March 03, 2011
My Upcoming Silk Project
There's a wedding in my future, not mine (been there, done that) but my cousin's. It's in April, like next month. A few years ago I made her sister a wedding shawl. Guess what? Now she needs one too.
So, her Mom and I picked out one that we thought would suit her and it's the Echo Flower Shawl by Jenny Johnson Johnen. I'm making the shawl size and the yarn that I've picked out is this one:
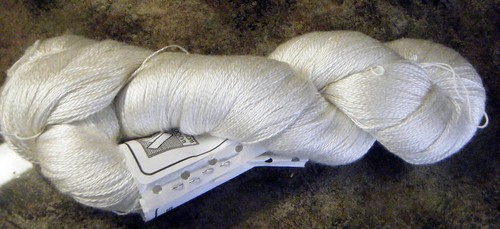
So, her Mom and I picked out one that we thought would suit her and it's the Echo Flower Shawl by Jenny Johnson Johnen. I'm making the shawl size and the yarn that I've picked out is this one:
It's from Woodland Woolworks and is a 20/2 silk lace weight and absolutely gorgeous and soft.
My problem with making this shawl in less than a month is that next week I'm going to be up to my eyeballs in a children's consignment sale that I'm co-chairing. There won't be any knitting time for me next week or this weekend for that matter as I'm starting to prepare for it. God help me.
Wednesday, March 02, 2011
From Olives & Grapes
http://fromolivesandgrapes.com/Site/Welcome.htmlIf you are ever in the Cocoa Beach, Florida, there's a shop you should take time to drop into. It's called From Olives & Grapes and it's a very unique little place. They specialize in flavored Olive Oils and Balsamic Vinegars. Sound weird? I thought so until I went in there.
It's set up in a huge circular bar and there are little cups for tasting the oils and vinegars. There are so many flavors! You can check them out on their website. I brought home Expresso Balsamic Vinegar and Pomegranate Balsamic Vinegar. My brother had already given me some Chocolate Balsamic Vinegar and Basil Olive Oil.
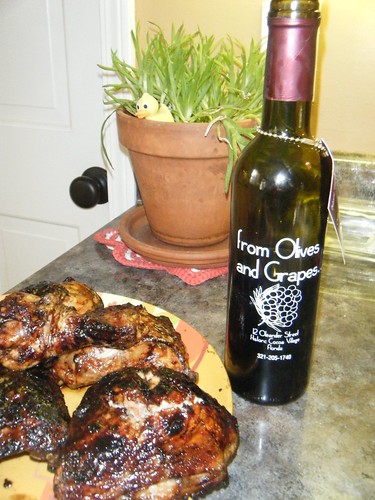
I played with the pomegranate one tonight by making a reduction. I cooked 1 cup full in a small sauce pan on the stove until I had about 1/2 a cup and it had thickened up a bit. Then, I put some chicken on the grill and glazed it with the reduction. It was absolutely fantastic! Just look how beautiful the chicken turned out:
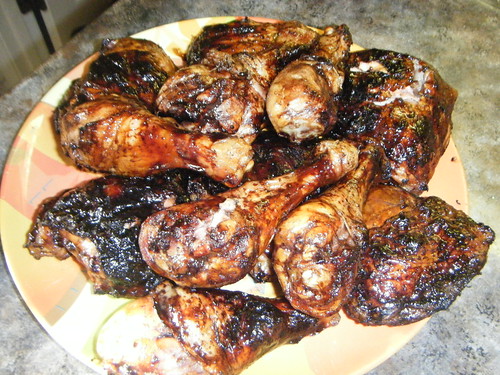
That's not burned by the way. The reduction was a very dark brown and it carmelized while on the grill. Oh so good! By the way, I am not affiliated with this shop in any way, shape or fan, but I am now a big fan!
It's set up in a huge circular bar and there are little cups for tasting the oils and vinegars. There are so many flavors! You can check them out on their website. I brought home Expresso Balsamic Vinegar and Pomegranate Balsamic Vinegar. My brother had already given me some Chocolate Balsamic Vinegar and Basil Olive Oil.
I played with the pomegranate one tonight by making a reduction. I cooked 1 cup full in a small sauce pan on the stove until I had about 1/2 a cup and it had thickened up a bit. Then, I put some chicken on the grill and glazed it with the reduction. It was absolutely fantastic! Just look how beautiful the chicken turned out:
That's not burned by the way. The reduction was a very dark brown and it carmelized while on the grill. Oh so good! By the way, I am not affiliated with this shop in any way, shape or fan, but I am now a big fan!
Monday, February 28, 2011
The Trip
Did you think that I fell off the face of the earth? Almost, but not quite. We took a quick trip to Universal Studios in Orlando, FL. Two 12 hour trips (there and back) with two kids in the car. Oh boy. Made for a long, long ride. Thank goodness for portable dvd players and headphones!
It was me and the Eldest that actually went to the park, everyone else crashed at my brother's pad. The Eldest has been desperate to go see the Harry Potter part of the park so we hit there first. Unfortunately, the only camera I have was on my crappy phone. It has a very poor excuse for a camera, but I did get a few fuzzy pics for ya.
Here's the Hogwart's train, the Eldest and two old folks we didn't know but were captured in our memory forever:

The Castle and a really odd smile from the Eldest:

The highlight of the Harry Potter stuff was in Ollivander's Wand Shop. We stood in line for an hour to finally be ushered in the door with about 20 other people. The shops are all tiny and you have to stand in line just to get into the gift shops. It's utterly ridiculous. I don't care if it's supposed to be true to the size of the shops in the books, it was poor planning for an amusement park. Anyway, once in the shop, the kids were told to go to the front. Ollivander came down the steps and welcomed the crowd and then began studying the children. Only one child is chosen per group to be "measured" for a wand. He made a beeline for the Eldest. It was so much fun to watch.
He made him hold out his "wand arm" and the Eldest did so while the guy carried on teaching the crowd how a wand chooses it's owner. Every time the Eldest's arm started to droop down the guy would stop what he was saying and just stare at the poor kid until the arm came back up. It was so funny. Then he gave the Eldest a wand and had him perform a spell to move a ladder. Drawers opened instead. Not the right wand. He picked another for the Eldest to try. This time he was supposed to make one bell ring. Tons of bells rung. The guy said, "Obviously not the right wand, but we're getting closer!" When the Eldest took the last wand, light started streaming down on him and a chorus of angels started singing. It was very well done and it totally made the kid's day. The only drawback was they made us pay for the wand, but we can't have everything, can we? :)
The Eldest was ready to leave the park right then. I could have wrung his little neck. We paid that much for tickets and he didn't want to see anything else? Good thing I'm a mean Mommy or we wouldn't have got this pic:
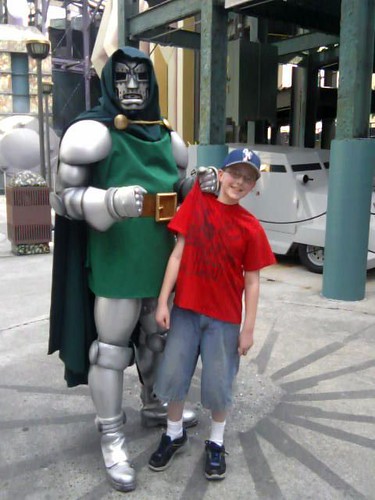
Or this one:

Or this one:

It really was a lot of fun.
It was me and the Eldest that actually went to the park, everyone else crashed at my brother's pad. The Eldest has been desperate to go see the Harry Potter part of the park so we hit there first. Unfortunately, the only camera I have was on my crappy phone. It has a very poor excuse for a camera, but I did get a few fuzzy pics for ya.
Here's the Hogwart's train, the Eldest and two old folks we didn't know but were captured in our memory forever:
The Castle and a really odd smile from the Eldest:
The highlight of the Harry Potter stuff was in Ollivander's Wand Shop. We stood in line for an hour to finally be ushered in the door with about 20 other people. The shops are all tiny and you have to stand in line just to get into the gift shops. It's utterly ridiculous. I don't care if it's supposed to be true to the size of the shops in the books, it was poor planning for an amusement park. Anyway, once in the shop, the kids were told to go to the front. Ollivander came down the steps and welcomed the crowd and then began studying the children. Only one child is chosen per group to be "measured" for a wand. He made a beeline for the Eldest. It was so much fun to watch.
He made him hold out his "wand arm" and the Eldest did so while the guy carried on teaching the crowd how a wand chooses it's owner. Every time the Eldest's arm started to droop down the guy would stop what he was saying and just stare at the poor kid until the arm came back up. It was so funny. Then he gave the Eldest a wand and had him perform a spell to move a ladder. Drawers opened instead. Not the right wand. He picked another for the Eldest to try. This time he was supposed to make one bell ring. Tons of bells rung. The guy said, "Obviously not the right wand, but we're getting closer!" When the Eldest took the last wand, light started streaming down on him and a chorus of angels started singing. It was very well done and it totally made the kid's day. The only drawback was they made us pay for the wand, but we can't have everything, can we? :)
The Eldest was ready to leave the park right then. I could have wrung his little neck. We paid that much for tickets and he didn't want to see anything else? Good thing I'm a mean Mommy or we wouldn't have got this pic:
Or this one:
Or this one:
It really was a lot of fun.
Thursday, February 17, 2011
Mystere Progress
I have finally completed the other side of the Mystere sweater:
I have already made a mod to the sleeves. The way the pattern is currently written has the panel in the middle with no cable pattern. I decided to add the cable pattern back into it so that it echos the panel that is on the main body. On the main body, the pattern calls for you to K7, do the cable, K7. On the sleeves, I have done K4, do the cable, K4. Other than that, so far I'm doing the pattern as written.
I have already made a mod to the sleeves. The way the pattern is currently written has the panel in the middle with no cable pattern. I decided to add the cable pattern back into it so that it echos the panel that is on the main body. On the main body, the pattern calls for you to K7, do the cable, K7. On the sleeves, I have done K4, do the cable, K4. Other than that, so far I'm doing the pattern as written.
Wednesday, February 16, 2011
Cessna
Yesterday was a good day for waterproof mascara. We had to have our dog put down. She was ancient (18 years to be exact) and just couldn't make it any further. She had developed a tumor in her sinuses, gone blind and deaf and finally lost her sense of smell. There were other issues as well, poor thing.
Cessna had a good long life and we got to spend 14 of those 18 years with her.
Cessna had a good long life and we got to spend 14 of those 18 years with her.
Monday, February 14, 2011
The Birthday Party
The birthday party was a huge success. The kids all had a fun time and took home lots of loot and the play room was completely trashed. My kids weren't real thrilled about the play room since it's their responsibility to keep it cleaned up, but they got over it.
Since our house number is a little difficult to see, I made a huge bat symbol to put on the front door so everybody would know what house was having the party and it worked like a charm. Every kid was yelling at their Mom while in the car "Look at his front door!" I took a piece of yellow posterboard and used a projector to get the bat symbol onto it and then painted it in with black craft paint. Very easy. It's now on his wall above his bed.
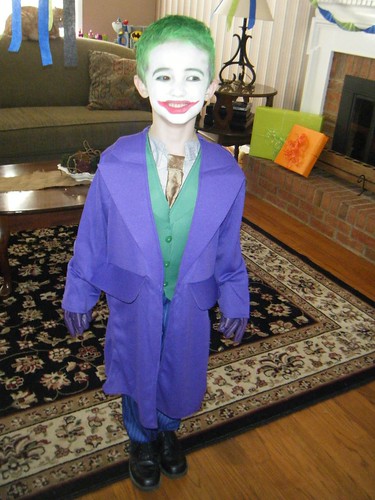
We had face painting for the kids, but only two took us up on it. One had a bat and the other kid (who belonged to me) went as the Joker:

The house was filled with blue, green and black crepe paper streamers as well as the same color balloons. We also made some bats before hand for a game that the kids played. We taped them to the kids' backs and they had a game of tag where they had to chase each other (in the house - total chaos) and see how many bats they could collect.
I also had all the kids "capture" The Joker by putting him into a chair and wrapping him up with rolls of toilet paper. In order to get his presents he had to "escape" from his bonds. He loved that part.
The only other game we had was one called "Stomp the Bad Guy". We filled balloons with candy, blew them up and drew stuff to represent the bad guys on them with a sharpie marker. For the Joker we wrote "Ha Ha Ha". The Penguin had an umbrella, Catwoman a cat and the Riddler had question marks. There were two balloons for each kid to pop. One little girl was so tiny that she had to get a pair of scissors to pop her balloon. She just didn't have the weight to do it. It was very cute.
The capes that I made were also a big hit and they wore them for most of the party and were really excited that they got to take them home. They took the bats from the tag game home as well.
The little guy had this smile on his face the entire day, long after the kids went home. I call that a big success!
Since our house number is a little difficult to see, I made a huge bat symbol to put on the front door so everybody would know what house was having the party and it worked like a charm. Every kid was yelling at their Mom while in the car "Look at his front door!" I took a piece of yellow posterboard and used a projector to get the bat symbol onto it and then painted it in with black craft paint. Very easy. It's now on his wall above his bed.
We had face painting for the kids, but only two took us up on it. One had a bat and the other kid (who belonged to me) went as the Joker:
This is his action pose
The house was filled with blue, green and black crepe paper streamers as well as the same color balloons. We also made some bats before hand for a game that the kids played. We taped them to the kids' backs and they had a game of tag where they had to chase each other (in the house - total chaos) and see how many bats they could collect.
I also had all the kids "capture" The Joker by putting him into a chair and wrapping him up with rolls of toilet paper. In order to get his presents he had to "escape" from his bonds. He loved that part.
The only other game we had was one called "Stomp the Bad Guy". We filled balloons with candy, blew them up and drew stuff to represent the bad guys on them with a sharpie marker. For the Joker we wrote "Ha Ha Ha". The Penguin had an umbrella, Catwoman a cat and the Riddler had question marks. There were two balloons for each kid to pop. One little girl was so tiny that she had to get a pair of scissors to pop her balloon. She just didn't have the weight to do it. It was very cute.
The capes that I made were also a big hit and they wore them for most of the party and were really excited that they got to take them home. They took the bats from the tag game home as well.
The little guy had this smile on his face the entire day, long after the kids went home. I call that a big success!
Friday, February 11, 2011
Batman Birthday Cake
Before tomorrow's birthday party, let me introduce you to the official Batman Cake (please ignore the outlet in the background):
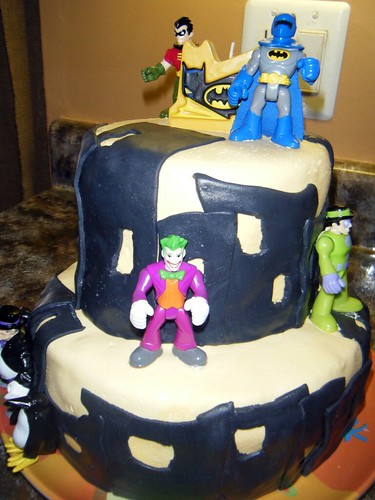
It's made from Marshmallow Fondant frosting and it was way easier to do than I expected (the cake, not the fondant. I've made that before.) For a great tutorial on how to make the fondant go here. I added yellow food coloring, Wilson's Paste, to the fondant as it was mixing. As long as you use a ton of vegetable shortening all over your counters and rolling pin, this fondant is really easy to work with. Clean up's a real pain, but I'll take that. Once I used all the yellow I needed, I added the black to the mix using my Kitchenaid Mixer.
I decided to go with a yellow cake and black cityscape. When it came time to do the buildings, I cut out squares for windows to let the yellow show through. I also let all the buildings be way off kilter for an authentic cartoon look to Gotham City. Have you ever really studied buildings in cartoons? They are never straight up and down. Go watch a Looney Tunes cartoon sometime and you'll see what I mean. Every single window, doorway and building is skewed.
If your background frosting, in this case yellow, is not perfect, don't try to make it so. You'll be layering on tons of buildings and it hides imperfections like a dream. I did the layering one building at a time and put windows in where the yellow was perfect.
The candle on the cake came from Party City and the figures are all Batman Imaginext toys that my son already had.

I'm thrilled with how this turned out!
It's made from Marshmallow Fondant frosting and it was way easier to do than I expected (the cake, not the fondant. I've made that before.) For a great tutorial on how to make the fondant go here. I added yellow food coloring, Wilson's Paste, to the fondant as it was mixing. As long as you use a ton of vegetable shortening all over your counters and rolling pin, this fondant is really easy to work with. Clean up's a real pain, but I'll take that. Once I used all the yellow I needed, I added the black to the mix using my Kitchenaid Mixer.
I decided to go with a yellow cake and black cityscape. When it came time to do the buildings, I cut out squares for windows to let the yellow show through. I also let all the buildings be way off kilter for an authentic cartoon look to Gotham City. Have you ever really studied buildings in cartoons? They are never straight up and down. Go watch a Looney Tunes cartoon sometime and you'll see what I mean. Every single window, doorway and building is skewed.
If your background frosting, in this case yellow, is not perfect, don't try to make it so. You'll be layering on tons of buildings and it hides imperfections like a dream. I did the layering one building at a time and put windows in where the yellow was perfect.
The candle on the cake came from Party City and the figures are all Batman Imaginext toys
I'm thrilled with how this turned out!
Thursday, February 10, 2011
Let's Make A Super Cape!
So say you have a Super Hero party for your child (ours is coming up this Saturday.) Could be Batman, Superman, etc. And suppose you need a cape for the Super Hero. Oh, and one for each of the guest heros that will be attending the party. Should you shell out a bunch of cash and buy them pre-made. NO! I'll show you a way to make a Super Cape (or 20) and do it for pennies. Sound good? Let's get started.
1. The first step is to make a template of your cape. Grab some newspaper. I would also recommend a child to hold it up against, but that's strictly optional. :)

These are the (very crudely drawn) measurements of the ones that I made. This was to fit a five year old boy. I know for a fact that there will be a tiny little girl at the party that this will probably hang on and I'll need to make some adjustments to it for her. Like I said, if you have a child in front of you that you can measure against, it would be really helpful.
I wanted to have the cape fall just below the rear end of the child and not be skimming the floor. This is for a Super Hero, not Darth Vader. If you plan on making a Vader cape, plan to make it twice as long.
Notice that the outsides at the collar edge are angled in. If you do not cut those angles, the cape will not drape right and it will sit all wonky at the shoulders.
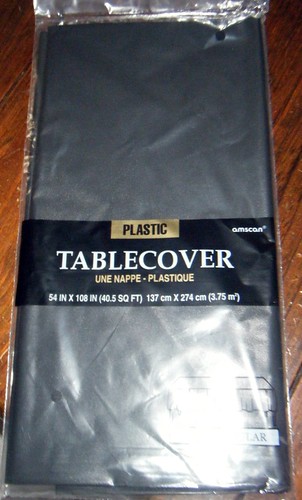
2. The Material. This is where you save the pennies when making this for multiple children. I did not use fabric. Fabric can get really pricey and I just don't have the money right now to shell out that much for this many capes. The next best thing? Plastic Tablecovers! You can find these at Party City or at your local dollar store. I've made all sorts of costume pieces for the stage for children out of this material and it will save you a ton of money.
4. Cut to the pattern. When you lay your newspaper pattern on each piece of the tablecover that you have cut, save yourself some cutting time by moving the pattern all the way to corner at the bottom. This way you have two less sides to cut.
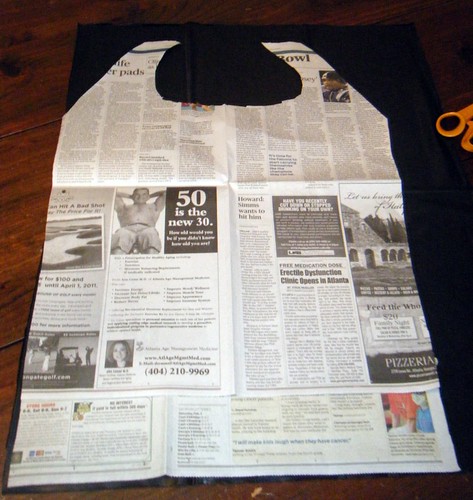
5. Cut the fabric out. Then the finishing touches are added. You can add some Sticky Back Velcro, shown below, to the points at the collar to hold it on. In the case of Batman, points were cut out at the bottom of the cape to give it that bat-like effect.
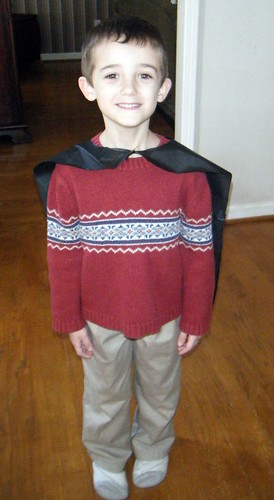
6. Try It On!

1. The first step is to make a template of your cape. Grab some newspaper. I would also recommend a child to hold it up against, but that's strictly optional. :)
These are the (very crudely drawn) measurements of the ones that I made. This was to fit a five year old boy. I know for a fact that there will be a tiny little girl at the party that this will probably hang on and I'll need to make some adjustments to it for her. Like I said, if you have a child in front of you that you can measure against, it would be really helpful.
I wanted to have the cape fall just below the rear end of the child and not be skimming the floor. This is for a Super Hero, not Darth Vader. If you plan on making a Vader cape, plan to make it twice as long.
Notice that the outsides at the collar edge are angled in. If you do not cut those angles, the cape will not drape right and it will sit all wonky at the shoulders.
2. The Material. This is where you save the pennies when making this for multiple children. I did not use fabric. Fabric can get really pricey and I just don't have the money right now to shell out that much for this many capes. The next best thing? Plastic Tablecovers! You can find these at Party City or at your local dollar store. I've made all sorts of costume pieces for the stage for children out of this material and it will save you a ton of money.
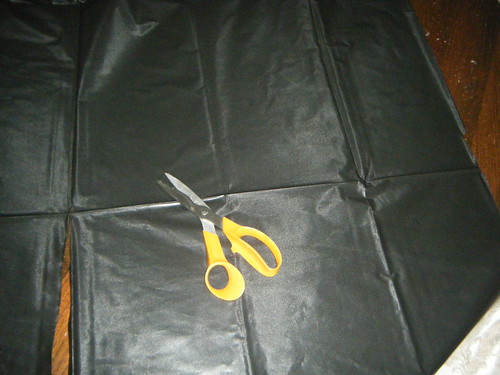
3. The horizontal fold that you see going through the center is the main center fold. I cut along the center fold and then every three rectangles to get the measurements seen above. Use your individual child's measurements to make sure that you have the width and length that you need. The factory folds just made this project easy for me to measure by. With the 54" x 108" table cover, I got enough "fabric" to make 10 capes. I purchased two tablecovers to get my 20.
4. Cut to the pattern. When you lay your newspaper pattern on each piece of the tablecover that you have cut, save yourself some cutting time by moving the pattern all the way to corner at the bottom. This way you have two less sides to cut.
5. Cut the fabric out. Then the finishing touches are added. You can add some Sticky Back Velcro, shown below, to the points at the collar to hold it on. In the case of Batman, points were cut out at the bottom of the cape to give it that bat-like effect.
6. Try It On!
BackView
Front View:
So what was the final cost per cape? I spent $1.99 for each tablecover totaling $4.00. Divide that by 20 and it comes out to just 20 cents per child! Not too shabby huh?
Tuesday, February 08, 2011
Thrift Store Fun
I went thrift shopping this weekend and was a woman on a mission. See I have this seating problem at my place. If I'm not in the living room and want a chair to relax in, the only options up til now have been a kitchen chair or my office chair. Now, I love my office chair. It's super comfy and I spend most of my day there. However, sometimes a gal needs a chair of her own and I wanted mine in the bedroom.
I did have a rocking chair in there. An old wooden one that was great for rocking babies, but it was not so kind on the rear end. It mostly held clothing that the husband just threw on it. Most people use a treadmill for draping clothes, he used the rocking chair. I have no clue what we're going to do with the chair now. We don't have room for it and it won't fit in the attic.
Anyway, we (my Mom and I) went shopping. The first place we hit (Goodwill), we struck gold. I found a small chair that had great high quality upholstery fabric and was super comfy. Best of all, it was only $25 bucks. Can't beat that with a stick, can ya? It needs cleaning and a little bit of tlc, but other than that, it's perfect.
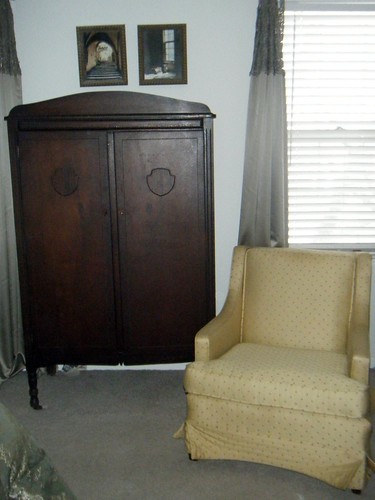
Welcome to my bedroom (I just realized that I've never shown you it before):
Mama's happy now. One comfy chair in the bedroom that didn't break the bank. Very cool.
I did have a rocking chair in there. An old wooden one that was great for rocking babies, but it was not so kind on the rear end. It mostly held clothing that the husband just threw on it. Most people use a treadmill for draping clothes, he used the rocking chair. I have no clue what we're going to do with the chair now. We don't have room for it and it won't fit in the attic.
Anyway, we (my Mom and I) went shopping. The first place we hit (Goodwill), we struck gold. I found a small chair that had great high quality upholstery fabric and was super comfy. Best of all, it was only $25 bucks. Can't beat that with a stick, can ya? It needs cleaning and a little bit of tlc, but other than that, it's perfect.
Welcome to my bedroom (I just realized that I've never shown you it before):
The color is perfect too. There's gold in my comforter (you can see a piece of it in the bottom right of the pic) and the brown dots on the chair are the same color as my drapes and the same brown is in my comforter also. It's parked next to my grandmother's chifferobe. What you can't see in the pic is a book shelf off to the right. One shelf is just the perfect height for holding a cup of tea while relaxing in the chair.
The tlc needed is at the bottom of the chair. The little flaps that cover the legs look like they're going to take flight. I'm planning on steam cleaning the upholstery and then sewing the flaps down properly so that the chair doesn't try and fly away.
Mama's happy now. One comfy chair in the bedroom that didn't break the bank. Very cool.
Monday, February 07, 2011
Life's little lessons are hard, aren't they?
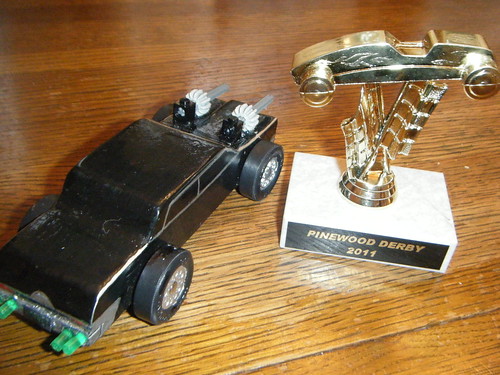
The Pinewood Derby was successful, except for the child that got sulky because he didn't have the fastest car and he received no special recognition for what he thought was a spectacular car. That would be The Eldest of course. Life's little lessons are hard, aren't they? He'll learn sooner or later.
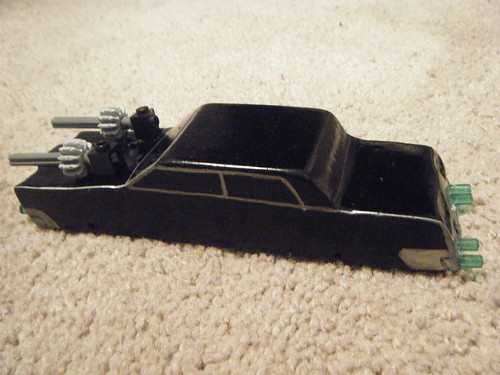
I finally got the official pics of the car with the wheels on it:
From the front:
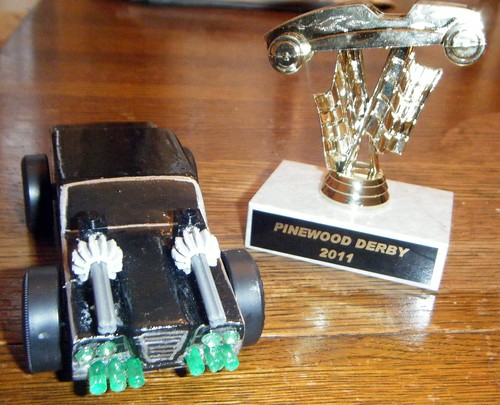
The guns on the hood were made from Legos that were hot glued on to the car. All chrome was done with a silver Sharpie marker. Headlights were glued on green jewels. Rockets were created from dollhouse torches that were sawed off and glued into pre-drilled holes.
Side View:
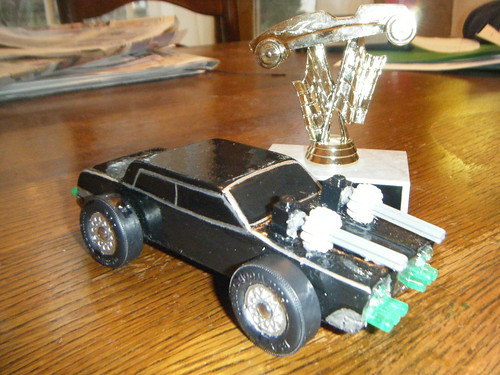
Back View:
The Hornet license plate was taken from a pic found online. I put it into Word and shrunk it down then printed it out.
The entire car had a really thick clear coat put on it as well. I would not recommend doing this in a freezing garage though. The clear coat (first one) ended up creating a crackle finish all over the car. Now, I don't know about you, but I don't think the mega wealthy green hornet would have that bad of a paint job on his car. So, I sanded it off, repainted the black, re-did the silver and then clear coated it (indoors this time) again. Basically, we did all the paint stuff twice. I won't be doing that again! Life's little lessons are hard, aren't they?
I finally got the official pics of the car with the wheels on it:
From the front:
The guns on the hood were made from Legos that were hot glued on to the car. All chrome was done with a silver Sharpie marker. Headlights were glued on green jewels. Rockets were created from dollhouse torches that were sawed off and glued into pre-drilled holes.
Side View:
Back View:
The Hornet license plate was taken from a pic found online. I put it into Word and shrunk it down then printed it out.
The entire car had a really thick clear coat put on it as well. I would not recommend doing this in a freezing garage though. The clear coat (first one) ended up creating a crackle finish all over the car. Now, I don't know about you, but I don't think the mega wealthy green hornet would have that bad of a paint job on his car. So, I sanded it off, repainted the black, re-did the silver and then clear coated it (indoors this time) again. Basically, we did all the paint stuff twice. I won't be doing that again! Life's little lessons are hard, aren't they?
Thursday, February 03, 2011
First Look at the Green Hornet Pinewood Derby Car
Pinewood Derby Season for the Cub Scouts has arrived again. The Eldest decided this year that he wanted The Black Beauty car from The Green Hornet.
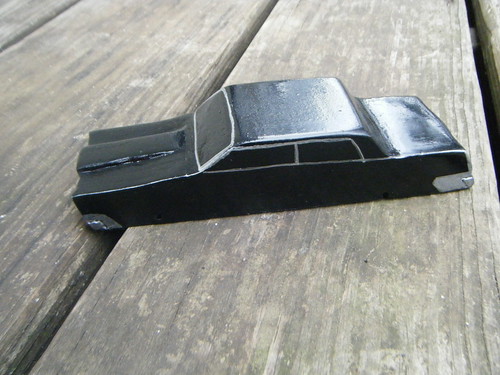
I think the toughest part of this car this year was getting the general shape of the car. There has been much sanding and dremelling going on around here. I could kick myself for not getting a pic of the car before painting it, but oh well.
Here's what it looked like after it had been painted black and had Silver Sharpie "Chrome" drawn on it:

The Eldest also wanted guns coming out of the hood like in the movie, so we raided our box of legos to get these and mounted them with hot glue:
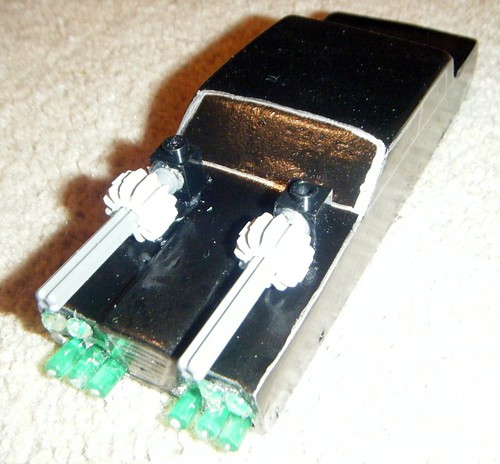
Don't these all look great used together?
The car is currently getting a clear coat of paint to seal everything and then it will get it's wheels. I'll show you the final version when it's finished.
I think the toughest part of this car this year was getting the general shape of the car. There has been much sanding and dremelling going on around here. I could kick myself for not getting a pic of the car before painting it, but oh well.
Here's what it looked like after it had been painted black and had Silver Sharpie "Chrome" drawn on it:
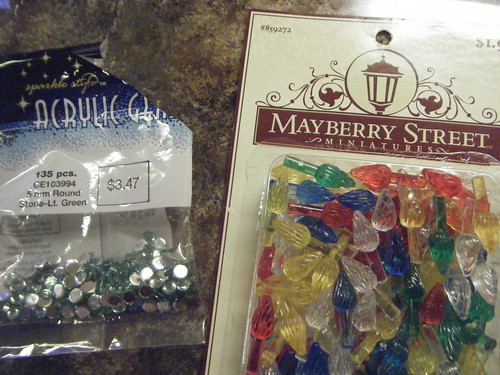
The next step involved taking a trip to Hobby Lobby and trying to get my son to stay out of the pinewood derby section for what we needed. He's a very straight forward child and to him, if it's not in that section, then you can't use it. Not a problem.
The first section that I made him go to was the doll house section. Boy did he not want to do that. That's girl stuff! But he started listening really quick once I told him my vision. I had found some plastic translucent torches that were perfect for making green rockets. We ultimately had to cut off the fat part of the torch and just use the stem in order to get the correct look. Worked perfectly. Then I pulled him into the jewelry making section to grab some glue on jewels to make headlights.
Here's a pic of the materials:
The Eldest also wanted guns coming out of the hood like in the movie, so we raided our box of legos to get these and mounted them with hot glue:
Don't these all look great used together?
The car is currently getting a clear coat of paint to seal everything and then it will get it's wheels. I'll show you the final version when it's finished.
Monday, January 31, 2011
Paint Weekend
I spent my weekend painting doors and cabinets. I was feeling good enough to tackle a paint brush, so I got to painting. It was nice to finally get the doors to my kitchen completely finished (and with new hardware even.)
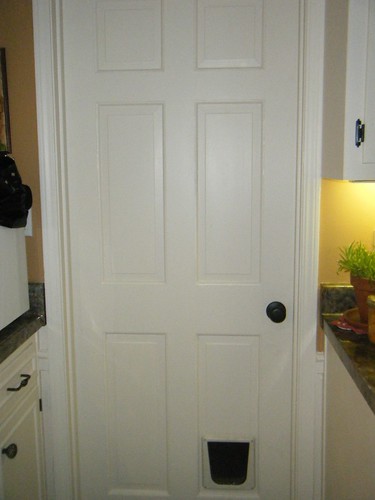
I know how exciting it is looking at a door, so I won't show you the other, it would be just too much excitement for this blog. So how about a primered cabinet?
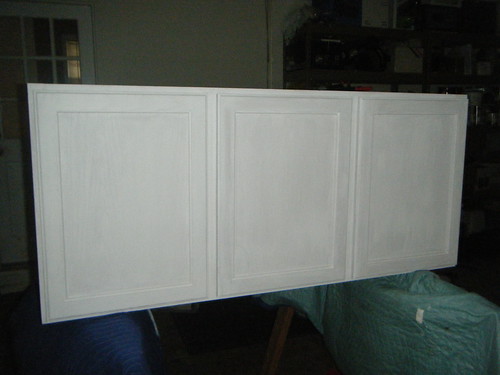
Oh yeah. Now that's excitement. I'm going to paint this cabinet the color of the walls in my laundry room instead of the contrasting color so that they blend in rather than stick out. I don't want these cabinets as noticeable. I will get some fun knobs for them though. :)
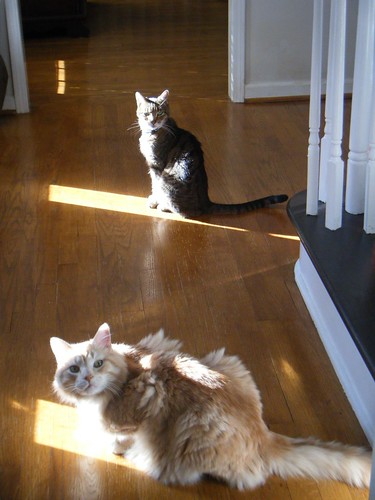
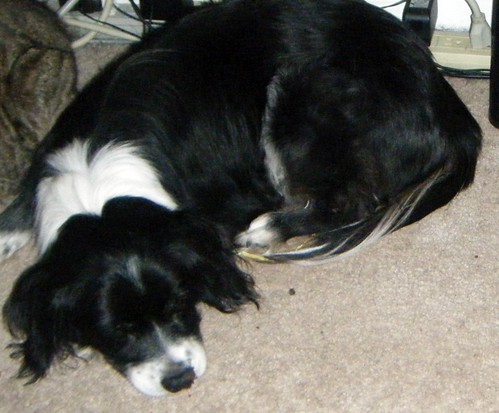
All this painting was just too much for these guys:
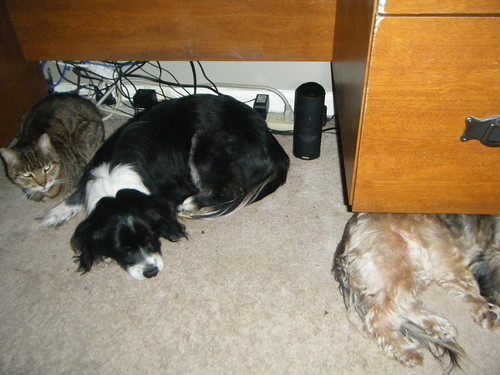
How many animals can you fit under your desk? Would someone please tell me why these animals congregate where my feet are supposed to go? And while your at it, would someone please go under there and pick up the speaker that fell off the back of my desk this morning? Thanks.
I know how exciting it is looking at a door, so I won't show you the other, it would be just too much excitement for this blog. So how about a primered cabinet?
Oh yeah. Now that's excitement. I'm going to paint this cabinet the color of the walls in my laundry room instead of the contrasting color so that they blend in rather than stick out. I don't want these cabinets as noticeable. I will get some fun knobs for them though. :)
All this painting was just too much for these guys:
Subscribe to:
Posts (Atom)