That time of year is upon us once again, The Cub Scout Space Derby! The Eldest and I put our heads together to come up with a design that most other boys would not be using. I've found that boys tend toward lots of flames for their rockets and cars and that makes me want to go in another creative direction entirely.
My first comment to him was, "You don't want to follow the rest of the pack do you?" He gave me The Look. Oh yeah, the scouts are considered a pack. Okay, poor example. Moving along.
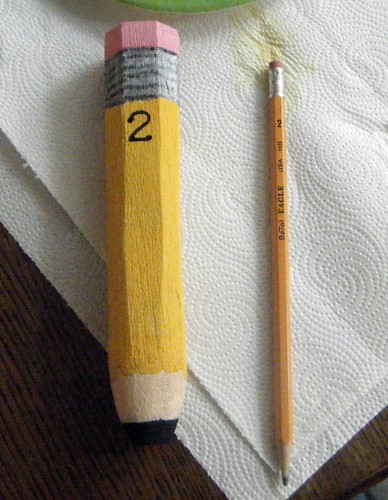
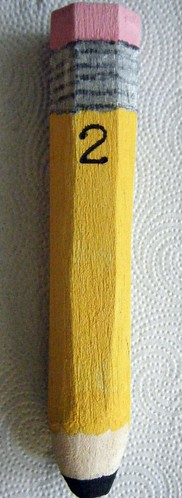
So what did we come up with? A number two pencil. The school year might be affecting us just a bit. Dad was ordered to go shape it properly and then we got to work.
I've found that when doing something like this, the devil is all in the details.
Notice at the bottom of the yellow section. See the rounded petals there? Ever noticed how when you sharpen a pencil that you get those petals? Details definitely add realism, don't ya think? For the silver part, we used a silver sharpie paint marker and once it dried, used a black sharpie to make the lines.
The Eldest did a pretty good job painting didn't he?
Would you believe that I happened to have the correct size stencil for the number two? This is why I never throw away any crafty stuff. I use it over and over and over. Of course, this could be why we have very little space in our garage. Bins full of craft supplies take up a lot of room.
I'll be out of town tomorrow for a funeral, so I'll just go ahead now and wish you a great weekend!
Thursday, November 04, 2010
Wednesday, November 03, 2010
How to create a Dr. Blowhole Notquiteapillowpet
Resuming yesterdays post...
While at the grocery store a couple of days ago, The Youngest saw a unicorn pillow pet. "I want it!" was immediately shouted. He doesn't care for unicorns particularly, it's just that the pillow pet commercials have completely zapped his brain making him think that he has to have one, now, Now, NOW!
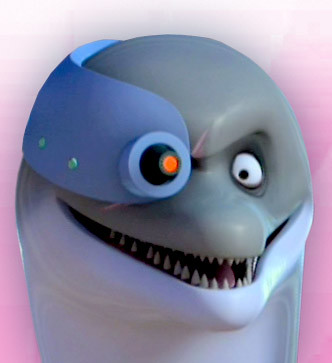
I mentioned to him that he doesn't like unicorns and that stopped him in his tracks for about 30 seconds. "I know!" he said, "I want a Dr. Blowhole pillow pet." Are you guys familiar at all with the Penguins of Madagascar cartoon? It's a family fav around here. Dr. Blowhole, a dolphin, is considered the Penguins' Arch Nemesis. He looks like this:
And to familiarize yourself a little more, here's a quick clip explaining him:
So I told the kid that sure, I'd make him one if we found a dolphin at the thrift store. Well, I thought I was pretty darn safe on that one. I mean, how often do you see a stuffed dolphin at the thrift store, right? Dang if he didn't walk right in and put his little hands on one.
I needed a pillow and some chenille, stat. Both were found at the next store we went too, Old Time Pottery. The perfect color blue pillow was $5 and I grabbed a gray chenille throw for $7. I would have paid a lot more than seven for the same amount of fabric at a fabric store. I'll save the unused portion for a future project.
Here are the steps that I used to make the Notquiteapillowpet. You could do this with any stuffed animal, my kid just wanted something extra super specific.
How to create a Dr. Blowhole Notquiteapillowpet:
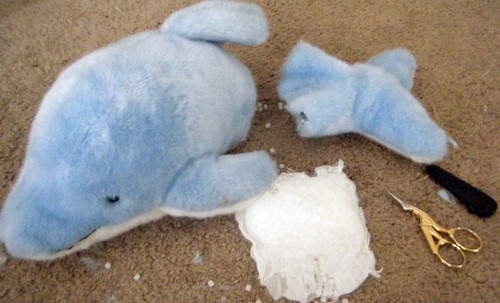
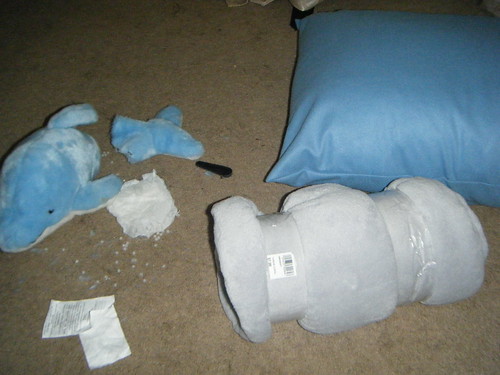
1. The first thing I did was to cut the dolphin in two parts and remove the plastic pellets that were in there:
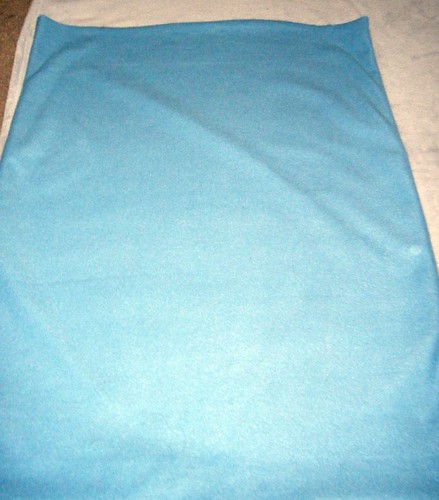
3. Laid out the pillow on top of the chenille throw and cut out a piece of the chenille to be the same size.
4. Next, I turned under the edges of the chenille and pinned it to one side of the pillow. At this point I also pinned the dolphin tale at one end and added some loops and tags for the fastenings. Note: If you are making an animal that has four legs, you would want to put the tail in the center of one of the sides, not at the end. I was going for a lengthwise dolpin body. EDITED TO ADD: You would also want to move the strap to the middle of the pillow so that when it was folded and strapped together you would sew four "Legs".
5. I sewed up the two long sides and the tail end and then stuffed the pillow body again with about 3/4 of what I had originally pulled out. Here's one side:
And the "flipper" side (sorry, couldn't resist):
6. Next I pinned in the head and sewed it up as well. No pic of this step, so on to the next!
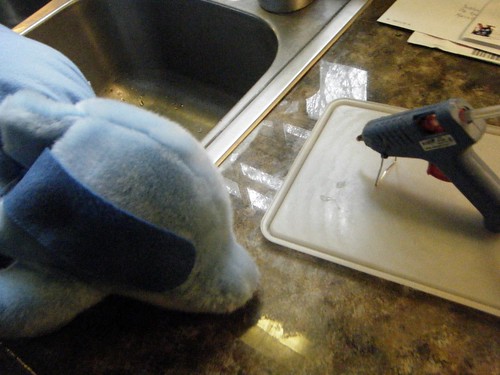
7. Now came the hard part. How to make the monocle and the strap that it goes on that only goes half way around his head and then attach it. I threw out all sorts of ideas before settling on felt for the strap. I hot glued it to the dolphin's head like so:
So how do you think The Youngest liked his Dr. Blowhole Notquiteapillowpet? I'll let you judge for yourselves:
Closed with dolphin shape:


While at the grocery store a couple of days ago, The Youngest saw a unicorn pillow pet. "I want it!" was immediately shouted. He doesn't care for unicorns particularly, it's just that the pillow pet commercials have completely zapped his brain making him think that he has to have one, now, Now, NOW!
I mentioned to him that he doesn't like unicorns and that stopped him in his tracks for about 30 seconds. "I know!" he said, "I want a Dr. Blowhole pillow pet." Are you guys familiar at all with the Penguins of Madagascar cartoon? It's a family fav around here. Dr. Blowhole, a dolphin, is considered the Penguins' Arch Nemesis. He looks like this:
And to familiarize yourself a little more, here's a quick clip explaining him:
So I told the kid that sure, I'd make him one if we found a dolphin at the thrift store. Well, I thought I was pretty darn safe on that one. I mean, how often do you see a stuffed dolphin at the thrift store, right? Dang if he didn't walk right in and put his little hands on one.
I needed a pillow and some chenille, stat. Both were found at the next store we went too, Old Time Pottery. The perfect color blue pillow was $5 and I grabbed a gray chenille throw for $7. I would have paid a lot more than seven for the same amount of fabric at a fabric store. I'll save the unused portion for a future project.
Here are the steps that I used to make the Notquiteapillowpet. You could do this with any stuffed animal, my kid just wanted something extra super specific.
How to create a Dr. Blowhole Notquiteapillowpet:
1. The first thing I did was to cut the dolphin in two parts and remove the plastic pellets that were in there:
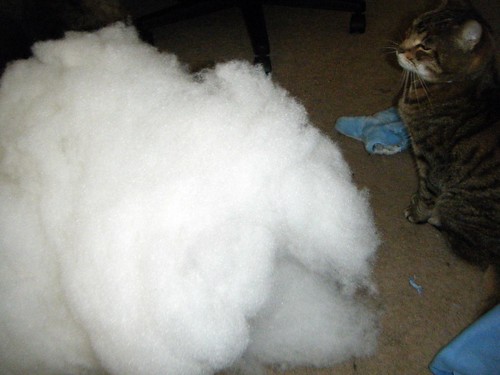
2. Then I opened the pillow at one end and removed the stuffing from it. The cat was feeling vaguely threatened by the huge ball of fluff.
3. Laid out the pillow on top of the chenille throw and cut out a piece of the chenille to be the same size.
4. Next, I turned under the edges of the chenille and pinned it to one side of the pillow. At this point I also pinned the dolphin tale at one end and added some loops and tags for the fastenings. Note: If you are making an animal that has four legs, you would want to put the tail in the center of one of the sides, not at the end. I was going for a lengthwise dolpin body. EDITED TO ADD: You would also want to move the strap to the middle of the pillow so that when it was folded and strapped together you would sew four "Legs".
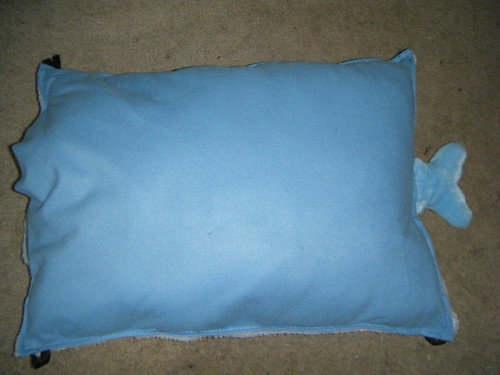
5. I sewed up the two long sides and the tail end and then stuffed the pillow body again with about 3/4 of what I had originally pulled out. Here's one side:
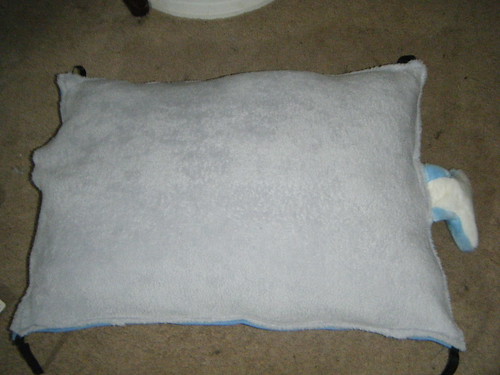
And the "flipper" side (sorry, couldn't resist):
6. Next I pinned in the head and sewed it up as well. No pic of this step, so on to the next!
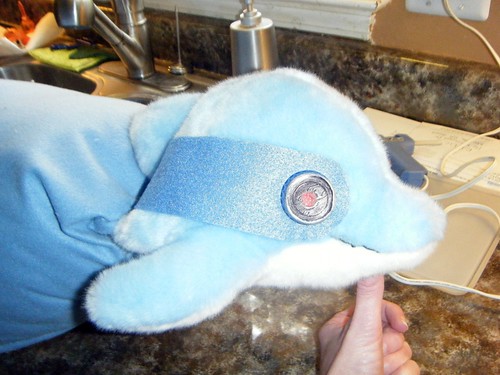
7. Now came the hard part. How to make the monocle and the strap that it goes on that only goes half way around his head and then attach it. I threw out all sorts of ideas before settling on felt for the strap. I hot glued it to the dolphin's head like so:
The monocle was pretty easy. I took a blue bottle cap, and drew all over the top with a black sharpie marker. Then around the very edge, I drew a circle with a silver sharpie paint marker. The last step was painting a large red dot in the center of the black with some acrylic paint. Once dry, I glued that onto the felt.
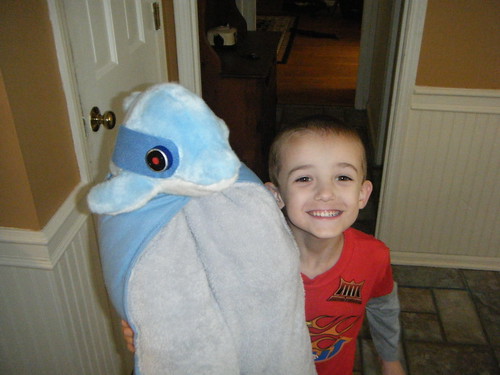
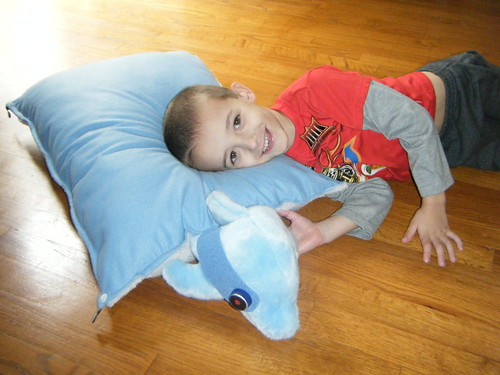
So how do you think The Youngest liked his Dr. Blowhole Notquiteapillowpet? I'll let you judge for yourselves:
Closed with dolphin shape:
Opened:

Welcome Dollar Store Craft Readers!
Welcome Craft Gossip Readers!
Tuesday, November 02, 2010
Newsflash: Dolphin cruelty siting!
Newsflash: Dolphin cruelty siting! Unnamed sources have reported the alleged mutilation of stuffed dolphin purchased from thrift store.
The sources have also confirmed that some of the dolphin parts will be casually thrown away and wasted. The rest will be horribly mutated into a so-called hand made "pillow pet". But not just any pillow pet, oh no. There are big plans for this one!
More to follow tomorrow!
The sources have also confirmed that some of the dolphin parts will be casually thrown away and wasted. The rest will be horribly mutated into a so-called hand made "pillow pet". But not just any pillow pet, oh no. There are big plans for this one!
More to follow tomorrow!
Monday, November 01, 2010
Post Halloween Lego Minifig Costume Follow Up
The Lego Minifig Halloween Costume was a roaring success this year. The Eldest had people stopping him on the street last night so they could take a picture of him. Too funny.
A few last minute notes about the costume should anyone wish to make this as well:
1. Make the hole in the torso section smaller than the bottom of the neck part of the head piece so that it rests squarely on the torso. I ended up making them the same size and it actually sat on his real shoulders and wasn't comfortable. It also moved around quite a bit too.
2. Carve out a section in the top of the head piece so that it fits snugly against the top of the head. This will also keep it from moving around so much.
3. A problem occurred with the torso/box rounding over his shoulders instead of staying square. I took two paint stir sticks, wrapped them in a rubbery material used to line cabinets and hot glued them into the shoulders. It fixed the rounding and provided comfortable support as well. I don't think this would be as much of an issue with an adult, but a 10 year old boy has small shoulders and needs all the help he can get.
4. If I made this again, I would go ahead and attach the heap piece to the torso to keep it from moving around, especially if this was for a child.
Hope everybody had a great Halloween!
Subscribe to:
Comments (Atom)

