Friday, February 11, 2011

Batman Birthday Cake

Before tomorrow's birthday party, let me introduce you to the official Batman Cake (please ignore the outlet in the background):

Batman Birthday Cake


It's made from Marshmallow Fondant frosting and it was way easier to do than I expected (the cake, not the fondant.  I've made that before.)  For a great tutorial on how to make the fondant go here.  I added yellow food coloring, Wilson's Paste, to the fondant as it was mixing.  As long as you use a ton of vegetable shortening all over your counters and rolling pin, this fondant is really easy to work with.  Clean up's a real pain, but I'll take that.   Once I used all the yellow I needed, I added the black to the mix using my Kitchenaid Mixer. 

I decided to go with a yellow cake and black cityscape.  When it came time to do the buildings, I cut out squares for windows to let the yellow show through.  I also let all the buildings be way off kilter for an authentic cartoon look to Gotham City.  Have you ever really studied buildings in cartoons?  They are never straight up and down.  Go watch a Looney Tunes cartoon sometime and you'll see what I mean.  Every single window, doorway and building is skewed.

If your background frosting, in this case yellow, is not perfect, don't try to make it so.  You'll be layering on tons of buildings and it hides imperfections like a dream.  I did the layering one building at a time and put windows in where the yellow was perfect. 


The candle on the cake came from Party City and the figures are all Batman Imaginext toys that my son already had.

2011_02110012

I'm thrilled with how this turned out!

Thursday, February 10, 2011

Let's Make A Super Cape!

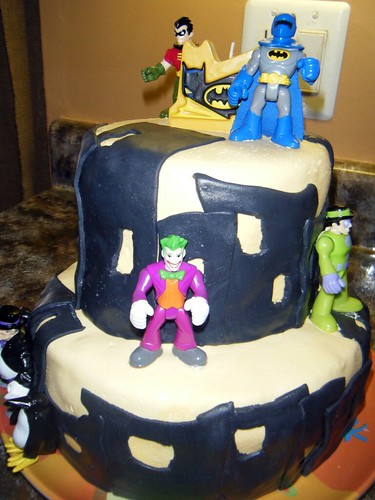
So say you have a Super Hero party for your child (ours is coming up this Saturday.)  Could be Batman, Superman, etc.  And suppose you need a cape for the Super Hero.  Oh, and one for each of the guest heros that will be attending the party.  Should you shell out a bunch of cash and buy them pre-made.  NO!  I'll show you a way to make a Super Cape (or 20) and do it for pennies.  Sound good?  Let's get started.

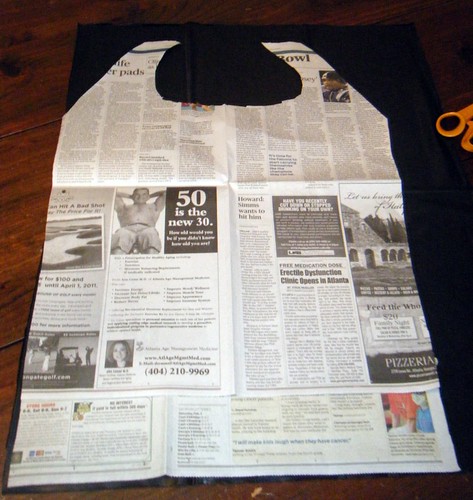
1.  The first step is to make a template of your cape.  Grab some newspaper.  I would also recommend a child to hold it up against, but that's strictly optional.  :)

2011_02100001

These are the (very crudely drawn) measurements of the ones that I made.  This was to fit a five year old boy.  I know for a fact that there will be a tiny little girl at the party that this will probably hang on and I'll need to make some adjustments to it for her.  Like I said, if you have a child in front of you that you can measure against, it would be really helpful.

I wanted to have the cape fall just below the rear end of the child and not be skimming the floor.  This is for a Super Hero, not Darth Vader.  If you plan on making a Vader cape, plan to make it twice as long.

Notice that the outsides at the collar edge are angled in.  If you do not cut those angles, the cape will not drape right and it will sit all wonky at the shoulders.  

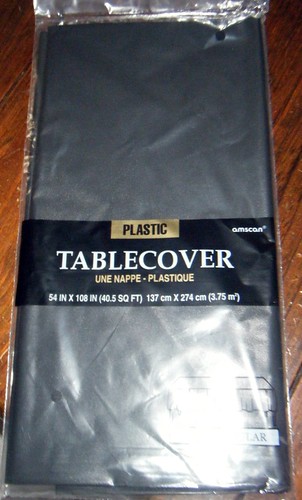
2.  The Material.  This is where you save the pennies when making this for multiple children.   I did not use fabric.  Fabric can get really pricey and I just don't have the money right now to shell out that much for this many capes.  The next best thing?  Plastic Tablecovers!  You can find these at Party City or at your local dollar store.   I've made all sorts of costume pieces for the stage for children out of this material and it will save you a ton of money. 


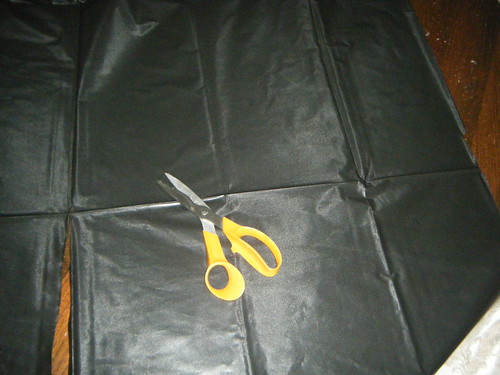
3. The horizontal fold that you see going through the center is the main center fold.  I cut along the center fold and then every three rectangles to get the measurements seen above.  Use your individual child's measurements to make sure that you have the width and length that you need.  The factory folds just made this project easy for me to measure by.  With the 54" x 108" table cover, I got enough "fabric" to make 10 capes. I purchased two tablecovers to get my 20.

2011_02100004


4.  Cut to the pattern.  When you lay your newspaper pattern on each piece of the tablecover that you have cut, save yourself some cutting time by moving the pattern all the way to corner at the bottom.  This way you have two less sides to cut.

2011_02100007


5.  Cut the fabric out.  Then the finishing touches are added.  You can add some Sticky Back Velcro, shown below, to the points at the collar to hold it on.  In the case of Batman, points were cut out at the bottom of the cape to give it that bat-like effect.
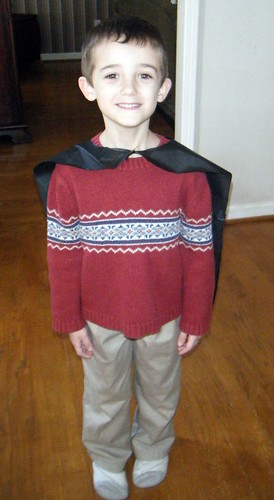
6.  Try It On!
BackView
2011_02100014


Front View:


So what was the final cost per cape?  I spent $1.99 for each tablecover totaling $4.00.  Divide that by 20 and it comes out to just 20 cents per child!  Not too shabby huh?  

Tuesday, February 08, 2011

Thrift Store Fun

I went thrift shopping this weekend and was a woman on a mission.  See I have this seating problem at my place.  If I'm not in the living room and want a chair to relax in, the only options up til now have been a kitchen chair or my office chair.  Now, I love my office chair.  It's super comfy and I spend most of my day there.  However, sometimes a gal needs a chair of her own and I wanted mine in the bedroom.

I did have a rocking chair in there.  An old wooden one that was great for rocking babies, but it was not so kind on the rear end.   It mostly held clothing that the husband just threw on it.  Most people use a treadmill for draping clothes, he used the rocking chair.  I have no clue what we're going to do with the chair now.  We don't have room for it and it won't fit in the attic. 

Anyway, we (my Mom and I) went shopping.  The first place we hit (Goodwill), we struck gold.  I found a small chair that had great high quality upholstery fabric and was super comfy.   Best of all, it was only $25 bucks.  Can't beat that with a stick, can ya?  It needs cleaning and a little bit of tlc, but other than that, it's perfect.

Welcome to my bedroom (I just realized that I've never shown you it before):


The color is perfect too.  There's gold in my comforter (you can see a piece of it in the bottom right of the pic) and the brown dots on the chair are the same color as my drapes and the same brown is in my comforter also.  It's parked next to my grandmother's chifferobe.  What you can't see in the pic is a book shelf off to the right.  One shelf is just the perfect height for holding a cup of tea while relaxing in the chair.
The tlc needed is at the bottom of the chair.  The little flaps that cover the legs look like they're going to take flight.  I'm planning on steam cleaning the upholstery and then sewing the flaps down properly so that the chair doesn't try and fly away.


Mama's happy now.  One comfy chair in the bedroom that didn't break the bank.  Very cool.

Monday, February 07, 2011

Life's little lessons are hard, aren't they?

The Pinewood Derby was successful, except for the child that got sulky because he didn't have the fastest car and he received no special recognition for what he thought was a spectacular car.  That would be The Eldest of course.  Life's little lessons are hard, aren't they?  He'll learn sooner or later.

I finally got the official pics of the car with the wheels on it:

From the front:

2011_02070005


The guns on the hood were made from Legos that were hot glued on to the car.  All chrome was done with a silver Sharpie marker.  Headlights were glued on green jewels.  Rockets were created from dollhouse torches that were sawed off and glued into pre-drilled holes.

Side View:

2011_02070004


Back View:

2011_02070006

The Hornet license plate was taken from a pic found online.  I put it into Word and shrunk it down then printed it out. 

The entire car had a really thick clear coat put on it as well.  I would not recommend doing this in a freezing garage though. The clear coat (first one) ended up creating a crackle finish all over the car.  Now, I don't know about you, but I don't think the mega wealthy green hornet would have that bad of a paint job on his car.  So, I sanded it off, repainted the black, re-did the silver and then clear coated it (indoors this time) again.  Basically, we did all the paint stuff twice.  I won't be doing that again!  Life's little lessons are hard, aren't they?