
While at the grocery store a couple of days ago, The Youngest saw a unicorn pillow pet. "I want it!" was immediately shouted. He doesn't care for unicorns particularly, it's just that the pillow pet commercials have completely zapped his brain making him think that he has to have one, now, Now, NOW!
I mentioned to him that he doesn't like unicorns and that stopped him in his tracks for about 30 seconds. "I know!" he said, "I want a Dr. Blowhole pillow pet." Are you guys familiar at all with the Penguins of Madagascar cartoon? It's a family fav around here. Dr. Blowhole, a dolphin, is considered the Penguins' Arch Nemesis. He looks like this:

And to familiarize yourself a little more, here's a quick clip explaining him:
So I told the kid that sure, I'd make him one if we found a dolphin at the thrift store. Well, I thought I was pretty darn safe on that one. I mean, how often do you see a stuffed dolphin at the thrift store, right? Dang if he didn't walk right in and put his little hands on one.
I needed a pillow and some chenille, stat. Both were found at the next store we went too, Old Time Pottery. The perfect color blue pillow was $5 and I grabbed a gray chenille throw for $7. I would have paid a lot more than seven for the same amount of fabric at a fabric store. I'll save the unused portion for a future project.
Here are the steps that I used to make the Notquiteapillowpet. You could do this with any stuffed animal, my kid just wanted something extra super specific.
How to create a Dr. Blowhole Notquiteapillowpet:
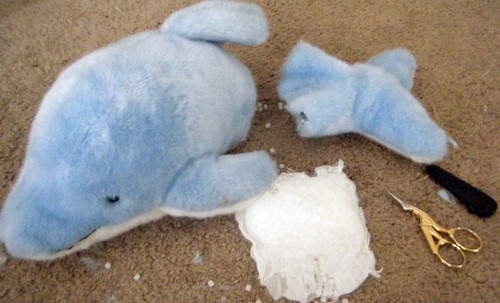
1. The first thing I did was to cut the dolphin in two parts and remove the plastic pellets that were in there:
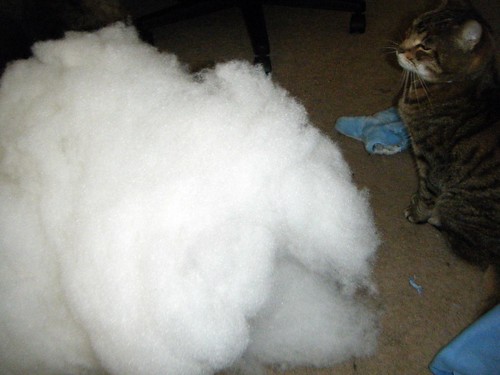
2. Then I opened the pillow at one end and removed the stuffing from it. The cat was feeling vaguely threatened by the huge ball of fluff.
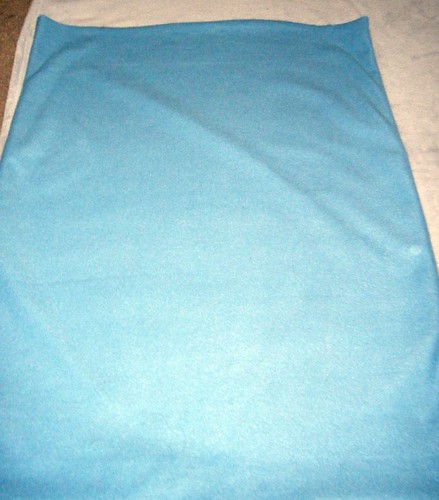
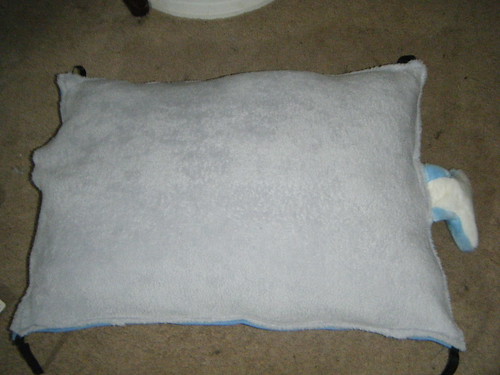
3. Laid out the pillow on top of the chenille throw and cut out a piece of the chenille to be the same size.
4. Next, I turned under the edges of the chenille and pinned it to one side of the pillow. At this point I also pinned the dolphin tale at one end and added some loops and tags for the fastenings. Note: If you are making an animal that has four legs, you would want to put the tail in the center of one of the sides, not at the end. I was going for a lengthwise dolpin body. EDITED TO ADD: You would also want to move the strap to the middle of the pillow so that when it was folded and strapped together you would sew four "Legs".
5. I sewed up the two long sides and the tail end and then stuffed the pillow body again with about 3/4 of what I had originally pulled out. Here's one side:
And the "flipper" side (sorry, couldn't resist):
6. Next I pinned in the head and sewed it up as well. No pic of this step, so on to the next!
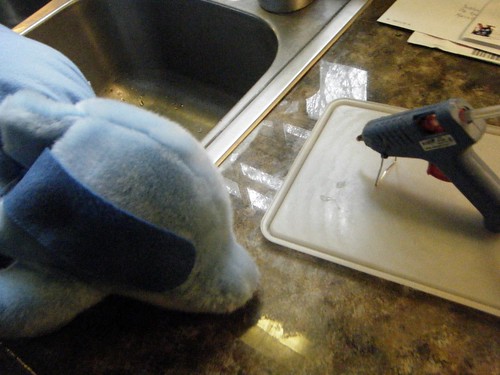
7. Now came the hard part. How to make the monocle and the strap that it goes on that only goes half way around his head and then attach it. I threw out all sorts of ideas before settling on felt for the strap. I hot glued it to the dolphin's head like so:
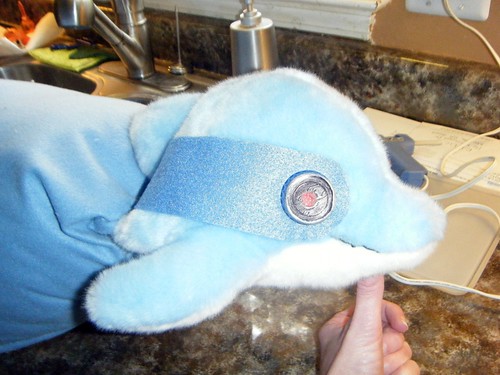
The monocle was pretty easy. I took a blue bottle cap, and drew all over the top with a black sharpie marker. Then around the very edge, I drew a circle with a silver sharpie paint marker. The last step was painting a large red dot in the center of the black with some acrylic paint. Once dry, I glued that onto the felt.
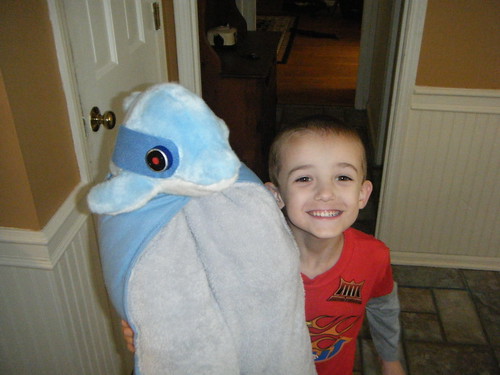
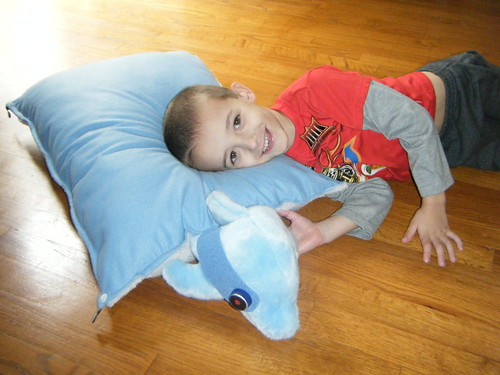
So how do you think The Youngest liked his Dr. Blowhole Notquiteapillowpet? I'll let you judge for yourselves:
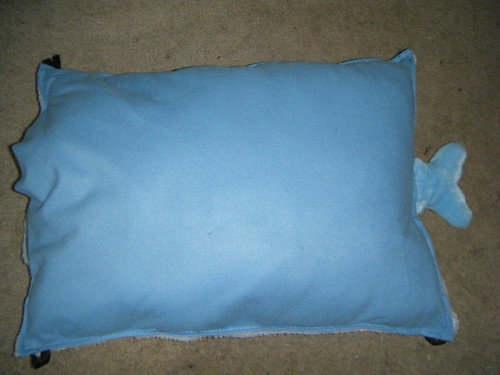
Closed with dolphin shape:
Opened:

Welcome Dollar Store Craft Readers!

Welcome Craft Gossip Readers!