Thursday, July 02, 2009

Tutorial: Make Cloth Napkins from Fat Quarters

I've been working on reducing our budget lately and thought that reusable napkins would be a way to help me do this, not to mention that it is eco-friendly as well. I needed something that would be kid friendly, hide stains well and would be suitable for everyday use.

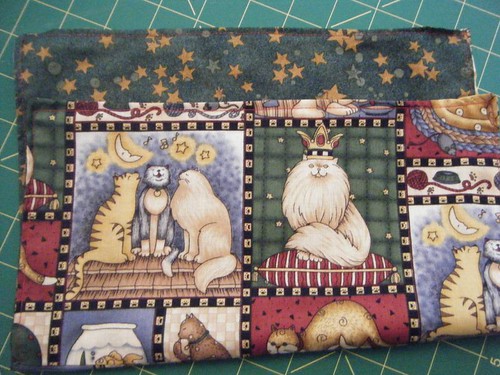
I found a tutorial online, but the only thing that I took away from it was the word reversible and the measurement 13" x 16". Here are some of the completed napkins. The widest part of each seen below is the front and the small sliver that can be seen next to it is the coordinating back of the napkin:

click to enlarge


I have a ton of fat quarters hidden away under all of our beds that are left over from my quilting days. Many of these are really cute and child friendly, so that's what I decided to use. The problem, is that these are only about 8 or 9 inches wide. Here's my solution/tutorial:

To Make Cloth Napkins from Fat Quarters:
1. Choose two coordinating/contrasting fat quarter fabrics.
2. Cut each of them into two equal pieces.
Cutting!
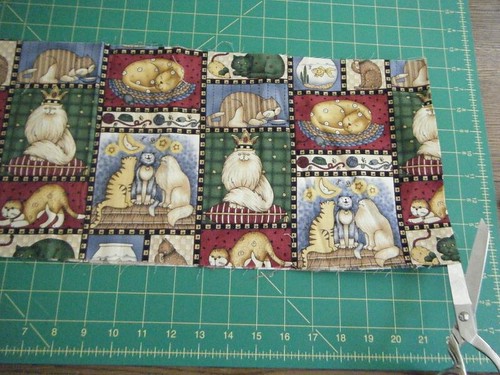
3. With right sides facing, sew the two pieces together on one side only. Do this again for the coordinating fabric.
( I used a quarter of an inch seam allowance for everything except step number 9.)

It's a quarter inch from the right edge of my presser foot to the needle in the center.

Once done, it should look like this:
Opened and pressed with an iron


4. Cut the fabric into a 13" x 16" piece. Do this for both fabrics. If it's not perfectly square, don't sweat it. It's napkins, not clothing. Close is okay. If it really bugs you, you can use a see through quilter's square and a rotary cutter to get it perfectly squared up.
13" x 16"
Once this is done, iron the seam to one side:
Seam ironed and laying to one side.

5. With right sides facing, sew your two 13" x 16" fabrics together, leaving about two inches on one side open.
Left open to turn the fabric rightside out again.

6. Cut the corners off of the napkin so that when you turn the piece inside out, you don't have a lot of unnecessary bulk in each of the corners.
Clip your corners!

7. Turn the napkin inside out. Make sure to push the corners as far out as you can get them for a nice, crisp corner.

8. Iron your napkin. At the two inch opening, turn both sides in and iron this closed as well.
Ironed and ready for top stitching
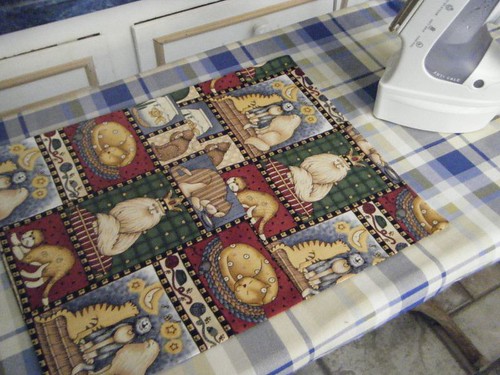
9. Top stitch around all four sides of the napkin, including the two inches that were originally left open. I top stitched approximately an eighth of an inch from each edge.

10. Pat yourself on the back for a job well done!

Front and Back of the Cloth Napkin
TIP!

To make turning corners easier, Using the wheel on the right side of your machine (if yours has this), make sure your needle is inserted into the cloth and leave it there for a moment.
Needle Inserted

Then, raise the foot: I picked it up even more to show you that the needle is still inserted into the cloth (please excuse the thumbnail - It's paint, not dirt, I promise!)

Foot lifted

Once this is done, rotate your fabric into the direction that you want to go. Lower your presser foot and you are ready to continue sewing.
Fabric Rotated


Enjoy your new napkins!

Sewing Skirts!

For the past two days I've been bitten by the sewing bug. I don't know why it bit me, but it bit me hard.

It started with the 20 minute skirt tutorial. I loved the fabrics she used. Normally I shy away from elastic waist skirts, but these were too cute to pass up. I took off to the store and found both of these skirts' fabric at Hobby Lobby. They had so much cute fabric, it was difficult to choose just two. When I made my skirts I deviated from the pattern by machine sewing some hems into the skirts. That was the only change that I made to the pattern.

This is the easiest skirt I've ever made. The tutorial is simple, quick and very easy to follow. For the record though, it took me longer than 20 minutes to make the skirts. The first took two hours due to a comedy of errors that are too numerous to mention, but they range from sewing machine problems to stupidity on my part. The second took me about 40 minutes. I figure that if I made another one I'd probably be right on the money at 20 minutes.

Here's how the skirts turned out. I've paired them with a black sleeveless top to show you how it will look on and so that you can't see the ugly elastic waists:


I'll show you the other sewing project tomorrow!

Wednesday, July 01, 2009

Fishing

We had a milestone in our family over the past weekend: The Youngest caught his first fish!

Granted, it's tiny and you need a magnifying glass to see it in the pic, but it was still a fish. With his PawPaw pretty much controlling the pole, the Youngest got a total of 8 fish on his first outing. The Eldest wracked up a stunning 14 in the same outing. The fishies were mighty hungry for worms that day.


It still thrills me to see the boys out fishing with their PawPaw. What a memory they'll have of him later in life!

Tuesday, June 30, 2009

The Pain in Frogging

I am still working on the log cabin blanket. As a matter of fact, I might have gone cross-eyed from looking at this damn thing. It's not really the blanket's fault, it's not the miles and miles and miles of boring garter stitch either. I'm putting all the blame on the yarn.

The Debbie Mumm Traditions yarn is a deliciously soft and gloriously colored corespun yarn. It's 70% acrylic and 30% wool. There. Now I've told you the good stuff, now for the bad. It's a corespun yarn. It's 70% acrylic and 30% wool. There, that was also the bad stuff.

It's splitty as hell and bunches up viciously. That's not so bad while you're knitting it up if you hold it loosely. The problem comes when, not if, you need to frog it. The soft yarn grips to itself like there's no tomorrow.

Remember these? These were a tank that for some God forsaken reason I thought this yarn would be good for:


I am in the process of frogging them. The bottom one took me four hours to frog. Yes, that's right, four friggin' hours of fighting with grabby yarn mixed with short rows. It wasn't fun. Needful, but not fun.

So after the frogging I have a bazillion small balls of yarn. Look how many ends have to be woven when you use a lot of these small balls of yarn in just a couple of squares:


Yeah. More not fun.

But, look how beautiful these are from the front:


I don't know how much more yarn I'll need and have no clue how much I'll get from frogging the other piece. I may need to try and order more since my JoAnn's didn't have any of this color left. They had two other colorways that could be fun to mix with this one, but I'm not sure if I'll do that or not.

All I know is that I just have to make triple sure any of the squares don't need frogging again, cause if it comes to that, I'll be putting the whole kit and caboodle in the trash.

Monday, June 29, 2009

Panic at the Escalator

Obviously the summer months are not the optimum time for me to be blogging. I do apologize for going incommunicado for a whole week, but I am back now. There were many things that happened last week, such as a lake trip, trying not to kill my children now that they are not in school and are at each other's throats, etc.

But there was one especially amusing incident last week that I want to share with you. It started out innocently enough as a trip to Dick's Sporting Goods. My father and husband have birthdays a week apart, so the kids and I hopped into the Mom van and went shopping for campy kind of stuff.

We grabbed a firestarter for my Dad and then found a cool tent thing that we could use on our family beach vacation trip in two weeks. It's not a camping tent, more like a tailgating tent that pops up in one fell swoop. Perfect, but it weighed a ton. But that was cool too since it has rollers on it and could easily be drug wherever you need it.

Great. Now, I got everybody sorted out: Eldest in front with the little items, me in the middle dragging the tent that ways a ton and the Youngest was bringing up the rear. We headed down the escalator (can you see where this is going yet?) in the same order: Eldest first with small items, me dragging tent that weighs a ton, and the Youn- oh wait a minute - guess what? He panicked at the last minute (the child that is afraid of nothing) and pulled away from me and stayed at the top of the damn escalator!

I threw the tent that weighs a ton to the eighty pound weakling and said, "Here, you're on your own" and turned around. My brain took one hundredth of a second to gauge how fast the escalator was moving and tried to figure out how fast my legs were going to have to move so that I would not be jogging in place. I was now about 8 or 9 steps down and I took off, blazing fast, looking hopelessly hokey as I started hoofing it up the moving steps. Meanwhile, the Youngest was at the top screaming "Mommy! Mommy!" and at this time four really cute college age guys show up behind him, grinning from ear to ear. Jeez, wouldn't you just know it?

I got to the top step, grabbed a little arm and dragged him to the stairs and proceeded to rendezvous with the Eldest at the bottom who had somehow managed to grab the one ton tent and drag it to safety. Phew! What a workout. I wasn't even huffing and puffing at the end either, with much thanks to Ye Olde Adrenaline.

What a hoot. I laughed so hard I could hardly breathe. Oh, and yeah, the cute college guys did too. I'm sure they were laughing with me and not at me. Yeah, right.