
So what is WPI anyway? It's an acronym for Wraps Per Inch and it's a really useful way to see if a yarn can be substituted in a project for another yarn.
Why have a WPI Tool? A WPI tool lets you know how many wraps per inch a certain yarn has. This allows for yarn substitutions in patterns for knitters and crocheters. For spinners, it allows you to match your yarn thickness to the standard sizes for yarn. You can use a standard ruler to do this, but if you're on the go, a long ruler just won't fit into a project bag, unless you broke it into pieces and that could get messy and you might get splinters.
Once I have one, How do I use it? Begin wrapping the yarn around the middle with the yarn touching, but not pulled too tight. Once you have wrapped the yarn all the way across, you can find the number of wraps per inch. After you have counted how many strands have been wrapped around the tool, you can match it to the chart below:
Yarn Sizes
Ultrafine (Lace Weight) = 18 or more WPI
Fine (Fingering Weight) = 16 WPI
Medium (Sport Weight) = 14 WPI
Heavy (Worsted Weight) = 12 WPI
Bulky (Bulky) = 10 WP
Very Bulky (Extra Bulky) = 8 or fewer WPI
The Tutorial:
Okay, now that's the background, let's get to making our own WPI Tool!
Supplies Needed:
Shrinky Dinks (Polysterene Plastic) - #6 recyclable plastic can also be used
Template
Sharpie Marker
Oven - toaster oven can be used as well
Cookie Sheet
Tape
Scissors

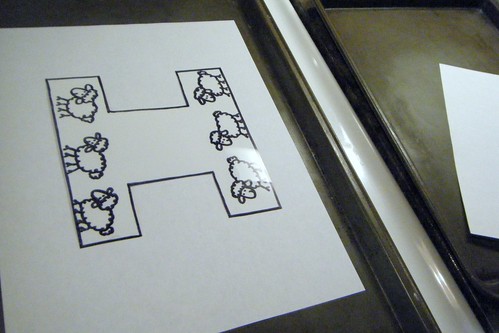
Take a sheet of Shrinky Dink plastic and place it on top of your template (the link to the template is listed above. Please let me know if anyone has trouble accessing it.) I used painter's tape to secure the plastic while I used my marker. The type of Shrinky Dink plastic that you use really doesn't matter. As a matter of fact, you'll see two different kinds used in this tutorial and I'll explain why in just a minute.
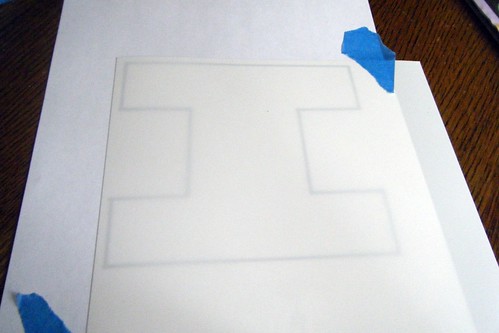
Using the template beneath the plastic, trace the "I" shape onto the plastic.
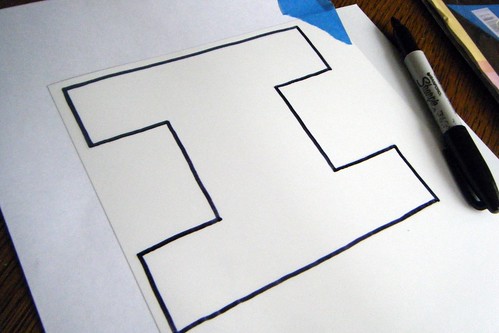
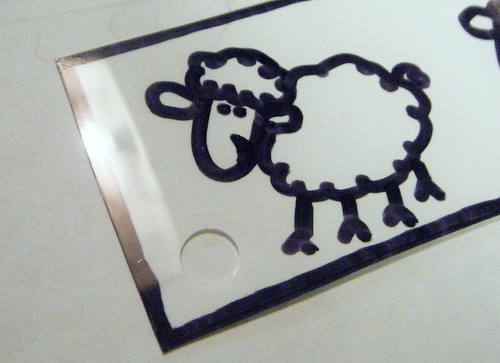
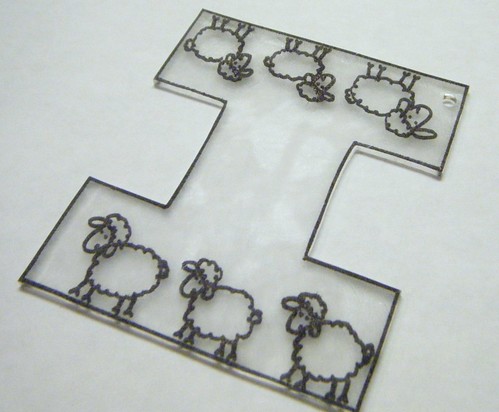
Once this is done you can begin decorating it if you wish. Of course I wished, this is the fun part! I free handed some sheep onto mine. I have very little artistic ability, which is obvious if you look at their feet. Yeah, stick feet, the feet of champion amateur cartoonists everywhere.
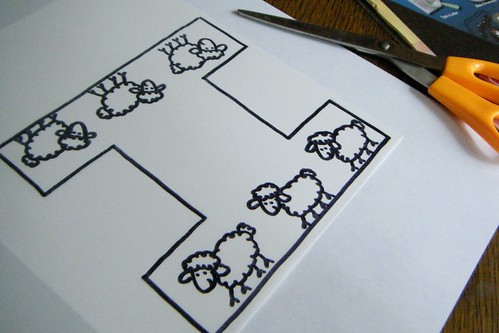
The template does not have the sheep on it, you'll have to draw your own, or better yet, come up with something really creative.
An optional step is using a standard hole punch to make a hole in the corner of the plastic:
This allows you to attach it to your spinning wheel or your project bag. I'll be using a key chain on mine and attaching it to my spinning wheel.
Next, set your oven to 300 degrees F. Let it fully preheat before trying to shrink the plastic. Get your cookie sheet (or in this case a jelly roll pan) and place your plastic on it. You can put a piece of paper underneath it if you wish. I did it both ways, with and without paper and it works just fine.
Now for the old switch-a-roo. In this step, I wanted to try something a little different. Don't do this next part, cause it didn't work worth a flip, but it will explain the difference in the type of Shrinky Dink plastic that you seen in the next pic. I put another piece of paper on top of the plastic and then a second cookie sheet on top of that in a vain attempt to prevent curling issues. It sort of fused the paper and the plastic together and I threw the whole thing in the trash. Thus the switch to the translucent plastic. Ahem. Moving on now. :cough: You may resume using the directions.
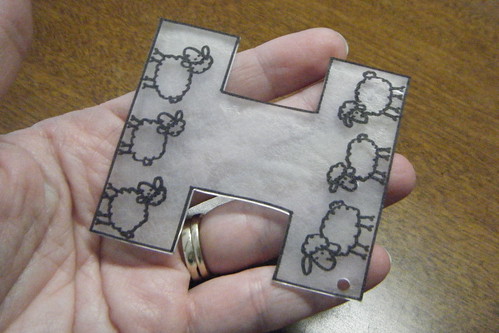
Bake for 3.5 or 4 minutes. It will curl, that's part of the fun of Shrinky Dinks, isn't it? However, the corners may curl in too much and stick to the center and not flatten out again. If this happens, using a couple of forks, or skewers, popsicle sticks, etc (By the way, you have no idea how odd the word popsicle looks until you've typed it a few times and then it just starts to look misspelled every single time it's typed) and gently pry them apart and bake it some more until the plastic flattens out. Take it out of the oven and let it cool before taking it off of the cookie sheet. If you place the plastic directly on the pan with no paper between, it will stick when it first comes out of the oven. Don't panic. Once cooled, it will pop right off.
If there is some distortion in your tool, you can re-bake it and flatten it out again. When it comes out of the oven, you can flatten it out by putting a piece of paper over the plastic and then use an oven mitt to press down gently on it for a second or two.
Hey Look! Your very own WPI Tool!
Enjoy! I look forward to seeing everybody's new toy!