(This is sans child of course since he's at school as I'm writing this up.)
There have been lots of Mommy hours put into this project. It all began with this inspiration. I want to thank those guys for creating these costumes and putting up such great pics of the whole process.
Some details:
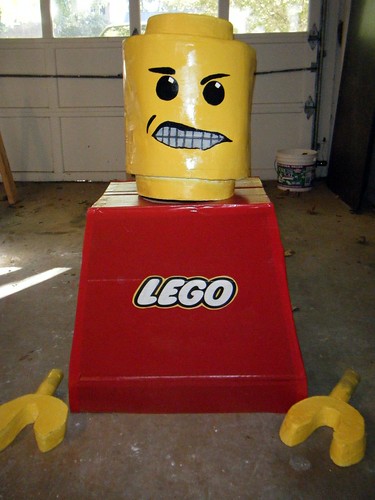
1. The mouth is made of screen that has been painted to resemble teeth. The wearer of the costume can easily see out, but unless you are very close, you can't see in.
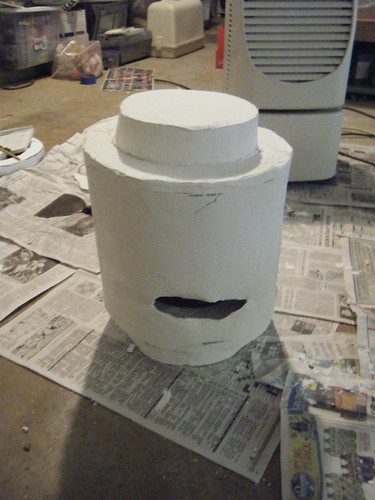
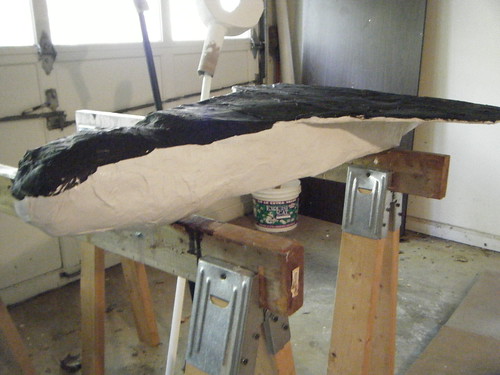
2. The head began as styrofoam and posterboard that I covered in three layers of joint compound. After much sanding, it was spray painted within an inch of its life a tradional Lego yellow.
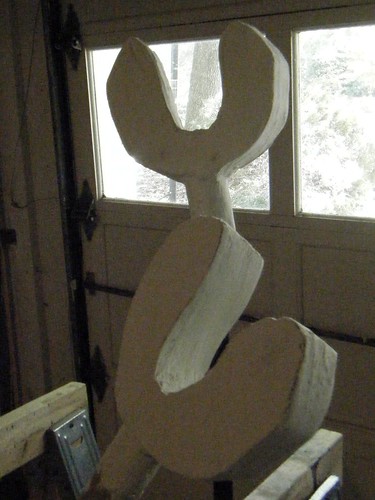
3. The hands were constructed in a similar way. The child will hold the paper towel tubes that are connected to the hands.
4. The torso piece was put together from a couple of different boxes and was to me, the hardest part of the whole project.
5. The face was hand painted on with acrylic craft paints.
6. For the logo, I did a google search and grabbed an image, then threw it into Gimp to enlarge and clean it up. Once that was done, I Modge Podged it on.
7. Everything has been sealed with a clear gloss sealer spray paint.
You can see how the process came about here and here.
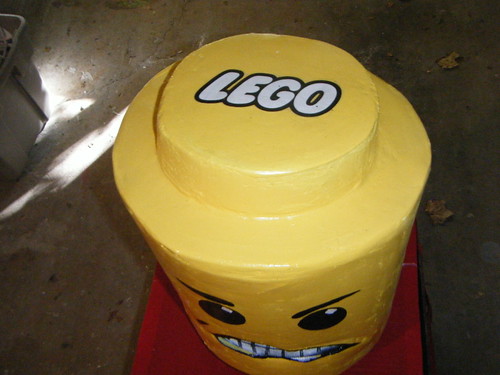
From the top:
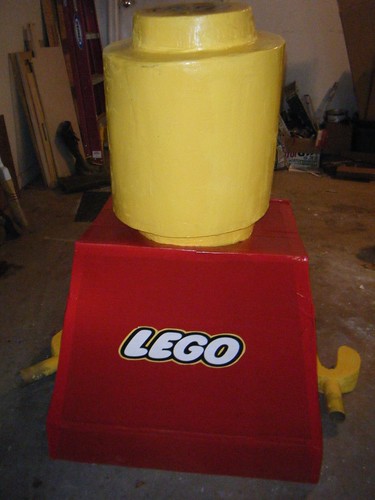
From the back:
The Eldest will be wearing a long sleeve red shirt (mine) to cover his hands while he is holding the hands part of the costume. For the legs, he's going to wear black pants and regular old tennis shoes. I'll probably have to lead him around so he doesn't run over his friends. There is no peripheral vision when wearing the head piece.
Want to know how excited I am about this project? Well, let's just say that The Eldest and I may have to arm wrestle over who gets to wear it on Halloween. :)