
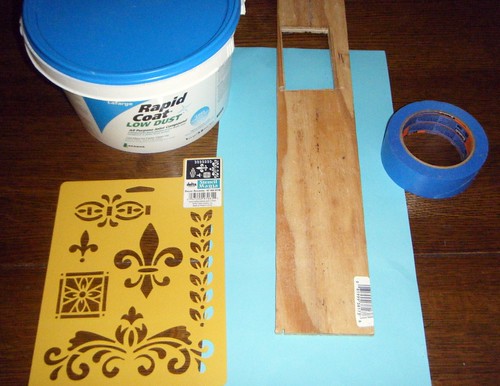
Basic Supplies:
Joint Compound - you can get much smaller size buckets of it than this. This is what I had in the garage already.
Wall or Cabinet Surface
Putty Knife - I couldn't find mine for this tutorial so I grabbed a joint knife instead.
Stencil(s)
Painter's Tape - please don't use masking tape, it will pull up paint from your wall's surface.
Tape Measure
Pencil
Level - optional
Step 1:
Working on a clean dry surface, use a tape measure to accurately pinpoint where the stencil should be placed. For this tutorial I am using a scrap board, so I did not measure anything.
Step 2:
Place stencil on the surface and tape it down with the painter's tape. At this point you may want to use a leveling tool to make sure that your stencil is level and not crooked. I can't tell you how aggravating it is to do all the work of getting a stencil on the wall and then take two steps back and notice that it's crooked and have to start all over.
Step 3:
Load up your putty knife with joint compound.
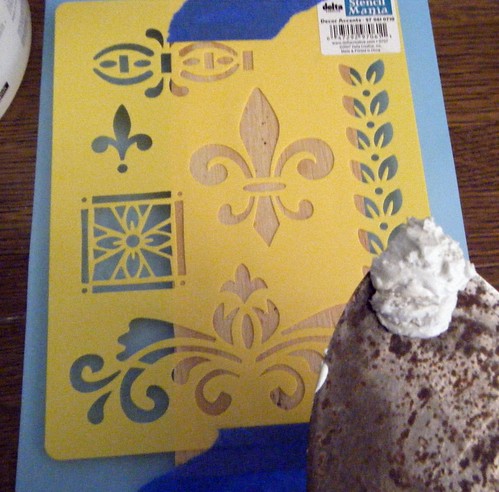
Step 4:
Lightly and carefully pull the putty knife across the stencil making sure to fill in all the blank spaces. Please don't make a thick layer, it's supposed to be subtle, remember?
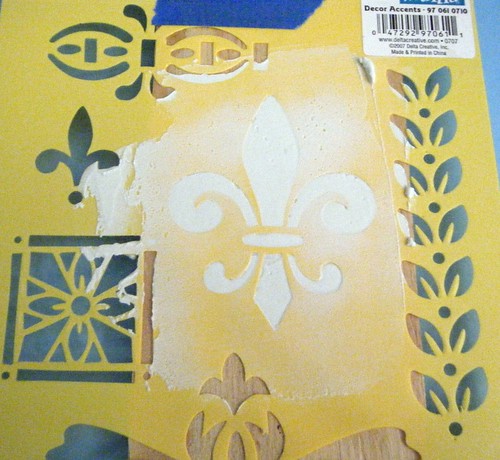
Step 5: (do this as soon as step 4 is complete).
Carefully pull the stencil away from the wall.
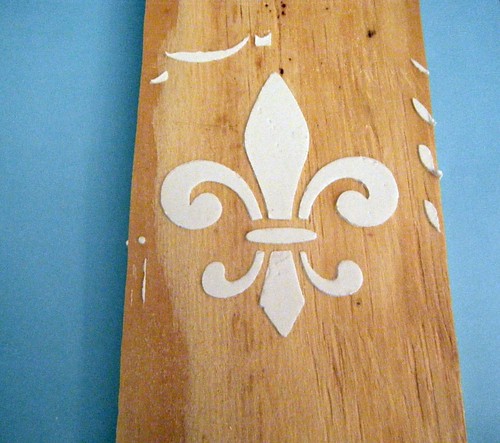
Step 6:
Using a damp paper towel, gently wipe away any unwanted joint compound that is on the surface. If you are neater than I was and use a putty knife instead, you'll be able to skip this step.

Step 7:
Did you make a mistake and want to start over? No problem, Use a damp paper towel to wipe away the whole thing and start over. Easy!
Step 8:
Step back and marvel at your creation.
The picture below is above my cabinets and right below my ceiling. It is unfinished as of now:

What should you do with it once it's dry?
This is the fun part.
a. If you want a very subtle tone on tone look that will play well with lights and shadows, paint over the piece with the same color that is already painted on the walls or cabinets.
b. Want it to show up a bit more? Antique it with a glaze paint.
c. Want it to really stand out? Paint the work with a contrasting color to the walls or cabinet.
Once my kitchen renovation is complete, I'll be using a combination of both a and b. It will be tone on tone and then very lightly antiqued to make it stand out a bit more on the cabinetry.
Enjoy!