Showing posts with label diy. Show all posts

Thursday, May 26, 2011

Paint Makes A Difference

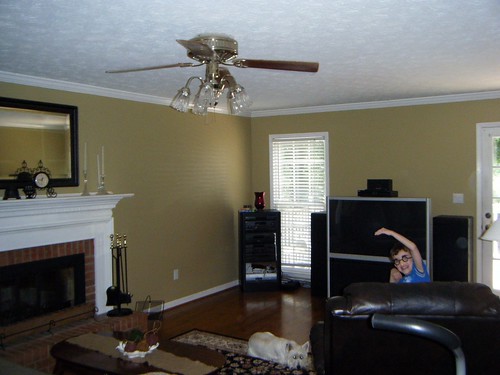
I've never really shown many pictures of my living room to you.  I've always been just a bit embarrassed to do so thanks to the walls and paint color choices of the previous owners of the house.  However, thanks to a fresh couple of coats of paint and a little rearranging of some furniture, that's going to change.

Here's a couple of before shots from two differents angles taken back in October:

In this shot you can see the wall color is a neutral brown, but it had a LOT of pink in it which just didn't go with anything that I owned.

2010_10010044


And here you can see the unfortunate wallpaper:

2010_10010036


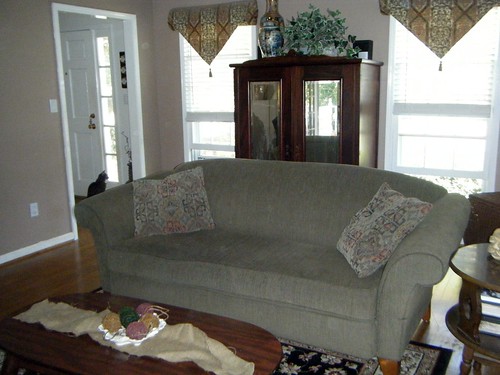
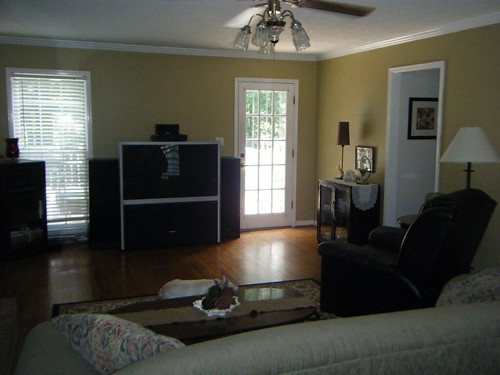
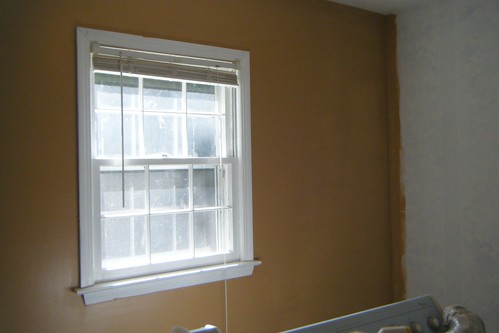
And here is the transformation:


I need to get some window treatments up, but I haven't yet decided what I want to do with them.  
In this view, I had a Picture Bomber:

2011_05260012


And yet one more angle:

2011_05260014


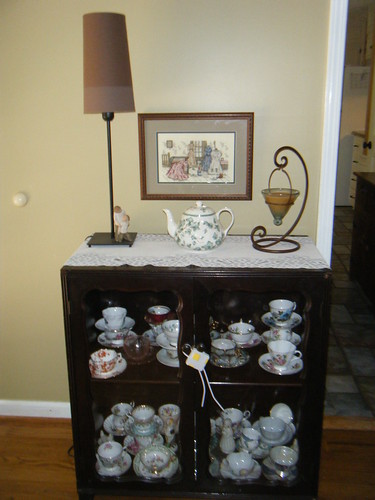
At this time of day, the light is poor and the pics came out just a touch dark.    Can you see the little table to the right of the back door?  This is what it looks like up close:

2011_05260006


The cabinet is filled with antique teacups.  At this point, the collection has outgrown it's cabinet, but until I find a better display for them, it will do.  The picture above the cabinet is a cross stitch project that I completed about 17 years ago.  The tea pot was acquired while on a trip to Scotland.

So, what do you think of the change?  There's still some tweaking to be done, but I love it already.

Monday, May 16, 2011

Getting Rid Of The Stripes

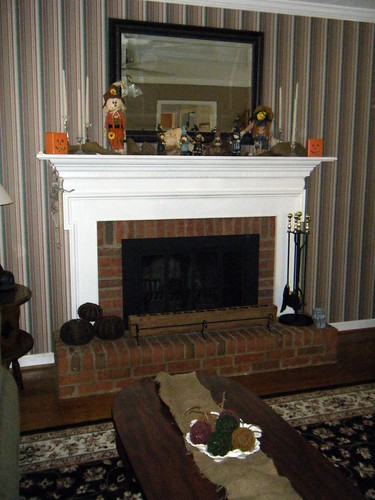
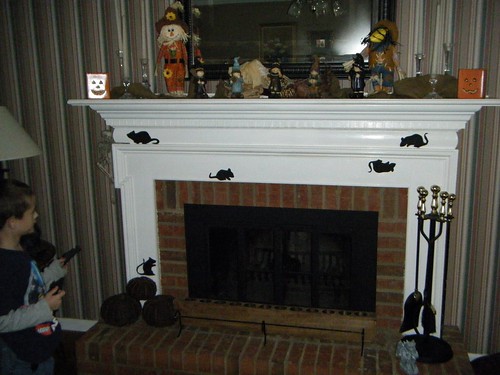
After having an atrocious week last week, I decided to do something that's been bugging me for eight years.  See the wall in the pic taken at Halloween, the one with all the stripes?


2010_10060005


Those stripes contain seafoam green, mauve, white and tan.  The people who lived in this house before us had hideous taste in decorating.  One wall was filled with this wall paper, the other three walls were painted a mauve/brown.  I've hated it since we moved in, but it was better than some of the other rooms, so I left it for a while.

So, since DIY is good for depression and anger, I tackled this project with gusto on Saturday.  First, I took a paint can lid that came from some paint that my parents had sitting around of a gorgeous gold that has green undertones.  It's amazing how this paint looks depending on the light in the room.  It really changes colors and has great depth to it.

The guy at Home Depot said, "Sure we can match that".   Well, the first batch that he "matched" wasn't even close to what I wanted.  It came out a more bamboo green.  Someone searching the oops bin is going to love it.  Me?  Not so much.  Another guy came up to help and they finally got it right.

You know what?  It looks awful next to the old paint:


It's just not a good combo.   Yuck!

Please excuse all the grainy pics today.  My camera battery died and I'm using my Ipod Touch and it's camera sucks.

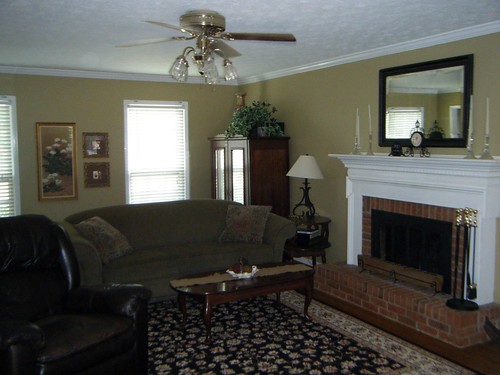
Here's what the main wall looks like now:


Way better.  My couch, rug and accessories are much happier with this gold color than the nasty pinky brown.

This one wall took me a long time to paint (working alone).  It's 23.5 feet long and 8' high!  It's a seriously long living room.  It took one coat of tinted primer and two coats of paint to hide all those damn stripes, but hidden they are!

Unfortunately, now the wall looks bare.  I think I'm used to seeing really busy stuff on the wall and I'm just not used to it.  It's going to take some thought to figure out how I'm going to fill some of that bare space. 

I still have three walls to paint, but they won't take quite as long nor quite as many coats of paint and primer.  I can't wait to see it finished! 

Tuesday, November 16, 2010

Plan B

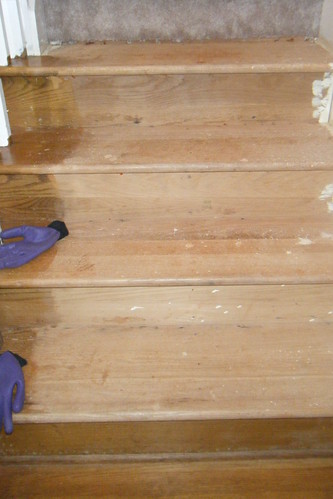
Plan A - was to stain the stairs.  Plan A will now have to be abandoned I'm afraid.  Now let me begin by saying that this is not the first time that I have stained things, so please believe me when I say that I am not an incompetent beginner.  That being said however, this project did not turn out like I expected.

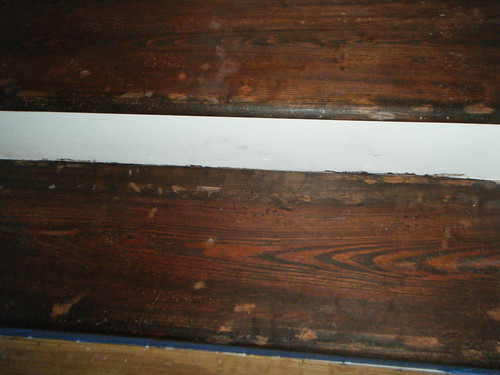
Evidently, the sloppy paint was A) oil based and B) had over 30 years to really get into the grain of the wood.  Also, there are traces of adhesive that were not apparent to the eye that has also gotten down into the wood.  You could spend a million years sanding these boards and they still wouldn't turn out right.

I used a hand sander, a palm sander, two detail sanders and a belt sander at various times on these stairs.  It's not the lack of sanding that caused problems.

I did two steps and then stopped due to these results:


It makes me sick to my stomach that they turned out this way.  They're polka dotted for heaven's sake!  They look worse in person, trust me on this one.   I abandoned the project, left all my tools and crap in the foyer and walked away to try and come up with a solution.

So, on to Plan B.  Paint!  Well, first primer, then paint.  I went today and picked out a lovely dark brown paint from Behr called Expresso Bean that will be really nice on these stairs.  The next complication will be to get the paint on the stairs and not have foot and paw prints all in it.   I see some late nights in my future.  

This was not the only disaster last night/ today, oh no it wasn't, but I'll tell you about that one tomorrow.  I need to calm down a little.  :)

Monday, November 15, 2010

DIY Frenzy

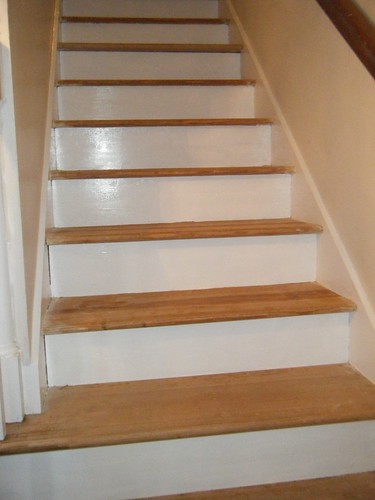
If you remember, I began working on my stairs in July.  Guess what?  Still not finished, but I'm darn close now.    With December 5th coming closer and closer (I'm hosting a Ladies' Tea) the scramble to get this project finished has begun.  The risers have been painted white and they look like this now:


We've been using them like this for a while now since I've been swamped with other projects.  As I am the only one working on these and there is only one of me, obviously it's taking a while.  
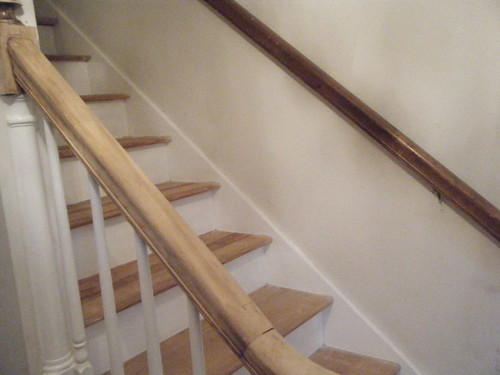
Today I was sanding the stair rail.  To see a before and after, look at the two rails in this shot:

2010_11150003

Now imagine, this house was built in 1980.  That's thirty years of oils, dirt and wax buildup on the rails.  Nasty.  It's taking a while just to sand that down.  Totally gross.  I won't be sanding down the one on the far wall in place.  It's going to have to be taken down completely and moved into the garage to begin sanding down that one.  I couldn't do this with the one that has the spindles in it though.  It's been a total pain in the neck to sand that sucker too.

I've started taping the risers and walls off and will begin staining the treads today.  I may have to be placed into a nice, soft padded room after I corral the two cats, two dogs and one four year old out of the way so that I can start.    Ack! 

So, progress has been made and is continuing as you are reading this.  Hopefully I'll have another progress report for you tomorrow.

Thursday, September 23, 2010

Fire Place DIY

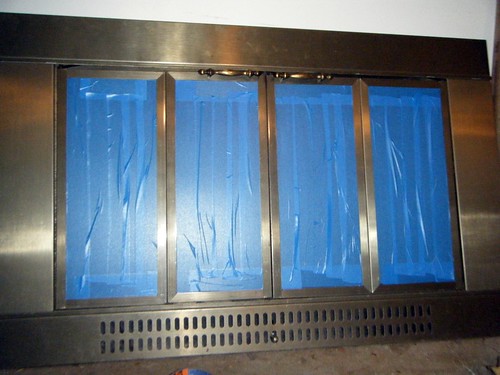
Since we moved into this house seven years ago, I've hated the way my fireplace insert looks.  It's a big ugly nasty colored brass.  Not a pretty brass, an ugly one.   Yesterday I decided to do something about it.

I had gotten out the steamer cleaner to clean the bricks on the fireplace and had to take the insert out anyway to do this.  This is the first time that I've had it pulled out and I decided that now is the perfect time to fix the color.

I took a trip to Home Depot this morning and purchased some High Heat spray paint for about $5.  DISCLAIMER: Please, if you do this kind of project, make sure you buy High Heat paint, not the regular spray paint.  I will not be responsible for your burning your house down if you don't buy the proper paint!

Here is the before:

2010_09230003


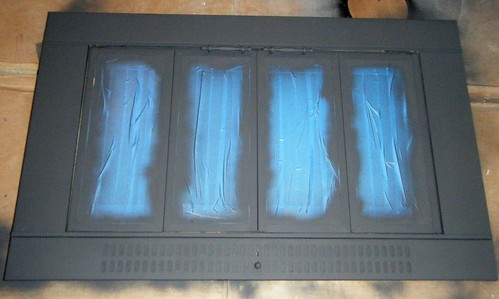
And here is the insert after taping up the windows and applying the first coat of paint:

2010_09230008


I picked a flat black paint because I want it to disappear in the fireplace.  It's had enough attention over the years, it doesn't need more.  It's there to insulate the house when the fireplace is not in use and that's all it should be doing, not taking away from the beauty of it's surroundings.

Tomorrow I'll show you how pretty it's going to look in the fire place!

Wednesday, August 04, 2010

Sloppy, Sloppy, Sloppy

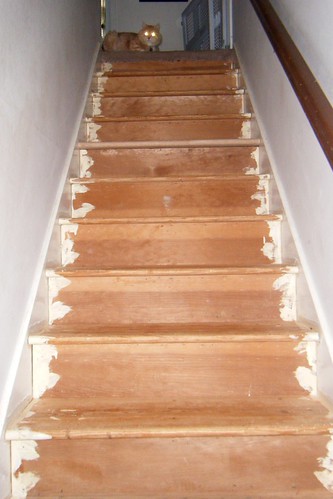
My stairs have now been completely uncovered and the wood is beautiful.  But, check out what the original painters left for me to clean up:

2010_08040006


Look Mom,  I've got a demonic cat and  "Go Faster Stripes" on my stairs!  What a pain this will be to fix up.  Not so much on the risers (the vertical part of the stairs), but on the actual steps themselves.  The risers will be primed and then painted white since I'm tired of trying to kill myself at night when walking up the steps in the dark, so the stripes are no big deal there.

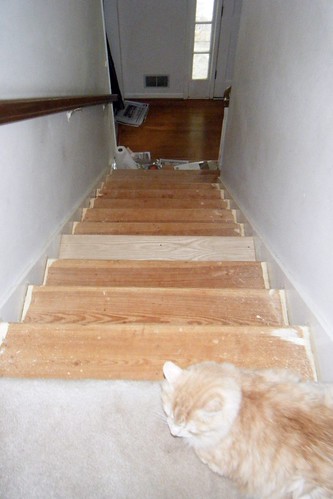
Here's the view from above complete with matching cat:

2010_08040003


Can you see the stripes now?  Also, do you see the one stair that doesn't match any of the others?  We had to replace that one.  It had split into two complete pieces and the builders had just rammed in a bunch of extra nails to keep in place.  It was going to be covered in carpet, so who cared right?    Combined with the careless painting, that's just plain sloppy all the way around in my book.  If you're going to do a job, why don't you just do it right the first time?  Except in knitting of course, you're allowed to fudge mistakes there, aren't ya?

The mess on the bottom step is where I'm using paint stripper to get the paint off.  This is going to be another slow, PITA process I'm afraid and one that will be better and quicker done once school starts back.


Once that's done however, I have a decision to make.  We plan on changing the floor color eventually (a good ways down the road.)  I hate the color that the wood has been stained.  I really dislike light oak colors and prefer dark cherry.  Do I go ahead and stain the stairs the color that I want the floor to be or do I try and match the current color of the floor?  What does the "Internet Collective" think?

Monday, July 26, 2010

Uncovering The Stairs

On Friday afternoon I started pulling up the carpet on my stairs.  The first four stairs are done, nine more to go.  My husband complained about how slow I was in uncovering the stairs.  "Why don't you just rip them all out at once?" he asked.

Well, it's because of all the little feet in this house that use those stairs.  The boys need to get to their bedroom and playroom and there are cats that travel those stairs as well.  Of course, it'd only be justice served if the cats stepped on something sharp since it's their fault that I'm have to do the stair renovation anyway.

When I ripped up the carpet on each stair, I found a bazillion staples besides the strip of carpet tacks.  The strip came up easily, the staples?  Not so much.  I had to pull those bad boys out one by one.  Once every thing was off the step I lightly sanded down any rough spots, vacuumed the mess up and started on the next stair.  I'd say that it took about an hours worth of work to get one stair completely uncovered and cleaned.

I now have a big blister on the juicy part of my right hand.  Thank God I was wearing work gloves or there's no telling where else I'd have blisters. 

But it's all been so worth it.  Just look at the wood underneath the carpet:

2010_07240006


From what I've been able to see, it looks like the whole staircase looks like this.  With such beautiful wood there, why would anyone want to cover it all up?  Now it's on to the next one!

By the way, posting may be spotty to non existent this week.  The boys and I are headed off to the lake again.  School starts in about two weeks here and we're trying to fit in as much swimming time as possible.  See ya!

Friday, July 23, 2010

Friday DIY

I'm thinking that my husband should just probably start avoiding coming home on Fridays.  It seems to be the day that I tend to get the diy bug the most often.  It certainly is the day he is becoming to dread the most.

Picture this:
Me: (calling his work)  Um, where do you keep your (insert tool of your choice here)?
Him: What are you doing and why do you need (the tool inserted above)?

This is the point where you can hear the uneasiness in his voice begin.

Me: Oh, no reason.
Him: No, really, what are you doing now and what are you doing it too?


This is what's been bugging me lately:

2010_07230016


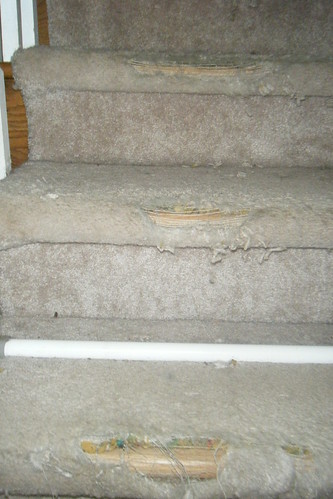
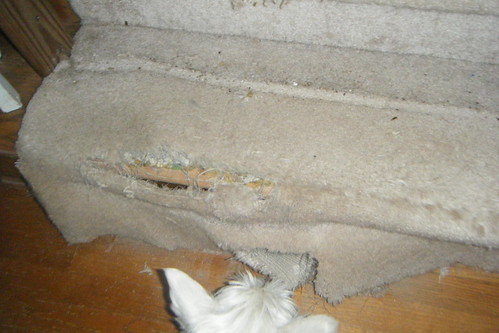
This is a prime example of why some people stuff cats and rocks in burlap bags and toss them into the nearest body of water.  I love my cats dearly, but look what they've done to my stairs!  Two cats in cahoots tore humongous holes into the carpet on the stairs.  It was a slow process and it took five years, but by golly, they finally did it.


2010_07230017


I did some investigation and there's some good news.  The first four steps where the damage is, look like the pic above and are all hard wood and are quite beautiful.

So here's the plan.  I'm going to rip off all the carpet on the bottom four steps and toss it.  Then I'm going to carefully pull up the next step and see how the steps look there.  If they look like the pic above, it's going to be rip city.  If not, I'll carefully tack it down and ignore it for a while and just refinish the bottom four steps.

So here's where I stand right now:

2010_07230018

I have a buddy helping me.  I'm dog sitting my folks' dog while they're out of town.  Boy, let me tell ya, she sure is a lot of help.  I can't tell you how many times I tripped over her while doing my investigations.

Have a great weekend!

Monday, July 05, 2010

So, How Did It Turn Out Already?

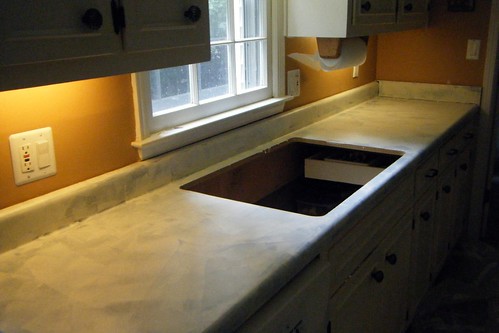
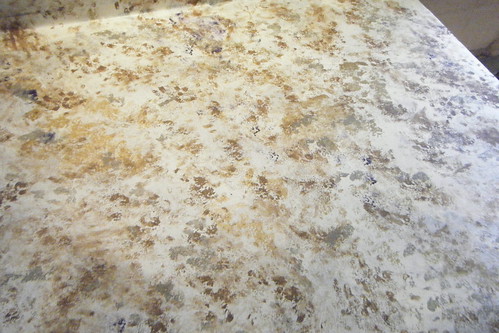
Having been out of town for a few days and letting the resin cure, now that I am back I can let you see how the large counter top renovation turned out:


This is such a shocking change for me, even having done the other counter tops in the kitchen over the past year.  Yes, it's taken me a year to get all of them done.  Sue me.  Anything is better than the godawful blue counters that I've been staring at for over seven years.

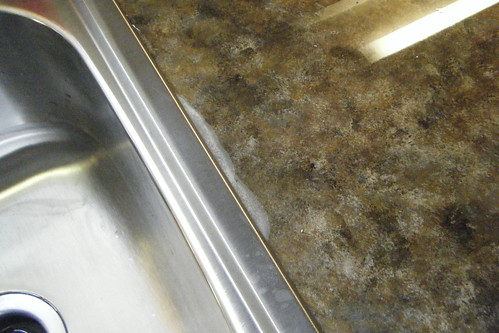
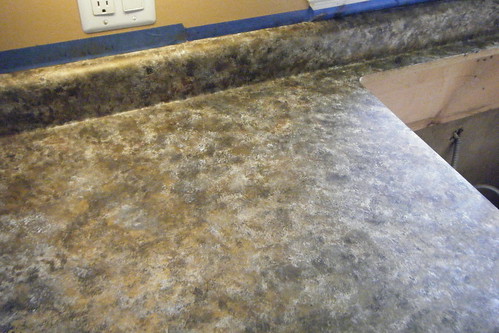
However, it's not all a bed of roses.  We decided to put in a new kitchen sink, replacing the nasty old white one that would never get fully clean.  When we did, we found that the new sink wouldn't quite fit in the old one's place.   The resin had been curing for four days at the time.  It gets hard cured after about seven days.  We cut the hole wider and then found that a very small section had released from the counter top.  It looks like this:

2010_07050004


See the white spot?  It's about half an inch thick and four inches long.  This is the first time that something like this has happened.  We think that when we cut the counter, the heat from the saw caused it.  It's now sealed from beneath the sink, so no water can seep into it.  Since the whole counter needs another coating of the resin, I'm going to go over this spot again with craft paints to disguise the imperfection, then do the coating of the resin.  It won't be this week, but it will happen soon.


Just thought I'd share this with you guys.  No project ever turns out perfectly for me and those doing diy/crafty type projects like are probably already familiar with some of the stuff that can go wrong.  But, I'm not going to let this get in the way of my new pretty kitchen counters!  Oh, no.  I'll just fix it (or at least disguise it) and move along.  Perfection is for the weak of heart.  I'm more into building character.  :)

Wednesday, June 30, 2010

Day 2 of the Kitchen Counter Renovation

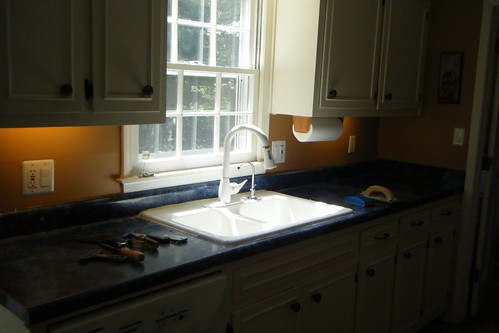
When renovating your kitchen counters that are hideously colored blue (with craft paint and resin of course), you should do the following:

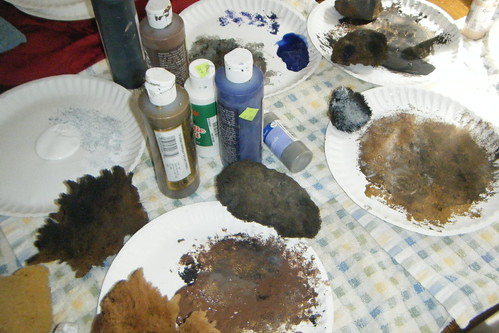
Step One:  Invite lots of help for your diy endeavors.  Oh, and lots of sponges and craft paint:


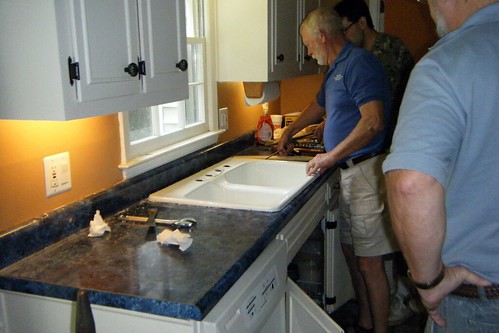
Step Two:  Make Sure there are lots of menfolk in the invitees to remove the sink.  Dude with the dark blue shirt and white beard is my Dad.  Shhh!  Don't tell, but he just had his 66th birthday two days ago!


Step Three:  After shooing away all the menfolk,  I rolled on the same paint that I used on my cabinets and wall trim:


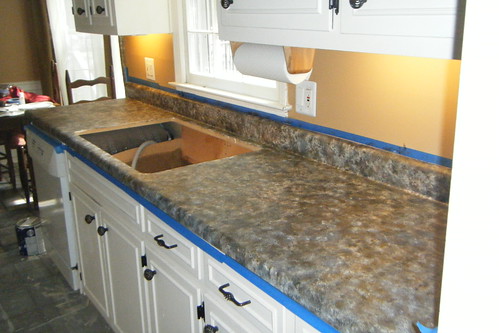
Step Four:  This is how it looked when we first started sponging on the craft paints.  Pretty yucky huh?


Step Five:  But look what happens when you add a bit more:


Step Six:  After several (like a hundred more) trips to the table back and forth to where the craft paint is, step back and admire how pretty it looks so far!


Next step, Resin!

Tuesday, June 29, 2010

Counter #3 DIY

And so we begin again.  This is the third and last installment of the counter top renovation.  Yay!  It feels like I've been dragging this project out forever, but it's almost done.  Here's how it currently looks:


This is the largest area that I will have renovated.  Normally my microwave is in the far right hand corner and also missing is the crap that seems to accumulate on all flat surfaces in my home.  Also not shown: how my other counters are now covered up with the stuff that came off of this counter.

Today I started removing caulk from around the sink in preparation to pulling said sink out.  This part totally sucks and I'm not enjoying it.  Some of the caulk is almost 30 years old and really doesn't want to give up the ghost.  I've resorted to this arsenal to help in its removal:


If that doesn't work I might try some C4 or TNT.  Anybody got some to spare? 

IF, and that's a BIG IF by the way, I can get the caulk removed sometime today, I'm going to go ahead and put a base coat of paint on the surface.  I'll stay about 2 or 3 inches from the sink though since we will be removing the sink tomorrow morning. 

The full plan for tomorrow involves sink removal, paint, lots more craft paint, and pouring of resin.  Then I get to devise a way to keep two very nosy cats away from the kitchen so that I don't find little cat prints destroying all my hard work later.  I will then be deserting the house for a few days while the resin cures.   Yes, there will be someone checking on my two deserted kitties so don't send PETA after me, ok?  That's a lot to get done in one little day.  Wish me luck.  Off to do more scraping!

Monday, June 07, 2010

Friday DIY Continued

My Laundry Room diy project carried on through the weekend and it looks like it will take me the rest of the week to complete it.  I live my life on a start/stop, start/stop basis thanks to my kids.  So no project is ever completed in a short time span.  Ever. 

There was a rush to get at least one corner of the room finished and that's where my washer and dryer go.  Laundry mountain is about to have an avalanche, so it's critical we get those hooked back up. 

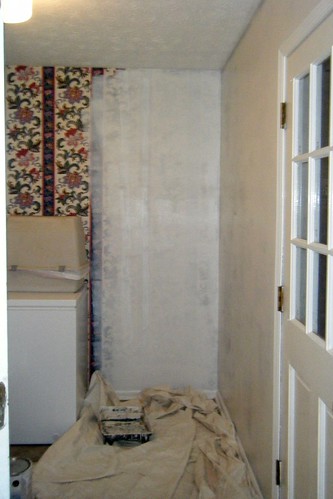
Remember the awful blue and hideous wallpaper?  Here's where it stands now:

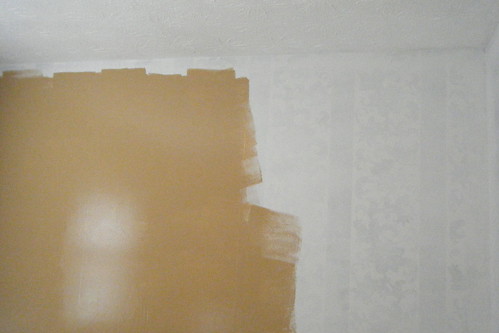
You can barely see the wall paper under the primer on the right and on the left is one coat of the paint color that's going up.  It's the same color as in my kitchen since the two rooms are right next to each other.  The wall paper is covering up nicely.  I was worried that it would show through the paint, but it's not.  Yay!

Here's another shot of a different wall.  The paint is a little darker here due to it being dry and the lighting:


The wall to the right is the same one as in the first picture.  The top pic was taken after this one. 

The paint color is sort of a very warm butternut squash kind of color.  It looks better in person than in the pics.  It's a little intense if you are used to white walls, but never let it be said that we are afraid of a little color around here!  It'll come together better when I get the rest of the trim color in and some pics up on the wall. 

You have no idea how much I loathed the wall paper.  Honestly, I was so sick of looking at what was in this room before that I would have slapped up an electric purple and called it a good day. 


I did do some knitting this weekend and there's bad news/good news, but I'll tell you about it tomorrow.

Friday, June 04, 2010

Friday DIY

I really need to stop watching home improvement style shows.  It makes me itchy for paint brushes and paint rollers.  I found that I needed to scratch that itch this afternoon and ended up with primer on walls, trim and my hands.

The room that is much in need of restoration is my laundry room and it attaches directly to my kitchen.  It's been clashing with the updated kitchen (well, almost updated - I still need to do one more countertop) and it's been driving me nuts to look at it.  With the freezer dying crisis of last week and our subsequent purchase of one a little smaller, I found myself able to see much more of the wall and the pressure to paint began to build up.  It came to a head while I was at the folks' house this past weekend and was watching diy channels.  I was doomed from that point on. 

This, of course, will naturally send the spouse's blood pressure skyrocketing as it always does whenever I get near paint or power tools.  He'll get over it.  I'm following the rule of thumb that says "It's better to ask forgiveness than permission."  I never told him I was going to start painting.  He'll find out when he gets home tonight.  :)

Here's the before pic (check out the hideous wallpaper):


After Priming part of the walls:


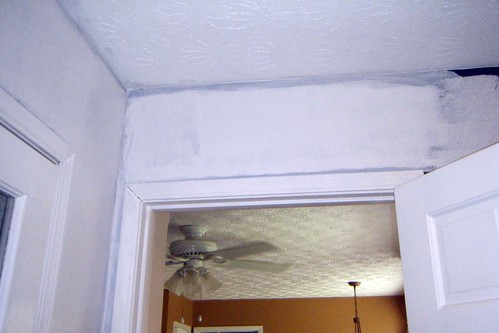
And another shot above the door that goes into the kitchen:


You can see the color of my kitchen walls in the last pic.  It really doesn't go well with dark blue and hideous wallpaper does it?  The primer may be spotty right now, but I already love it better than what was in there.

This is the point where I stopped for the day.  I'm going to have to rearrange the laundry room to get to the rest of the walls and that will require some help to move the appliances.  Everything will need at least two coats of primer and then two coats of the paint.  I'm priming the trim as I go along now to save some time later.  There's a lot of prep work to be done to the walls before the paint can be applied.  The primer has really highlighted a lot of stuff that I missed before. 

The idiots that lived here before us left some real problems for me to deal with.  One of those being the wallpaper.  They didn't prime the walls before applying it.   So, in order to save an incredible amount of trouble, I'm painting over it and hoping for the best.  They also bolted some stuff into the walls and then tore them off when they left, leaving the anchors in the walls.  So I get to patch those holes as well.  Sometimes I really wish I had those people in rock throwing distance, I really do.

Have a great weekend!

Thursday, January 07, 2010

Mirror Followup

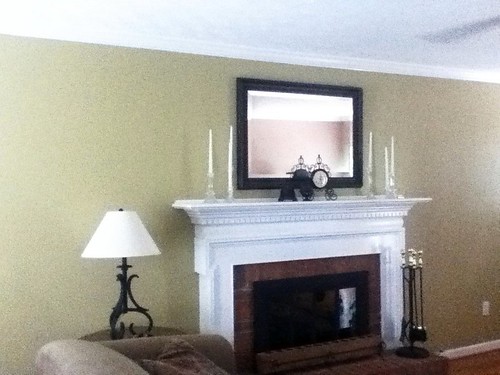
Yesterday I showed you my Mirror DIY project where I painted the two mirrors with some Krylon Metallic Paint in Oil Rubbed Bronze.  Today I wanted to show you the big mirror on the mantle and the mantle itself.

Every year after I take down all the Christmas decorations I get all depressed.  The house looks so bare and so does the mantle.  I usually just go with a spare look, such as just a few candlesticks on each side and maybe one thing in the middle, but not this year.  This year I wanted something busy, but it had to include many shades of brown, a few other natural colors and have lots of texture.

Here's how it's turned out so far.  Bear in mind that this is a work in progress and that I'm still tweaking it:


I've had a devil of a time photographing this mantle.  The pictures just don't do it justice and neither does my camera.  So here's a couple of other angles:


All three of these are blurry. One day I'll get a real grown up DSLR camera.

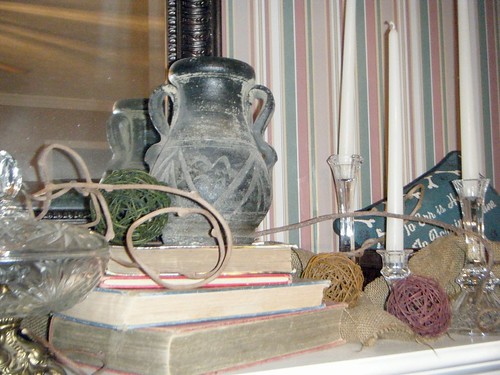
For a breakdown of what's on the mantle:


This is to the left of the mantle.  The tall wooden puppet is from Indonesia and really works.  The brown teapot was brought back by my husband from a trip to Peru and the box it's sitting on was a gift from my brother's trip to the Czech Republic.


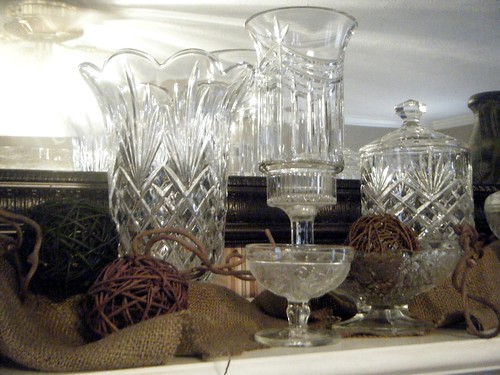
In the center is a small collection of cut crystal.  Some were wedding gifts, some belonged to my grandparents and a couple were also brought back by my brother from the Czech Republic.


And to the right, I found some old books that has been tucked away and stacked them with their edges out to display the different shades of tan and brown.  These also served to give some height to display the black pottery.  Oh, and there's a green pillow tucked into a small metal basket on the right.

To pull everything together I grabbed some strips of burlap that was leftover from the kitchen curtain project and bunched it up a little and then spread it across the mantle.  I made sure to give it some height in some places to add interest.  Next I grabbed some dried curly grape vines that were originally in my foyer in a large pottery jug and stuck it in random places.  I also have some little vine balls on the mantle that have been dyed that I purchased at Target.  I used these as filler.

Also please keep in mind that the nasty striped wall paper will also be disappearing over the next couple of months. My "MantleScape" will have so much more impact then when it doesn't have to fight the stripes to be seen.

I'm not sure what else I'll do to the mantle, but I like where it's heading so far and I"m loving my "new" mirror.

Wednesday, January 06, 2010

DIY 2010 project #1

I have a couple of mirrors in the house that I loathe.  They were fine when purchased, but more and more, as I found my own personal decoration style, I came to hate them with a purple passion.  The frames were brassy where the rest of my home has warm browns and autumn tones.

So I decided to do something about it.


First came the little cheap plaster of paris mirror:


Then the beveled mirror that goes over my mantle:


In the mirror is the view of our garage ceiling.  Notice the patches made there next to the light?  Yeah, while putting in our new second attic space, the hubby decided to step through the ceiling.  Not that that has anything to do with mirrors, I'm just saying.

Here's another view of the big mirror all taped up and ready for painting.  Don't ya just love cheap dollar store construction paper?  Notice the nasty brass color of the frame?  This pic is probably the truest to it's natural color:


And a corner closeup:


I used Krylon's Metallic paint in Oil Rubbed Bronze and sprayed two coats to get this:


This, obviously is not where they will end up, but it was all I could get before my camera battery died. 


Big. Difference.

I will probably put some rub 'n buff on the smaller mirror, but the larger one is done.  I'll have a finished, back on the mantle pic for you tomorrow after my camera battery is revived.

Thursday, July 23, 2009

DIY Fun - Joint Compound & Stencils

Ever wanted to add a little subtle pizzazz to your walls or cabinets for little to no money? Using joint compound and stencils is a great way to do this and I'll show you how to do it on the cheap!

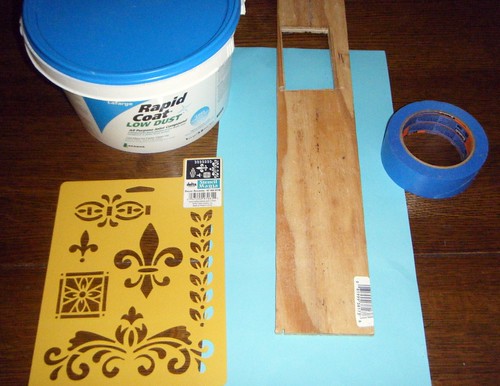
Basic Supplies:

Joint Compound - you can get much smaller size buckets of it than this. This is what I had in the garage already.
Wall or Cabinet Surface
Putty Knife - I couldn't find mine for this tutorial so I grabbed a joint knife instead.
Stencil(s)
Painter's Tape - please don't use masking tape, it will pull up paint from your wall's surface.
Tape Measure
Pencil
Level - optional


Step 1:

Working on a clean dry surface, use a tape measure to accurately pinpoint where the stencil should be placed. For this tutorial I am using a scrap board, so I did not measure anything.

Step 2:

Place stencil on the surface and tape it down with the painter's tape. At this point you may want to use a leveling tool to make sure that your stencil is level and not crooked. I can't tell you how aggravating it is to do all the work of getting a stencil on the wall and then take two steps back and notice that it's crooked and have to start all over.

Step 3:

Load up your putty knife with joint compound.
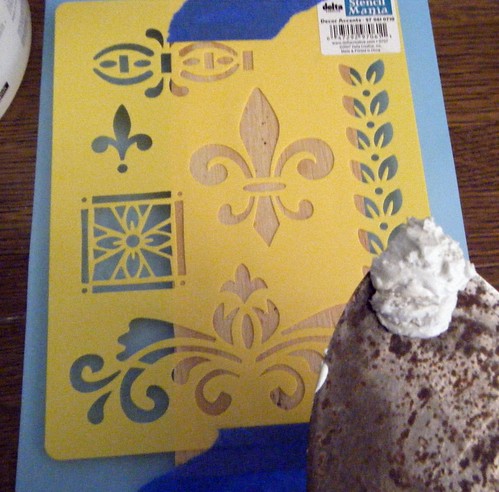

Step 4:

Lightly and carefully pull the putty knife across the stencil making sure to fill in all the blank spaces. Please don't make a thick layer, it's supposed to be subtle, remember?
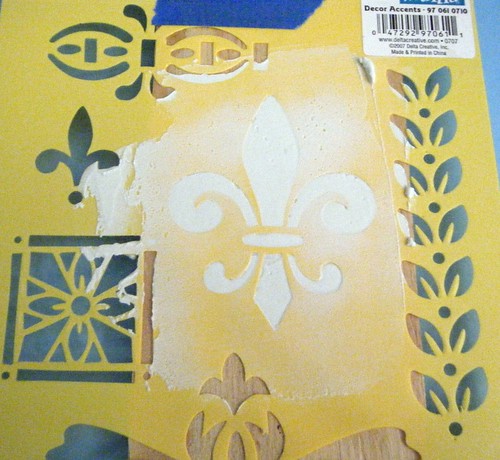


Step 5: (do this as soon as step 4 is complete).

Carefully pull the stencil away from the wall.
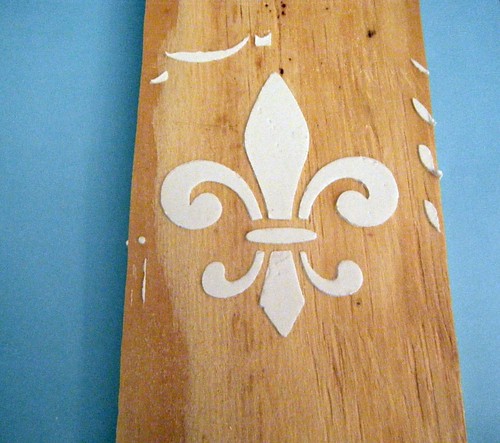


Step 6:

Using a damp paper towel, gently wipe away any unwanted joint compound that is on the surface. If you are neater than I was and use a putty knife instead, you'll be able to skip this step.


Step 7:

Did you make a mistake and want to start over? No problem, Use a damp paper towel to wipe away the whole thing and start over. Easy!
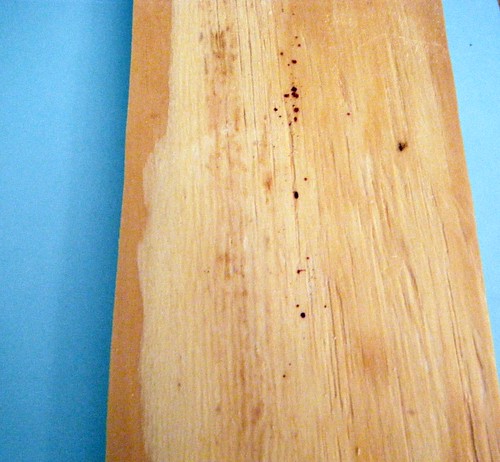

Step 8:

Step back and marvel at your creation.

The picture below is above my cabinets and right below my ceiling. It is unfinished as of now:


What should you do with it once it's dry?


This is the fun part.

a. If you want a very subtle tone on tone look that will play well with lights and shadows, paint over the piece with the same color that is already painted on the walls or cabinets.

b. Want it to show up a bit more? Antique it with a glaze paint.

c. Want it to really stand out? Paint the work with a contrasting color to the walls or cabinet.

Once my kitchen renovation is complete, I'll be using a combination of both a and b. It will be tone on tone and then very lightly antiqued to make it stand out a bit more on the cabinetry.

Enjoy!