
Before on the left and After on the right:
Burlap Curtain Project Review:
1. I did this on a bay window. It would normally be very simple to do the hardware for the project, just have 3 straight curtain rods and 2 swivel socket connectors. Put them together and install. However, Ikea's connector was for a 90 degree angled wall and the angle for my bay windows was not. Thus, the blow torch that I mentioned in an earlier post. It would have been much simpler to use a swivel socket connector. This carries on the tradition of my making every single project I touch much more difficult than it needs to be!
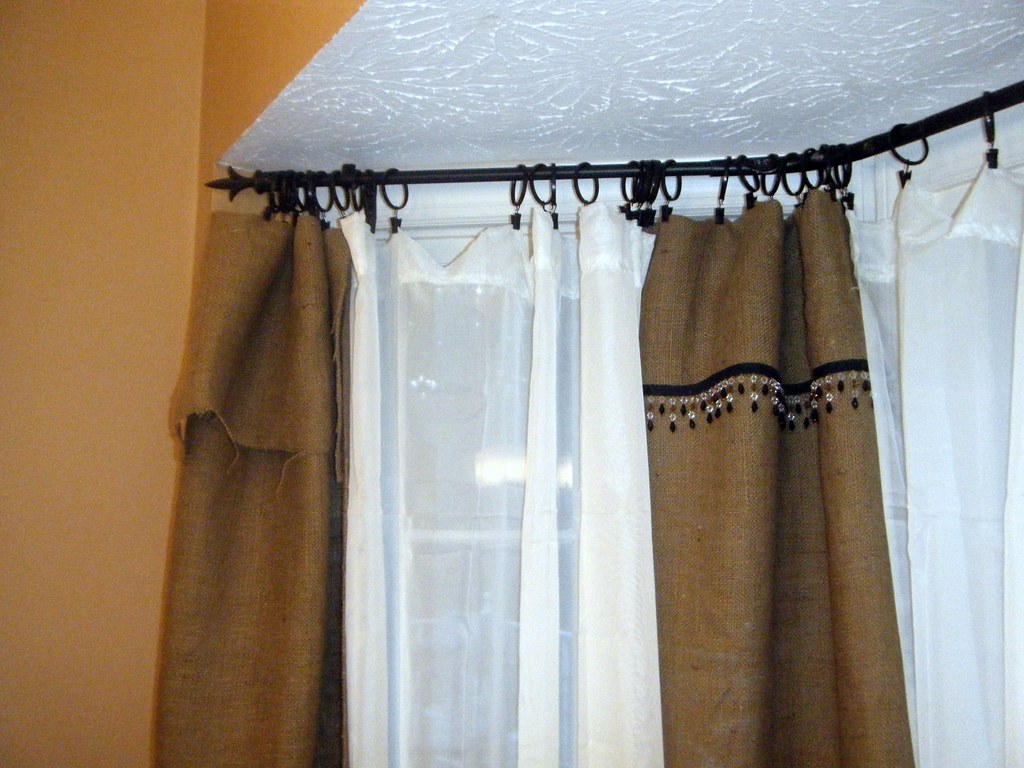
2. My burlap panels are not going to be closed, they will stay as they are in the pic above. So I cut the panel in half, approx. 24 inches wide. If they were to be closed I would have left them at 48 inches wide, but that wasn't necessary for these windows.
3. No sewing necessary! I added 9 extra inches to my finished length. 1 inch to be turned under at the bottom for the hem and hot glued and 8 inches to be folded over in the front for a faux valance-y kinda look. Obviously I do not know the formal name for this type of curtain. Normally you would put the black part of the trim to the inside of the flap, but I wanted the black trim to echo the black bar above and the knobs on the cabinets.
4. The panel is hung on the alligator clips attached to the rings. So, you don't need to sew a pocket for the rod or put in grommets. Grommets are not my friends. They don't like me very much.
5. For the bay window, I did 4 total panels of burlap, which was super cheap. It was $2.99/yd and I had a 40% off coupon from JoAnn's. The trim was purchased there as well. I only used about two yards. I got this on sale as well. There are also 4 sheer panels that I found at Big Lots for $5.00 a piece.
Here's how I hung them up: Panel, sheer, panel, sheer, sheer, panel, sheer, panel. Or, one panel on each side and one in between each window.
6. These go down to one inch above the floor. I wanted a more dramatic look in the breakfast nook than shorter curtains would have given me.
So my breakfast nook is now complete: (Please ignore studious boy doing homework)
