Showing posts with label dyeing roving. Show all posts

Thursday, June 04, 2009

Some Old, Some New

My computer is working against me today. I've tried posting to the blog three different times and something has gone wrong every damn time. So, fourth time's a charm, right?

Okay, before I get to the new, let's talk old stuff:

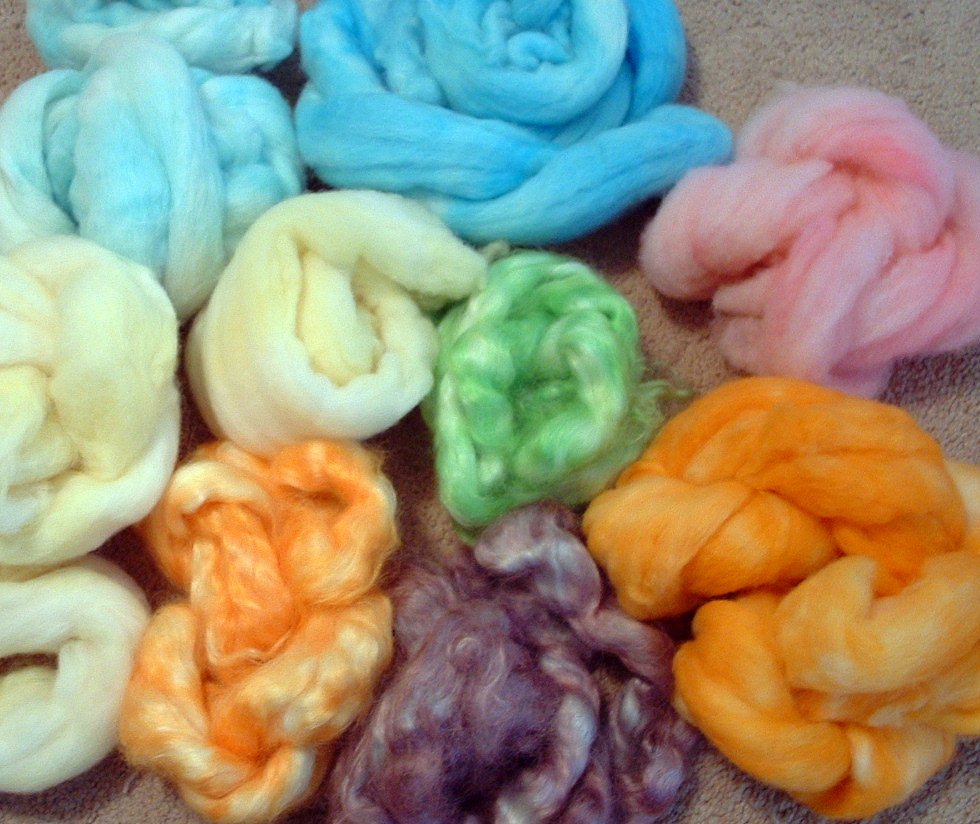
1. I did a massive dyeing project a couple of weeks/months ago and realized that I never showed you my color wheel that I made from the project. So, without further ado, here ya go:

I also found two colors that I missed while dyeing the roving. The purple and the green are not true and broke easily, so the colors that they gave are really odd sometimes. But that's okay and that is why this testing was conducted, so that I would have a better grasp on what the dyes would do straight out of the box. The center three are not primaries, they are secondary colors. Please don't think that I haven't a clue as to how it is supposed to look. I just got lazy about putting the three in the center when I already have them placed in the circle.

I am now very thankful to have all of the big pile of roving off of my table in my dining room/office/craft room. I'm sure it won't be long until some other crap moves in to take it's place on the table.

2. I'm still working on my first log cabin square. This would have been finished by now except that I noticed that I had picked up stitches on the wrong side of two different parts. :sigh: By the way, the Debbie Mumm Traditions yarn does not like to be ripped out. It's not fun.

On to something new:

I got the urge to dye some roving again. As a matter of fact, I wanted to play with 4 ounces of Falkland and I wanted to do some natural dyeing with tea. I have dyed fabrics with tea and yarn, but I wanted to try for a deeper color this time.

So I soaked the Falkland in water with some Alum and Cream of Tartar for a couple of hours while I took the Eldest to a gym class.


While that was going on, I got out my huge enamel pot and filled it with water and about a bajillion tea bags that I had lying around from an old tea party that I gave a few years ago. Yes, I said years. While I drink tea, I don't usually drink it caffeinated and at this point it would be too stale to drink anyway. I also added some ammonia to the mix (smells godawful now) in order to try and get a deeper richer color out of the tea.


The wool is now soaking and I'll probably let it soak overnight. I can't wait to see what color brown that I get out of it.

If it works out, it'll be one of the first few items that I will list in my new Etsy store. I'll throw out a link to it when it goes up. See ya tomorrow!

Tuesday, April 28, 2009

Dye Day

Today was dye day at the House of Shea. Remember the 75 boxes of egg dye that I and my Mom purchased recently? I decided it was high time that we test these for color accuracy and saturation. This literally took half of my day and all of my kitchen to do.

I got out a bag of scrap fiber and the postal scale and measured out bumps that weighed .2 ounces each.


I got out all the glass jars I could find and mixed up my dyes with the vinegar. The directions suggest 1/2 cup water and three tablespoons vinegar per dye tablet. I did some playing around and found that for each .2 oz bump, I would need 1/4 cup of product to get the deep color that I was looking for. Your mileage, of course, may vary.

I set up my table with post it notes on two sides. Top down was yellow, orange, green, red, blue and purple. Left to right was blue, green, yellow, orange, red, purple. Once these were dyed in the microwave (2 min. on and 2 min. resting until dye exhausts) I put them on plates and on the table in their graph position so that I could keep up with what colors were mixed together.


These really don't make sense lined up as they are in this picture. Once they dry I'll be able to set up a color wheel to show you how they turned out.

The colors were not what I expected at all. Purple and Green dye tablets are not at all true. The purple likes to break and is more blue than true purple. The Green is a Teal green and has way too much blue in it. Red, Orange, Yellow and Blue were as expected.

I was looking for more muted colors in some areas and didn't get them at all. I will have to go back and add more complimentary colors into what I already have on the table.

It will be interesting to go back and overdye some of these with browns and grays. I'll either do this with Wilton's or I will break down and get some more Jacquard dyes to do this with.


EDITED TO ADD: There is both Red #40 and Red #3 dyes in these tablets. The box does not say which colors contain which reds. However, the purple kept breaking like crazy, so I guess it's safe to assume it has the red #3 in it. Red #3 can be persnickety at the best of times. It has a problem with acidity. It's not soluble below 6 ph so when the acid, in this case vinegar, is added, it separates and will eventually wash out. Next time I try this, I will add the acid very, very slowly and probably on the stove top over a long period of time and check the results then.

Thursday, April 16, 2009

Dyeing and Spinning Day

Yesterday was chock full of dyeing and spinning. I got nothing else done except for making dinner and taking kids to and from school.

Here's what I got busy with:

1. Easter Egg Dye: I had three goals with this project.

a) I wanted to play around with mixing some colors. There's a green that I would really like to have a on a sweater, so I got out the Yellow, Blue and Orange dyes and mixed them up. I put a tablespoon of citric acid and one cup of water in glass containers with the dye tablets.

b) Then, I took out some scraps of roving and made crochet chains with them. I wanted to do a different dye technique where I colored the bumps of the chains. I was going for a mottled effect where I would still have some of the white in the roving showing. In the first chain, I combined one part yellow, one part blue and two parts orange. This ended up giving me a lovely olive color, but not what I wanted. The second chain had one part yellow, one part blue and half a part of orange. Got the perfect green in that one. The last chain had all three colors randomly placed all over it, just for fun.

c) Microwave setting the dye (Mini Tutorial). I put the chains, one at a time in a glass dish that was lined with plastic wrap. I then colored them with the dye and then covered the whole dish with more plastic wrap. Next, I turned the microwave on for two minutes. Let it rest for two minutes. Then repeated until the dye was exhausted. Really simple, but you want to be careful not to cook it for longer than two minutes at a time. You could felt your roving/yarn if you cook it longer. Slower is good and it's always better to be safe than sorry!

The Results (re-chained - they were unchained so that they would dry better):
Moss green on top, Mix in the Middle, Olive on the Bottom

I'm thinking I might mix all of these in one tiny spinning project, just for fun.


2. Second dye Project of the day: Dyeing with Dandelions. I made the kids go out with me and pick a big pile of dandelions. It was great fun until we realized there were tiny little bugs on them. Now, I'm a self confessed hypochondriac. It's not good for us to see tiny bugs that might possibly crawl from our hands to the top of our heads. I'm positive no bugs made it into my hair, but now the top of my head has been itching like crazy for two days! I'll tell you about this project more tomorrow, it's still in process.

3. Spinning Project of the day: Actually, this would be a Plying project. I had two bobbins that needed to be plied and this was not how it turned out, at first.:

This was the second time around. The first time was way over-plied, crunchy hard and mega twisty. I ran it back through the wheel and untwisted quite a bit of it. This is approx. 216 yards, give or take. This is a two ply yarn and was intentionally made thick and then. I want this yarn to be more rustic looking.

I have a bobbin of more plied yarn that needs to be skeined and I've got about 4 more ounces to spin and ply of this stuff. I have a project in mind, but there's no guarantee I'll get enough yardage for it. So, I'm keeping the project under my hat until it's determined whether I'll have enough yarn or not.

Whew! That's it. Now can you see why I didn't get anything else accomplished yesterday?

Wednesday, April 15, 2009

How I Spent My Morning

I haven't knit anything in, like, four days. I'm starting to get the shakes. My hands have been all twitchy and stuff.

I finished a big project and want to start another. The problem, is that I used up my spare change to buy fiber to spin, so there's no money for yarn. So last night and tonight I will be spinning like crazy to get enough yarn for a medium sized project at least.

Meanwhile, this morning I started opening boxes of Easter Egg dye (25 of them to be exact) and breaking everything down into it's component parts:


I now have 25 of each of the 6 colors that came in the box in separate bags. I also clipped the directions and put one in each of the bags. The directions were interesting because they gave instructions on using different kinds of acids to get different shades of each color. I probably won't pay much attention to these, but it will be nice to have them if I get curious. I ended up with one mixed colors bag. I had one box of PAAS dye that came with 12 different colors in it. Nothing labeled, so telling one from the other was just too much to take. I'll play with those later and figure out what they are the hard way.

Unfortunately, I now have 25 sheets of stickers, 25 sheets of an Easter memory game, 25 sheets of cardboard circle creator thingies and 25 egg dipping tools. There has to be some use for these, doesn't there? I hate throwing these kind of things away. Feels wasteful. The stickers won't be a problem, The Youngest will take care of those, but the rest? If anyone has any crafty ideas on what to do with those, I'm all ears! My Sister In Law is a teacher. Maybe she could use some of those for something.

This afternoon's project will be to dye some wool top in the microwave. I haven't done that before. I'm also going to experiment with mixing some of the egg dye and hand painting it onto the wool. I'm really looking forward to making a big mess in the kitchen. I might, maybe, eventually cook dinner for the family too.

Friday, August 01, 2008

Caught Me Red Handed

Important Note to Self: When deciding to experiment with Red food coloring and roving, it would perhaps be best if one chose to wear gloves.


In the never ending quest for a roving in my favorite color, I headed to the Wilton's food coloring in the cabinet and picked out the color Red Red. I don't know about the roving yet as it's still on the burner, but fingers color nicely. I know I'll be the envy of all when they see the luscious red that my fingers have now become.

Tuesday, July 15, 2008

Uggly Roving and Dyepots Galore!

You thought I was kidding about the dyepots didn't you?
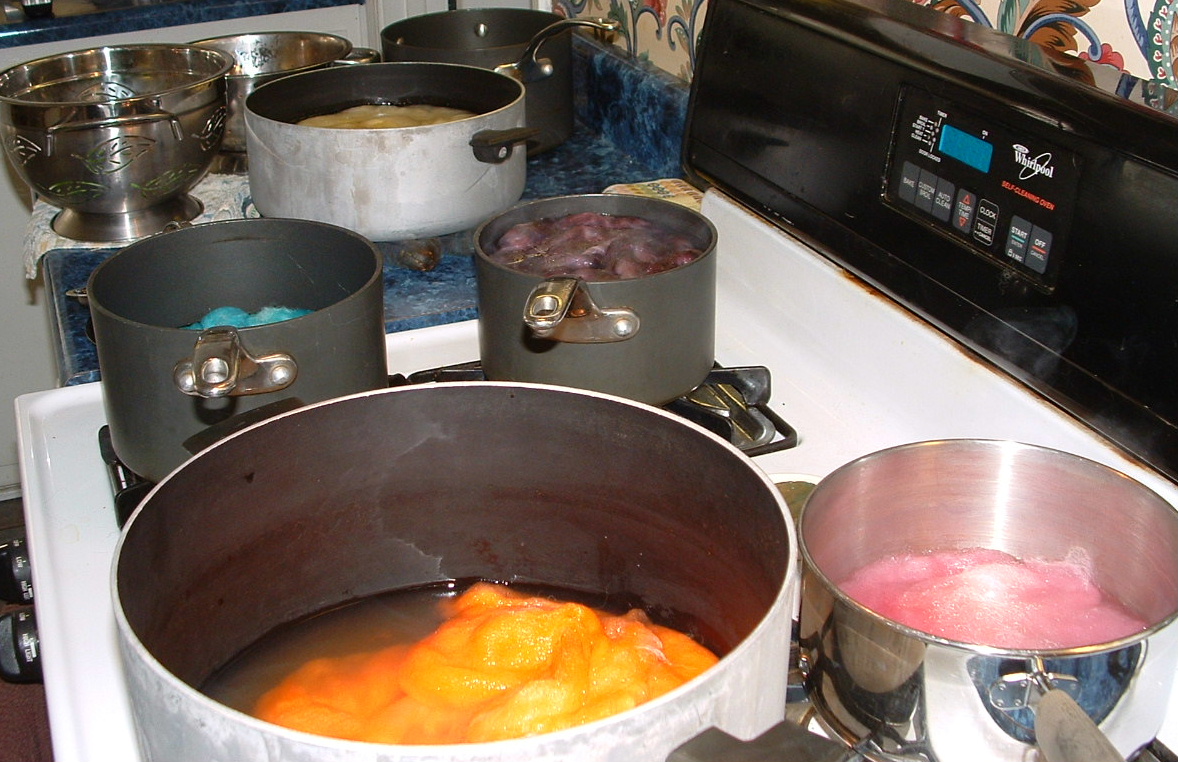
8 different pots

This is what I got for my efforts:


A nice hodge-podge of colors to mix and match. They were produced from kool-aid and Easter egg dyes. The purple, green and small orange in the middle are mohair. The rest are anonymous wools from sheep shed studio. I'm going to mix them with some black to add depth.

While I was busy with dyepots, this is what was going on in the living room:

I think they must've been sick or something. I'm not used to quiet cooperative play in my house. Maybe the tent city had something to do with it. Oh, and yeah,that's Cessna. She's still kicking, so far so good.


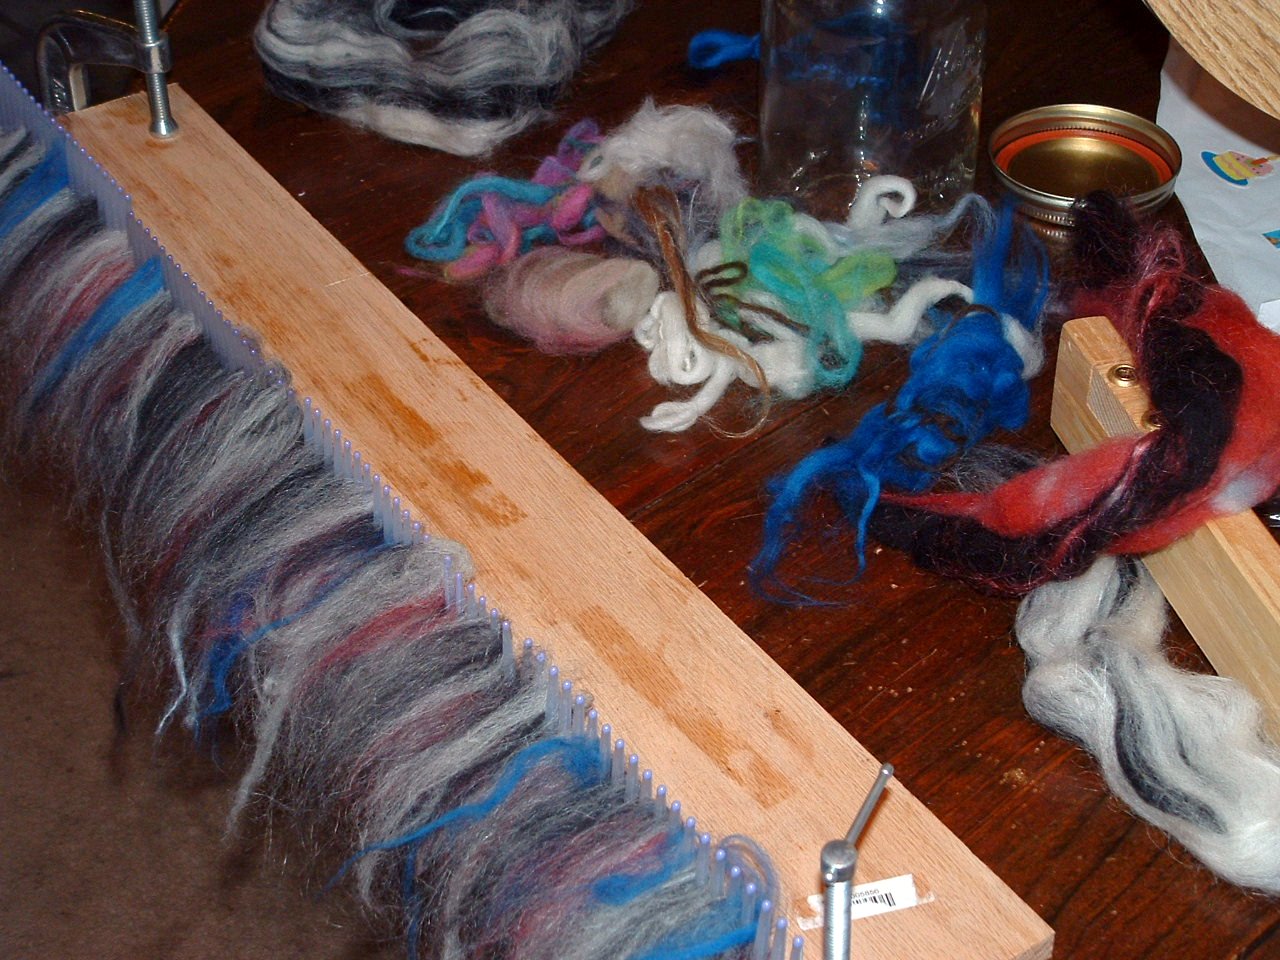
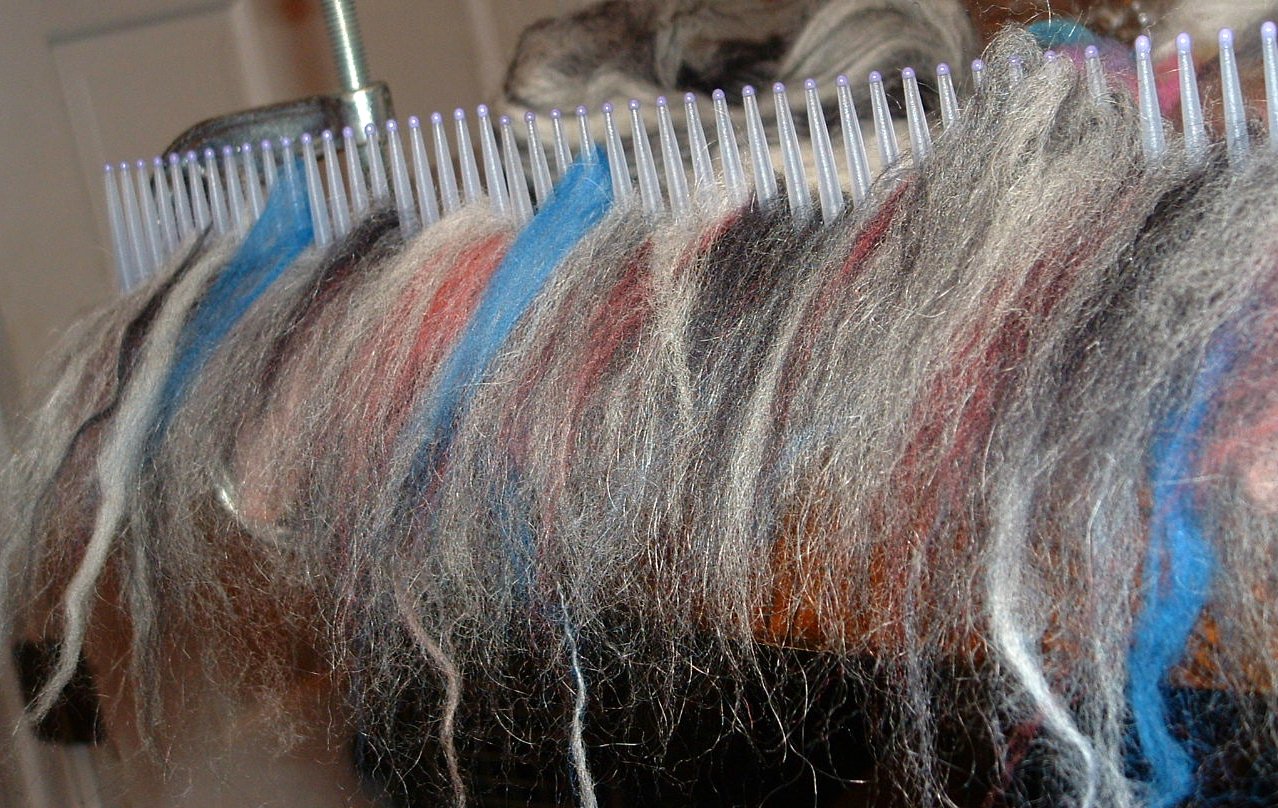
This mixing and matching with the hackle is very addictive. It makes the artsy side of me very happy. I took a bunch of little pieces of fiber that I've been saving in a quart jar on my desk and mixed it with some gray/black/white roving last night when I was supposed to be knitting on the wedding shawl.

Here's a closeup of how it looks on the hackle:

What did I get out of it? Well, most people have Ugly Batts, I have Uggly Roving!


I spun up a little and loved what I got. I apologize for the poor pic of the singles. My camera hates macro stuff.

Monday, July 14, 2008

DIY! My new toy!

This weekend I found a new DIY project to tempt me away from all other responsibilities. I made a Hackle.

What the H*ll is a Hackle you ask?

It's a tool used for combing out and blending fiber which is then pulled through a Diz to make roving for spinning. That's it in a nutshell.

First, I'd like to thank Travis (who is married to the Yarnzombie) from the blog The Land for coming up with this idea which costs about $10 bucks to make. Brilliant. They have a couple of videos at The Land that show you how to use the Hackle along with the how to for making it.


What you need for the whole project:

Combs or hair picks
Board
Self Drilling Screws
Drill - If you use a screwdriver it make take you two years to complete
Diz or Button
Crochet Hook
Board
C Clamps

I made one modification to the project and that was using combs instead of hair picks. That way, I wouldn't have to cut anything off at the bottom. My hubby already gets really nervous when I start these kind of projects. I can't imagine the apoplectic fit he would have had when I went for the jig or circular saws. :)

It's very simple. I grabbed a large vise while working on the project and put the board in it to hold it steady. Then I placed a comb on the edge of the board and used masking tape to hold it steady. The masking tape also helps to keep the screws from traveling all over the place while your drilling and it helps cut down on the scratching and/or splitting of the combs. Then just grab your drill and screws and go to town attaching those combs to the board.


The length of the board is up to you. The longer the board, the longer the piece of roving that you will end up with.

Here it is complete and clamped to the table with the C-clamps:

Here's the button that I grabbed to use as my Diz and the crochet hook used to pull the fibers through the button holes:


Now why on earth would you want to do this? Here's one example for you.

Here's some roving that came in a grab bag when I placed an order at Sheep Shed Studio. I love grab bags, you never know what you'll get. This, though, was fugly and matted. It looked like the hair that comes off the rear end of a mangy dog:
Yuck!
How does it look now after putting it through the Hackle?

Lovely

I'm dying to play with blending different color fibers now. I've got some roving (some wool and some mohair) soaking in the sink now in preparation for dyeing. I'm going to dye 8 different batches of color and then play with the new hackle.


Tuesday, June 24, 2008

Black Rose

I promised you a new dye project didn't I? Well, here it is.

I wanted to experiment with some Kool-aid dyeing. I still had some of the black/white wool/mohair roving to play with so I grabbed that. I used it all, 11 oz. of it.

I knew wanted a dark red, but I also knew I didn't have enough of the red koolaid packets to go around, so I did some experimenting. The rule of thumb is one packet to 1 0z of roving or yarn. This is what I used:

2 grape, 2 black cherry, 1 strawberry, 1 tropical punch, 1 cherry, 1 watermelon cherry.

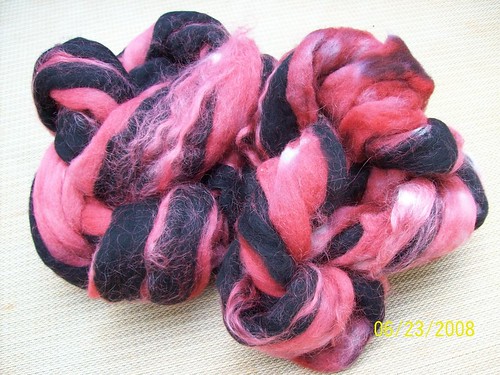
I wasn't at all sure what would come out, but hoped for the best. It didn't turn out red, but I got the most gorgeous rose ever!
Black Rose Colorway

Pre-drafted

Look how it softens up when it's predrafted. So pretty!

This was done on the stove top. I soaked the roving in water and vinegar before beginning. I then placed it in the pot, I had already mixed the packets with water and dumped those in as well. I added water to cover and then simmered it all for about 40 minutes. I didn't stir it once it went in the pot for two reasons: I was afraid of felting it and I didn't want it completely uniform. I like uneven colorways. It makes the magic of spinning it up so much more fun. Then I turned off the pot and left it to cool for several hours.

This is the first time that I've had wet sheep fur that didn't smell like wet sheep fur. The kool-aid made it smell so much better! I can't wait to get started spinning this!

Tuesday, June 17, 2008

Oops. Missed a day. I'm blaming it on the lake atmosphere. I headed out of dodge for the week and I'm still here. I figured that if I stayed at home I would just fret and worry about the camp that I'm not at. So, here I am at the lake.

But! Here's something cool that I dug up at my folks place. A pair of hand cards that belonged to my g-grandmother and possibly to hers. They were made in the mid 1800s or so.

There is still a stamp on them that is just barely visible. It took some time doing internet research to fill in the missing blanks, but it reads:

"The only genuine Old Whittemore Patent, Improved, No. 10 Cotton, L.S. Watson & Co., Leicester, Mass."

The tines are in horrible condition, but the wood (maple) is fine. I would like to replace them with tines for wool if I can find some. Not sure where to look. I'll ask on Ravelry to see if anyone knows.


Mama Poole's Cotton Handcards

Horrible condition
Here's some cuteness for you. She was "helping" me take pics of everything:
Miss Minnie


Something else that I did this weekend was dye more roving. The roving is from Sheep Shed Studio and is a merino/mohair combo. It looks like Mint Chocolate Chip to me, especially spun up. I'll show you some of that later.


Yum, Mint Chocolate Chip!


I'm not extremely pleased with the dye job. I may go back later and overdye the yarn, we'll see. I used dylon dyes in lime and bahama blue.


Monday, April 21, 2008

A different fiber-y goodness

Late last year (Oct or Nov?) I ordered several pounds of roving from Sheep Shed Studio. They have some great stuff. Most of it is rescued Mill Ends that for whatever reason doesn't get spun, but it's all excellent for spinning. It was all natural colored and has been waiting patiently for a new look. Last night, it happened.

The Eldest and I had a craft project. He just loves those. We weighed out approx. 4 oz. of roving and soaked it in warm water and a generous dash of vinegar for 30 minutes, then let the water out and gently pressed down on the wool to get the excess water out.

Taking it's bath:

While it was soaking, the fun began. We got out a spare pack of Easter egg dyes and added 1 dye tablet, 3 tbsp of vinegar and 1/4 water to each cup.


We placed one layer of roving in the bottom of my crockpot (these are food safe dyes so it was okay to use my one and only crockpot. If you use acid dyes, please don't use the crockpot again for food, make it a dedicated crafting crockpot instead.) On the bottom layer we drizzled the purple dye and two blue dyes over the roving. We then added another layer of roving and drizzled the two greens and one yellow on it. Then the red, pink and orange was used for the top layer. I added a bit of water to the pot by pouring it onto the top rim and letting it drip down the sides making sure not to pour it directly on the roving itself.
Looks bright doesn't it?
I was very paranoid that I would felt my roving. I made sure not to stir or agitate the water in any way in order to avoid felting. The colors looked very intense in the pot didn't they? I was also worried that we would get "mud" colors since we used 9 different colors, but oh was it worth it!

The roving sat in my crockpot for 3 hours on low. Then I turned it off, poured out the water and let it all come to room temp before rinsing in lukewarm water. The roving then went into the washer for a few minutes of spin cycle and was hung to dry the rest of the way.

This is what came out of all that work:
Check out the colors! - click to enlarge for fine detail.

It's perfect and ready for spinning! What should I name this colorway?