Tuesday, July 07, 2009

Museum Day

Today was fun! Me, my Sis-In-Law and the boys took a trip to the Fernbank Museum in downtown Atlanta today to see the Dinosaur exhibit. The Youngest was particularly impressed. He's in to all things dinosaur or dragon, take your pick. They seem to be interchangeable. According to him they all say "Yaw!"

I got some cute pics: (click to enlarge for extra cuteness)


This one really cracks me up. There was a science room in the museum that had a weather forecasting station. The kids could stand in front of a green screen just like a tv weatherman and see themselves on tv. The problem was, The Youngest was almost too short to be seen:
Look! A half-headed Weatherboy.


The kids are all worn out now. Funny thing is, today is their Dad's Bday. Lucky Dad gets to come home and deal with a three year old that missed his nap today!

Knitting Stuff:

I'm having a bit of a packing dilemma. Well, more knitting than packing really. Do I take the log cabin project since it's incredibly mindless, or do I pick something else that's not quite as mindless. If I picked the other, whatever it may be, will I really be able to concentrate while I'm on vacation? I can't decide. I don't want to take two projects since I won't have room, so I have to choose. :sigh:

Monday, July 06, 2009

Beach Countdown

The Countdown to the "Official Summer Beach Vacation" has begun.

Every single morning I am informed by the Youngest that "we're going to the beach today." Time means nothing to a three year old, he's been told over and over that we leave Saturday.

The boys and I went shopping for supplies today to get a head start on packing. My idea of supplies was sunscreen, bug repellant, nonperishable food items, you get the drift. Gee, I'm so glad that I took my personal beach consultants with me. You wouldn't believe how things have changed over the years. Evidently you now need so many new things for a trip to the beach - waterguns (Ironman and Spiderman of course), pool toys, swords (not sure why we need swords, that one escapes me), legos, movies, etc. Ahem. I might have given in over the water guns, but I spent the rest of the trip to the store saying,

"No."
"No."
"What did I just say? NO!"

Ah, the joys of motherhood and vacation planning. Why can't children see what's really important for a vacation trip? Like: yarn, needles, liquor, (repeat as necessary.)

Thursday, July 02, 2009

Tutorial: Make Cloth Napkins from Fat Quarters

I've been working on reducing our budget lately and thought that reusable napkins would be a way to help me do this, not to mention that it is eco-friendly as well. I needed something that would be kid friendly, hide stains well and would be suitable for everyday use.

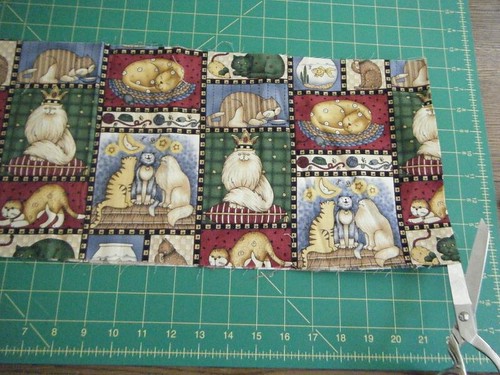
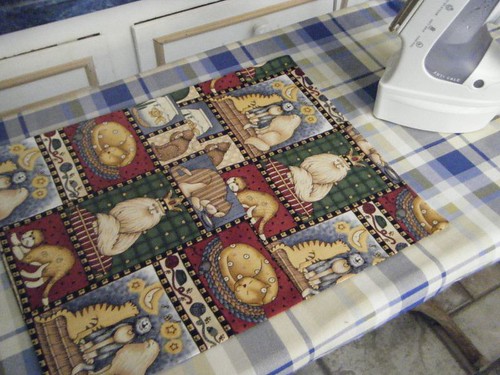
I found a tutorial online, but the only thing that I took away from it was the word reversible and the measurement 13" x 16". Here are some of the completed napkins. The widest part of each seen below is the front and the small sliver that can be seen next to it is the coordinating back of the napkin:

click to enlarge


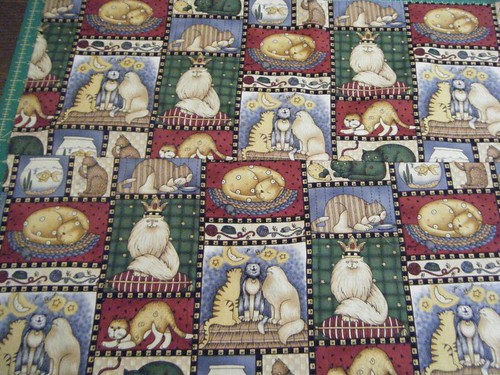
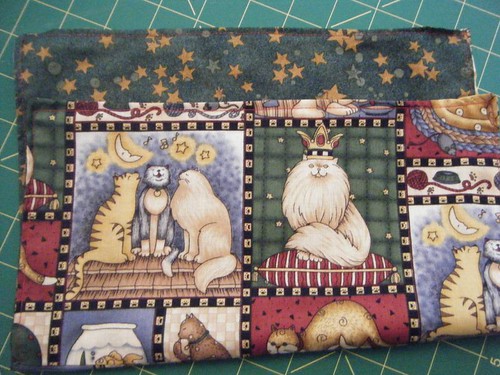
I have a ton of fat quarters hidden away under all of our beds that are left over from my quilting days. Many of these are really cute and child friendly, so that's what I decided to use. The problem, is that these are only about 8 or 9 inches wide. Here's my solution/tutorial:

To Make Cloth Napkins from Fat Quarters:
1. Choose two coordinating/contrasting fat quarter fabrics.
2. Cut each of them into two equal pieces.
Cutting!

3. With right sides facing, sew the two pieces together on one side only. Do this again for the coordinating fabric.
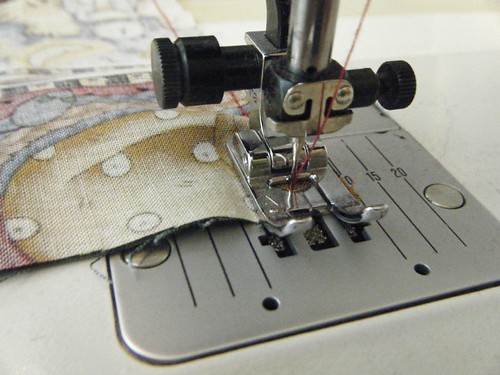
( I used a quarter of an inch seam allowance for everything except step number 9.)

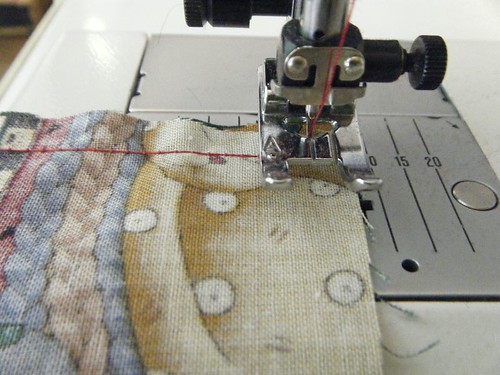
It's a quarter inch from the right edge of my presser foot to the needle in the center.

Once done, it should look like this:
Opened and pressed with an iron


4. Cut the fabric into a 13" x 16" piece. Do this for both fabrics. If it's not perfectly square, don't sweat it. It's napkins, not clothing. Close is okay. If it really bugs you, you can use a see through quilter's square and a rotary cutter to get it perfectly squared up.
13" x 16"
Once this is done, iron the seam to one side:
Seam ironed and laying to one side.

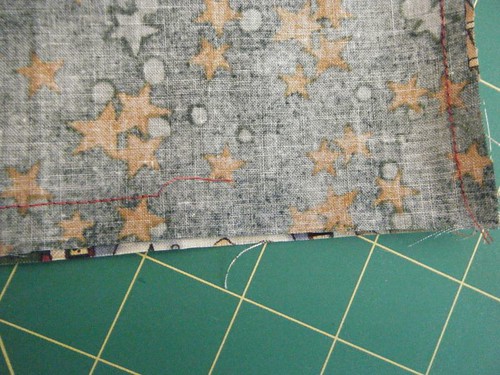
5. With right sides facing, sew your two 13" x 16" fabrics together, leaving about two inches on one side open.
Left open to turn the fabric rightside out again.

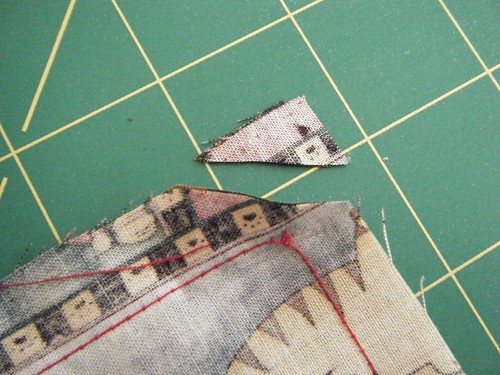
6. Cut the corners off of the napkin so that when you turn the piece inside out, you don't have a lot of unnecessary bulk in each of the corners.
Clip your corners!

7. Turn the napkin inside out. Make sure to push the corners as far out as you can get them for a nice, crisp corner.

8. Iron your napkin. At the two inch opening, turn both sides in and iron this closed as well.
Ironed and ready for top stitching

9. Top stitch around all four sides of the napkin, including the two inches that were originally left open. I top stitched approximately an eighth of an inch from each edge.

10. Pat yourself on the back for a job well done!

Front and Back of the Cloth Napkin

TIP!

To make turning corners easier, Using the wheel on the right side of your machine (if yours has this), make sure your needle is inserted into the cloth and leave it there for a moment.
Needle Inserted

Then, raise the foot: I picked it up even more to show you that the needle is still inserted into the cloth (please excuse the thumbnail - It's paint, not dirt, I promise!)

Foot lifted

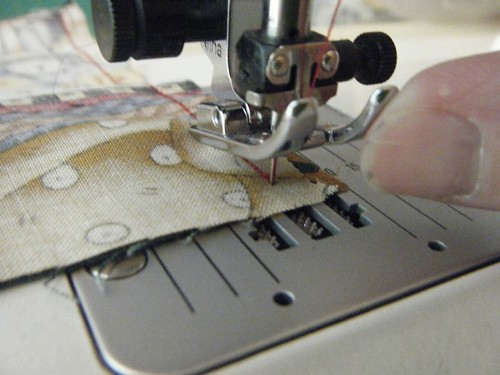
Once this is done, rotate your fabric into the direction that you want to go. Lower your presser foot and you are ready to continue sewing.
Fabric Rotated


Enjoy your new napkins!

Sewing Skirts!

For the past two days I've been bitten by the sewing bug. I don't know why it bit me, but it bit me hard.

It started with the 20 minute skirt tutorial. I loved the fabrics she used. Normally I shy away from elastic waist skirts, but these were too cute to pass up. I took off to the store and found both of these skirts' fabric at Hobby Lobby. They had so much cute fabric, it was difficult to choose just two. When I made my skirts I deviated from the pattern by machine sewing some hems into the skirts. That was the only change that I made to the pattern.

This is the easiest skirt I've ever made. The tutorial is simple, quick and very easy to follow. For the record though, it took me longer than 20 minutes to make the skirts. The first took two hours due to a comedy of errors that are too numerous to mention, but they range from sewing machine problems to stupidity on my part. The second took me about 40 minutes. I figure that if I made another one I'd probably be right on the money at 20 minutes.

Here's how the skirts turned out. I've paired them with a black sleeveless top to show you how it will look on and so that you can't see the ugly elastic waists:


I'll show you the other sewing project tomorrow!

Wednesday, July 01, 2009

Fishing

We had a milestone in our family over the past weekend: The Youngest caught his first fish!

Granted, it's tiny and you need a magnifying glass to see it in the pic, but it was still a fish. With his PawPaw pretty much controlling the pole, the Youngest got a total of 8 fish on his first outing. The Eldest wracked up a stunning 14 in the same outing. The fishies were mighty hungry for worms that day.


It still thrills me to see the boys out fishing with their PawPaw. What a memory they'll have of him later in life!