I have decided that both of my offspring are freaks of nature. I bought a wonderful seedless watermelon today for us all to eat. One refused to try it, swearing the whole time, "I don't like that" and the other took a bite and then made faces like he was going to throw up. Who doesn't like watermelon? It's the perfect hot weather fruit! I just don't get it.
I finally made it through all of the sewing that I began working on Friday. Like these six fabric baskets:
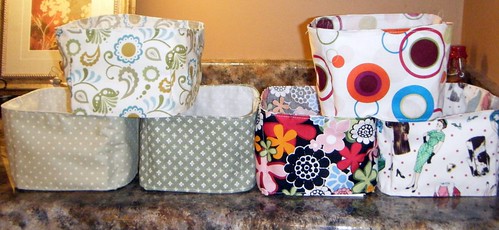
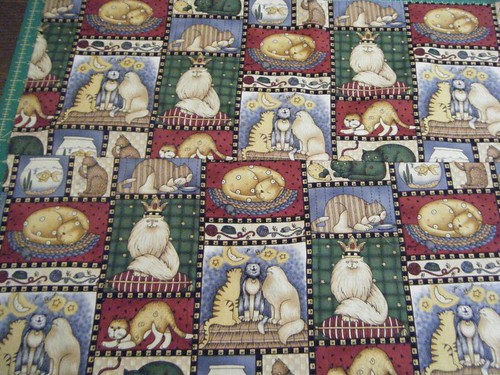
The green ones are for my bff's birthday and the other three are for my Mom's bday which is tomorrow. She got them this weekend since I won't be seeing her on her actual birthday. I fell in love with all of these fabrics, but especially the fabric that looks like 50's paper dolls. It's so cute!
I also made a swath through some shirts and shorts that my cousin had given me. She purchased them at a Russell brand's sample sale. The each had a small slit cut into them. They are made in another country and each one that is brought over the border to be samples has to have the cut in them. I'm not sure why, but that's okay. I sewed up the slits and now have some great shirts and shorts to sleep in. Yay!
Last, but not least in the sewing pile were some pillow covers that I had promised to make my Sister In Law. Unfortunately, I promised to sew these for her about 2 or 3 YEARS ago. Can we say "Procrastinator Extraordinaire? Hmm?
The one on the right was made from a quilted panel that I had made her about five years ago when I was hot and heavy into quilting. The batik that you see is real batik fabric that she made in high school and has kept for the past twenty odd years. I added the dark blue edging to the batik one since it wasn't quite large enough for the pillow. I still feel guilty for waiting so long to do what amounted to about a one hour project.
Here's a closer view of my quilting:
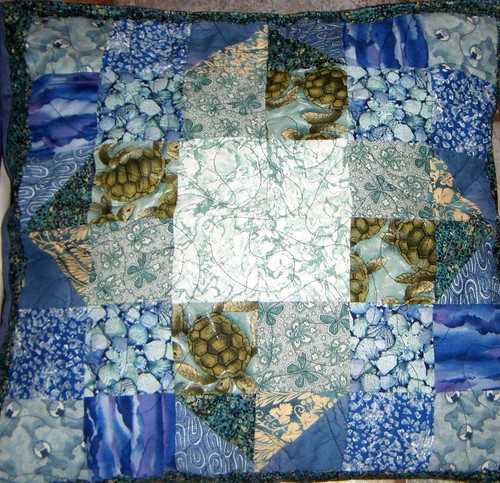
So, I'm so thankful to have all those sewing projects out of the way! It freed up so much space where all those projects had piled up. Let's hear it for decluttering (at least a small section of the house anyway)!
Showing posts with label sewing. Show all posts
Monday, June 21, 2010
Thursday, June 17, 2010
I Saved A Sweater
I'm tackling about twenty projects today and getting very little done. My multi-tasking-fu is just not keeping up with everything that needs to get done. I'm sewing more fabric baskets for birthday gifts, pillow covers for my sister-in-law, cleaning the house for company that's coming over this weekend and working with the kids on their Father's Day gifts to Dad and Grandfathers. Whew!
One project that I did manage to complete today was an alteration to a sleeveless sweater. This is one of my favorite summer tops. It's made of silk, nylon and viscose. It's also very thin and so incredibly soft.
Why does it need altering? Well, let me show you:
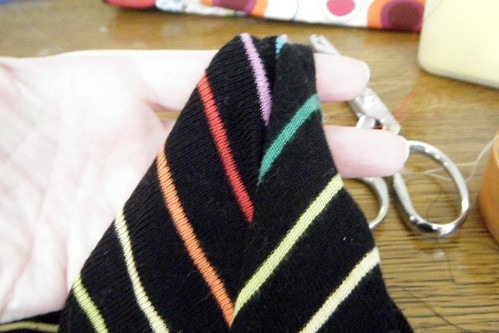
If you look in the first pic, that hole is in the right hand side of the sweater piece that hangs down and drapes from the shoulder. I was so upset and disgusted when I found the hole that I threw the whole sweater under my bed in disgust and left it there. I figured that sooner or later I could make it into something new or throw it in the trash.
So, about eight months and lots of cat hair later, I got it out again. I intended to get the seam ripper out and just remove the whole drape-y piece and just have a simple tank top. But when I looked at the hole again, I had an epiphany. There was enough fabric that I could fold it over carefully and hand stitch it down to cover the hole. Guess what? It worked:
Look Mom! No hole! Yay me, I save it from the landfill! I'm feeling so green and recycley! (You like my new made up word?) Now to get all that cat hair off of this sweater.
One project that I did manage to complete today was an alteration to a sleeveless sweater. This is one of my favorite summer tops. It's made of silk, nylon and viscose. It's also very thin and so incredibly soft.
Why does it need altering? Well, let me show you:
A hole!
If you look in the first pic, that hole is in the right hand side of the sweater piece that hangs down and drapes from the shoulder. I was so upset and disgusted when I found the hole that I threw the whole sweater under my bed in disgust and left it there. I figured that sooner or later I could make it into something new or throw it in the trash.
So, about eight months and lots of cat hair later, I got it out again. I intended to get the seam ripper out and just remove the whole drape-y piece and just have a simple tank top. But when I looked at the hole again, I had an epiphany. There was enough fabric that I could fold it over carefully and hand stitch it down to cover the hole. Guess what? It worked:
Look Mom! No hole! Yay me, I save it from the landfill! I'm feeling so green and recycley! (You like my new made up word?) Now to get all that cat hair off of this sweater.
Monday, November 23, 2009
Easy Denim Quilt
I showed you a WIP last week that was over a year and a half old. Well, this week's FO completely put it to shame. This one took me over SEVEN YEARS. Yep, seven whole years.
This is my denim quilt that I began way back when: and finished a couple of nights ago:
It is an incredibly easy quilt to make. The hard part is getting enough denim to start the project.
How do you make it?
Wash your backing fabric first! Then start cutting out squares. You will have to do some math to figure out how many to make. It depends on if you want a throw size or a specific bed size. This one is a twin size. A smaller quilt would have been so much smarter to do on my part. I believe the squares were around 6" square. Then they were sewn in strips - one denim and one fish. Next, the strips were all sewn together with the seams all on the denim side. Clip the seams carefully, don't go through the sewing. Wash and dry about four or five times and you're done! You really don't need more instructions than that for this quilt. If you want more details, let me know and I will attempt to remember back seven years for you.
It's extremely heavy. This would be a great one to leave in the trunk of the car and use for picnics or other outdoor activities.
This is my denim quilt that I began way back when: and finished a couple of nights ago:
We were cleaning out the garage and I found it. The reason that I never finished it was because of the scissors and denim combination. You have to clip through two layers of denim and two layers of cloth and it's very tiring on the hands. When I found it again, I got it out and started cutting. I ended up using small garden shears to do it. I was supposed to be doing laundry, but we all know how that goes, huh? I ended up with blisters on my thumb and my pinky finger the other night as I finished it. Not the fun part of this quilt. Then I washed and dried it and it was ready to go.
The denim was all from jeans that were worn my me, the hubby and the Eldest. The Youngest wasn't even a thought at the time of this quilt's beginning. This is such a great way to use up old denim jeans and jackets.
Here's a close up so you can see what I'm talking about with the clipping of the denim. The clipping allows the backing fabric and the denim to fray so that the backing color peeks in through the denim in the front.
How do you make it?
Wash your backing fabric first! Then start cutting out squares. You will have to do some math to figure out how many to make. It depends on if you want a throw size or a specific bed size. This one is a twin size. A smaller quilt would have been so much smarter to do on my part. I believe the squares were around 6" square. Then they were sewn in strips - one denim and one fish. Next, the strips were all sewn together with the seams all on the denim side. Clip the seams carefully, don't go through the sewing. Wash and dry about four or five times and you're done! You really don't need more instructions than that for this quilt. If you want more details, let me know and I will attempt to remember back seven years for you.
It's extremely heavy. This would be a great one to leave in the trunk of the car and use for picnics or other outdoor activities.
Tuesday, July 28, 2009
Roman Shade Inflamed
A while back we moved the boys into the same bedroom and turned the spare bedroom into a gigantic playroom. The decor in their shared bedroom was still coyboy nursery themed and the Eldest hasn't been very happy with it. Now that the Youngest is three and a half and into Hotwheels as much as his brother, we decided to make that the theme of their room.
We started by decorating the walls with vinyl decals of cars. There were four cars to the pack (can be found at Joann's), but they didn't originally come with flames as seen below. The flames came with a gigantic tire decal. I decided that there were already more than enough flames with the tire and moved some flames to come out the pipes in the back of each car. I placed all of the decals strategically around the room just for fun.
Another problem that had to be overcome were the windows. They had blinds on them, but the Youngest spent the better part of his naptime one afternoon destroying them. It was far to late by the time I realized he was doing this for me to save them.
I really want to make roman shades for the kitchen, but wanted to practice first before I tackled making them out of expensive fabrics. So I found a wonderful roman shade tutorial online and got to it. This was the result:

I just noticed that the top right of the right hand shade got loose when we put the screws into the molding of the window. I'll fix that as soon as the Youngest gets up from his nap today. But besides that, didn't they turn out cute? In a very rugged boyish way of course. All in all, I'm pretty proud of this sewing project.
If you'll notice, I left a curtain rod up over the windows. These did hold a bandana valance at one time. I'm planning on suspending a bunch of hotwheels cars on the rod with varying lengths of ribbon or yarn or something. If it turns out well, you'll get to see a pic of that later also.
See ya tomorrow!
We started by decorating the walls with vinyl decals of cars. There were four cars to the pack (can be found at Joann's), but they didn't originally come with flames as seen below. The flames came with a gigantic tire decal. I decided that there were already more than enough flames with the tire and moved some flames to come out the pipes in the back of each car. I placed all of the decals strategically around the room just for fun.
Another problem that had to be overcome were the windows. They had blinds on them, but the Youngest spent the better part of his naptime one afternoon destroying them. It was far to late by the time I realized he was doing this for me to save them.
I really want to make roman shades for the kitchen, but wanted to practice first before I tackled making them out of expensive fabrics. So I found a wonderful roman shade tutorial online and got to it. This was the result:
Please be aware that the children picked out the fabric for the curtains for their room, not me. :)
I just noticed that the top right of the right hand shade got loose when we put the screws into the molding of the window. I'll fix that as soon as the Youngest gets up from his nap today. But besides that, didn't they turn out cute? In a very rugged boyish way of course. All in all, I'm pretty proud of this sewing project.
If you'll notice, I left a curtain rod up over the windows. These did hold a bandana valance at one time. I'm planning on suspending a bunch of hotwheels cars on the rod with varying lengths of ribbon or yarn or something. If it turns out well, you'll get to see a pic of that later also.
See ya tomorrow!
Thursday, July 02, 2009
Tutorial: Make Cloth Napkins from Fat Quarters
I've been working on reducing our budget lately and thought that reusable napkins would be a way to help me do this, not to mention that it is eco-friendly as well. I needed something that would be kid friendly, hide stains well and would be suitable for everyday use.
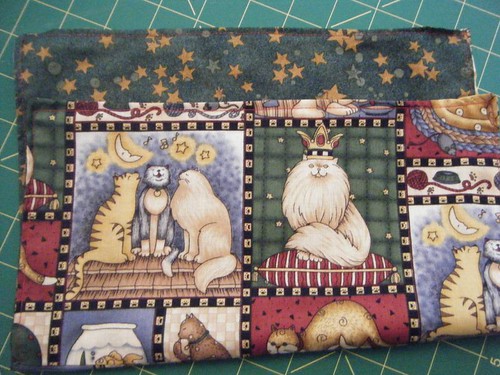
I found a tutorial online, but the only thing that I took away from it was the word reversible and the measurement 13" x 16". Here are some of the completed napkins. The widest part of each seen below is the front and the small sliver that can be seen next to it is the coordinating back of the napkin:

I have a ton of fat quarters hidden away under all of our beds that are left over from my quilting days. Many of these are really cute and child friendly, so that's what I decided to use. The problem, is that these are only about 8 or 9 inches wide. Here's my solution/tutorial:
To Make Cloth Napkins from Fat Quarters:
1. Choose two coordinating/contrasting fat quarter fabrics.
2. Cut each of them into two equal pieces.

3. With right sides facing, sew the two pieces together on one side only. Do this again for the coordinating fabric.
( I used a quarter of an inch seam allowance for everything except step number 9.)

Once done, it should look like this:

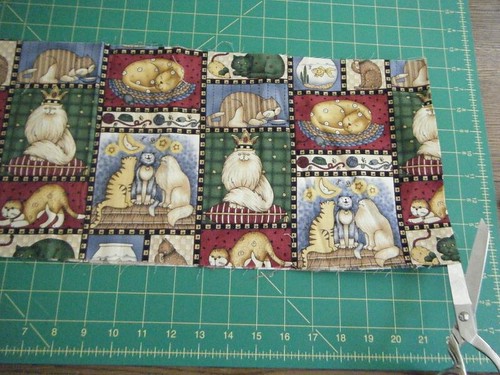
4. Cut the fabric into a 13" x 16" piece. Do this for both fabrics. If it's not perfectly square, don't sweat it. It's napkins, not clothing. Close is okay. If it really bugs you, you can use a see through quilter's square and a rotary cutter to get it perfectly squared up.
Once this is done, iron the seam to one side:

5. With right sides facing, sew your two 13" x 16" fabrics together, leaving about two inches on one side open.

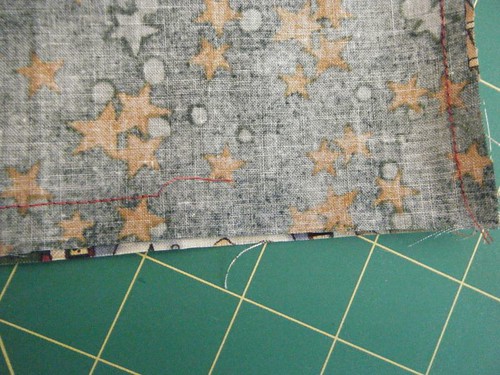
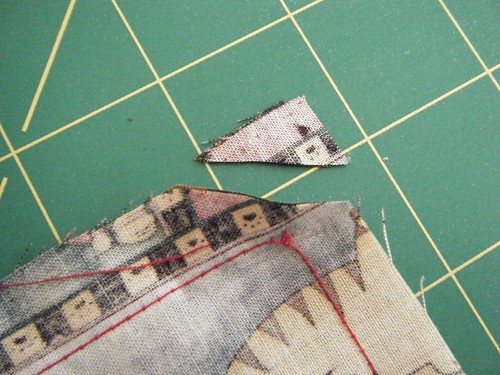
6. Cut the corners off of the napkin so that when you turn the piece inside out, you don't have a lot of unnecessary bulk in each of the corners.

7. Turn the napkin inside out. Make sure to push the corners as far out as you can get them for a nice, crisp corner.
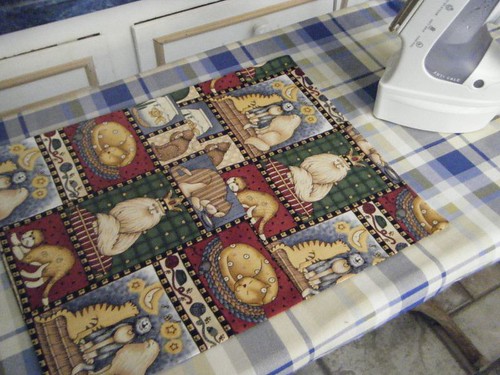
8. Iron your napkin. At the two inch opening, turn both sides in and iron this closed as well.

9. Top stitch around all four sides of the napkin, including the two inches that were originally left open. I top stitched approximately an eighth of an inch from each edge.
10. Pat yourself on the back for a job well done!

TIP!
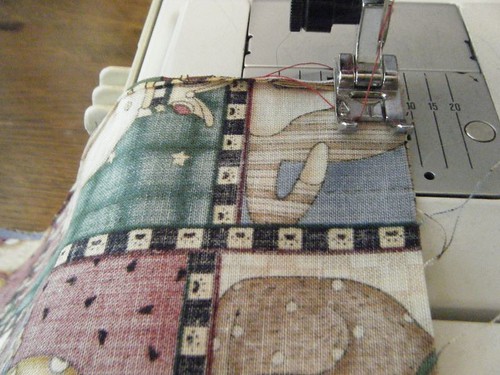
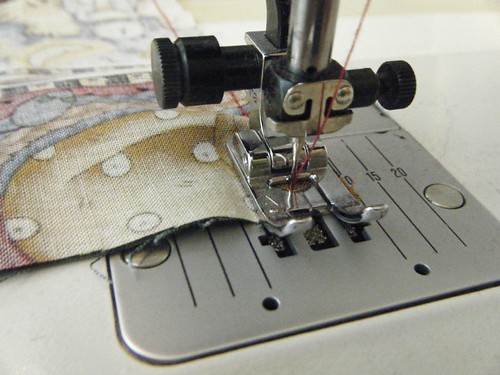
To make turning corners easier, Using the wheel on the right side of your machine (if yours has this), make sure your needle is inserted into the cloth and leave it there for a moment.

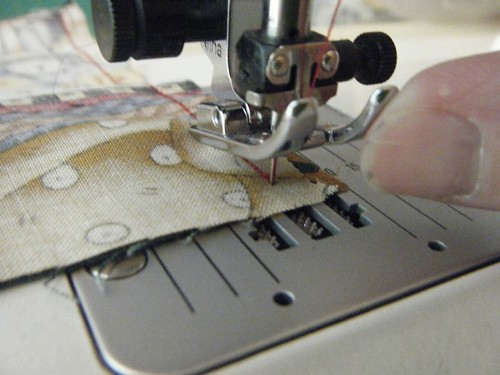
Then, raise the foot: I picked it up even more to show you that the needle is still inserted into the cloth (please excuse the thumbnail - It's paint, not dirt, I promise!)

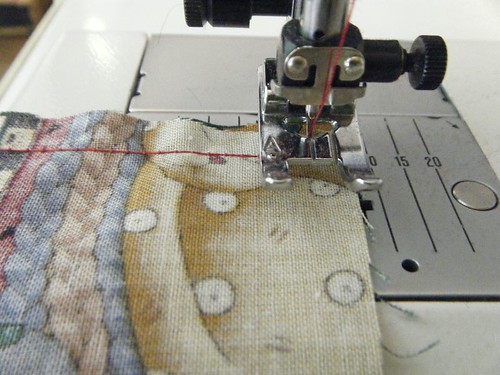
Once this is done, rotate your fabric into the direction that you want to go. Lower your presser foot and you are ready to continue sewing.

Enjoy your new napkins!
I found a tutorial online, but the only thing that I took away from it was the word reversible and the measurement 13" x 16". Here are some of the completed napkins. The widest part of each seen below is the front and the small sliver that can be seen next to it is the coordinating back of the napkin:
click to enlarge
I have a ton of fat quarters hidden away under all of our beds that are left over from my quilting days. Many of these are really cute and child friendly, so that's what I decided to use. The problem, is that these are only about 8 or 9 inches wide. Here's my solution/tutorial:
To Make Cloth Napkins from Fat Quarters:
1. Choose two coordinating/contrasting fat quarter fabrics.
2. Cut each of them into two equal pieces.
Cutting!
3. With right sides facing, sew the two pieces together on one side only. Do this again for the coordinating fabric.
( I used a quarter of an inch seam allowance for everything except step number 9.)
It's a quarter inch from the right edge of my presser foot to the needle in the center.
Once done, it should look like this:
Opened and pressed with an iron
4. Cut the fabric into a 13" x 16" piece. Do this for both fabrics. If it's not perfectly square, don't sweat it. It's napkins, not clothing. Close is okay. If it really bugs you, you can use a see through quilter's square and a rotary cutter to get it perfectly squared up.
13" x 16"
Seam ironed and laying to one side.
5. With right sides facing, sew your two 13" x 16" fabrics together, leaving about two inches on one side open.
Left open to turn the fabric rightside out again.
6. Cut the corners off of the napkin so that when you turn the piece inside out, you don't have a lot of unnecessary bulk in each of the corners.
Clip your corners!
7. Turn the napkin inside out. Make sure to push the corners as far out as you can get them for a nice, crisp corner.
8. Iron your napkin. At the two inch opening, turn both sides in and iron this closed as well.
Ironed and ready for top stitching
9. Top stitch around all four sides of the napkin, including the two inches that were originally left open. I top stitched approximately an eighth of an inch from each edge.
10. Pat yourself on the back for a job well done!
Front and Back of the Cloth Napkin
TIP!
To make turning corners easier, Using the wheel on the right side of your machine (if yours has this), make sure your needle is inserted into the cloth and leave it there for a moment.
Needle Inserted
Then, raise the foot: I picked it up even more to show you that the needle is still inserted into the cloth (please excuse the thumbnail - It's paint, not dirt, I promise!)
Foot lifted
Once this is done, rotate your fabric into the direction that you want to go. Lower your presser foot and you are ready to continue sewing.
Fabric Rotated
Enjoy your new napkins!
Sewing Skirts!
For the past two days I've been bitten by the sewing bug. I don't know why it bit me, but it bit me hard.
It started with the 20 minute skirt tutorial. I loved the fabrics she used. Normally I shy away from elastic waist skirts, but these were too cute to pass up. I took off to the store and found both of these skirts' fabric at Hobby Lobby. They had so much cute fabric, it was difficult to choose just two. When I made my skirts I deviated from the pattern by machine sewing some hems into the skirts. That was the only change that I made to the pattern.
This is the easiest skirt I've ever made. The tutorial is simple, quick and very easy to follow. For the record though, it took me longer than 20 minutes to make the skirts. The first took two hours due to a comedy of errors that are too numerous to mention, but they range from sewing machine problems to stupidity on my part. The second took me about 40 minutes. I figure that if I made another one I'd probably be right on the money at 20 minutes.
Here's how the skirts turned out. I've paired them with a black sleeveless top to show you how it will look on and so that you can't see the ugly elastic waists:


I'll show you the other sewing project tomorrow!
It started with the 20 minute skirt tutorial. I loved the fabrics she used. Normally I shy away from elastic waist skirts, but these were too cute to pass up. I took off to the store and found both of these skirts' fabric at Hobby Lobby. They had so much cute fabric, it was difficult to choose just two. When I made my skirts I deviated from the pattern by machine sewing some hems into the skirts. That was the only change that I made to the pattern.
This is the easiest skirt I've ever made. The tutorial is simple, quick and very easy to follow. For the record though, it took me longer than 20 minutes to make the skirts. The first took two hours due to a comedy of errors that are too numerous to mention, but they range from sewing machine problems to stupidity on my part. The second took me about 40 minutes. I figure that if I made another one I'd probably be right on the money at 20 minutes.
Here's how the skirts turned out. I've paired them with a black sleeveless top to show you how it will look on and so that you can't see the ugly elastic waists:
I'll show you the other sewing project tomorrow!
Wednesday, March 25, 2009
Dress complete!
Okay, I know that I've teased you for two days about my new little black dress, but now, now you get to see it in all it's little glory. I'm so tickled with how this little number turned out. I've been prancing around in it for the last fifteen minutes or so, squealing (quietly - the kid's down for his nap) for joy.
Lookee:

It fits me better than Endora here. Evidently Endora is well endowed with broad shoulders. In this shot, I couldn't get the dress zipped up all the way, but you can't tell it from the photo.
I had a devil of a time trying to get a photo of it to show you, which is why I put it on Endora. My official photographer is not home from school yet, but I did get a shot of it on me. Behold the ubiquitous bathroom shot. Notice my fingers balancing me on the countertop as I stand on tip toes in order to show the flowers at the bottom of the dress:

We're doing a sixties number for the upcoming show that I'm in and I'll be wearing this and a pair of white go-go boots for it. Otherwise, I'll be wearing it every chance I get this summer and I've got several sets of sandals that will go with it nicely.
I love the A-line dresses! They are incredible flattering on us pear shapes - smaller on top than on bottom. ahem. When the pattern was cut I opted for one size larger on bottom and the dress absolutely could not fit me better.
I think without the flowers, this would be the perfect little black dress for going out in.
Lookee:
It fits me better than Endora here. Evidently Endora is well endowed with broad shoulders. In this shot, I couldn't get the dress zipped up all the way, but you can't tell it from the photo.
I had a devil of a time trying to get a photo of it to show you, which is why I put it on Endora. My official photographer is not home from school yet, but I did get a shot of it on me. Behold the ubiquitous bathroom shot. Notice my fingers balancing me on the countertop as I stand on tip toes in order to show the flowers at the bottom of the dress:
We're doing a sixties number for the upcoming show that I'm in and I'll be wearing this and a pair of white go-go boots for it. Otherwise, I'll be wearing it every chance I get this summer and I've got several sets of sandals that will go with it nicely.
I love the A-line dresses! They are incredible flattering on us pear shapes - smaller on top than on bottom. ahem. When the pattern was cut I opted for one size larger on bottom and the dress absolutely could not fit me better.
I think without the flowers, this would be the perfect little black dress for going out in.
Thursday, March 19, 2009
Sewing Fear
I wish I wasn't feeling about twelve kinds of stoopid right now. I wish I were a brave and fearless seamstress. Alas, I'm not.
Thank God for the endless source of sewing knowledge that is my Mom. I just avoided a horrible mistake by second guessing myself and calling her up and begging for correct answers.
This is where I was an hour ago in the process:

Not very damned far, I admit. I'm trying to double check everything and it's slowing me up terribly. I now have everything cut out and will begin pinning and sewing. Endora the dress dummy will finally be used as her maker originally intended. I'm going to pin and check the fit before sewing.
I seriously need some "sewing for dummies" lessons, or I at least need to sew more often to get my confidence up. It scares the wits out of me.
With knitting or crochet, if you screw up, you rip and begin again. No harm done, just wasting lots of time, and I'm okay with that. If you screw up in sewing clothing (especially the cutting part) you might as well dump everything in the trash. There's not much room for fudging and no room really for going back. In my past experiences anyway. Now when I've quilted or made bags, yes, I could go back and fudge the heck out of it and make it work. But in sewing clothes, if you want the garment to fit, no fudging.
What is it about this whole sewing thing that makes a college grad gibber in fear?
Thank God for the endless source of sewing knowledge that is my Mom. I just avoided a horrible mistake by second guessing myself and calling her up and begging for correct answers.
This is where I was an hour ago in the process:
Not very damned far, I admit. I'm trying to double check everything and it's slowing me up terribly. I now have everything cut out and will begin pinning and sewing. Endora the dress dummy will finally be used as her maker originally intended. I'm going to pin and check the fit before sewing.
I seriously need some "sewing for dummies" lessons, or I at least need to sew more often to get my confidence up. It scares the wits out of me.
With knitting or crochet, if you screw up, you rip and begin again. No harm done, just wasting lots of time, and I'm okay with that. If you screw up in sewing clothing (especially the cutting part) you might as well dump everything in the trash. There's not much room for fudging and no room really for going back. In my past experiences anyway. Now when I've quilted or made bags, yes, I could go back and fudge the heck out of it and make it work. But in sewing clothes, if you want the garment to fit, no fudging.
What is it about this whole sewing thing that makes a college grad gibber in fear?
Wednesday, March 18, 2009
Sewing!
Once again I have wrecked my dining room/office/craft room. This time, with sewing crap. I have yet to have more than two days of this room being clean. There's always some project scattered everywhere and then the kids come barreling through leaving destruction (toys/shoes/socks/etc) in their wake. Never a dull moment around here, or a clean one for that matter.
I'm performing in a show in two weeks time and it's a medley of different era songs. We're responsible for getting our own costumes. I've got a poodle skirt lined up for one, and I'm making a cute little A-line dress for the sixties one. I'm totally getting some go-go boots too, I've always wanted a pair of those. My mom should be shot for getting rid of hers. I mean, come on now, didn't she think her daughter would want those? :) I don't have a clue what to do for clothing from the 1700s (Les Miserables). Any ideas?
This is what I'm putting together for the 60s costume:

The dress will be black, but the flowers will be done in the fabrics in the photo.
I'm hoping that this will all work out. A fabulous seamstress, I am not. My mom? yes. Me? Not so much.
Meanwhile, I've wrecked the room again. Everything is spread out all over the place. Fabric, ironing board, flowers, toys, basically everywhere.
Does anybody even use a formal dining room nowadays? We might use this room once a year for dining. Mostly it's my office/crafting area and I swear that this one little room is used more than 90% of the rest of our house. We might as well live in a two room hut. Cause, where Mommy is, that's where two boys, two cats and three dogs all want to be at the same time.
I'm performing in a show in two weeks time and it's a medley of different era songs. We're responsible for getting our own costumes. I've got a poodle skirt lined up for one, and I'm making a cute little A-line dress for the sixties one. I'm totally getting some go-go boots too, I've always wanted a pair of those. My mom should be shot for getting rid of hers. I mean, come on now, didn't she think her daughter would want those? :) I don't have a clue what to do for clothing from the 1700s (Les Miserables). Any ideas?
This is what I'm putting together for the 60s costume:
(the one with the flowers)
The dress will be black, but the flowers will be done in the fabrics in the photo.
I'm hoping that this will all work out. A fabulous seamstress, I am not. My mom? yes. Me? Not so much.
Meanwhile, I've wrecked the room again. Everything is spread out all over the place. Fabric, ironing board, flowers, toys, basically everywhere.
Does anybody even use a formal dining room nowadays? We might use this room once a year for dining. Mostly it's my office/crafting area and I swear that this one little room is used more than 90% of the rest of our house. We might as well live in a two room hut. Cause, where Mommy is, that's where two boys, two cats and three dogs all want to be at the same time.
Friday, October 31, 2008
Happy Halloween!
I broke out of my crafting comfort zone yesterday to do a little sewing. From Scratch. That's right, no pattern! I don't have any problems making clothing out of yarn. If I mess it up, I know that I can go back and start over. But with a sewing machine? If I mess it up, there's no real fixing it. Once you start in with the scissors on the fabric, if it's cut wrong, say sayonara to the project. So I'm quite proud of what I was able to accomplish in a couple of hours this time.
I grabbed a tutorial off of ThreadBanger about making a hoodie based on a fitted Tshirt that I already owned. This is a great little tutorial. I absolutely love this kind of stuff - Inexact, guess as you go projects. I'm not sure why I was unafraid of this, I'm usually terrified of sewing clothes. I can quilt, but sewing is not my forte.
So, I started with some black velour fabric out of the stash that my Mom donated to her favorite charity, me, and with a fitted Tshirt out of the closet:

Added in a little help from my Mom's Westie:

And eventually got to this:

A cute little shirt for just a few hours of time.
Please excuse the blurry pic and the dirty mirror. (It's hard to photograph yourself in a dirty mirror wearing black velour when your usual photographer is at school being studious.)
I did mess up one part though. The all important hood. It's just not a hoodie without one of those, ya know? Somehow, and I don't have a clue how, it came out too small. So Widget the cat now has her witchy costume (or would that be her Widgey costume?) for tonight:

And let me tell you, she's just thrilled to pieces about it. Can't you tell?
I grabbed a tutorial off of ThreadBanger about making a hoodie based on a fitted Tshirt that I already owned. This is a great little tutorial. I absolutely love this kind of stuff - Inexact, guess as you go projects. I'm not sure why I was unafraid of this, I'm usually terrified of sewing clothes. I can quilt, but sewing is not my forte.
So, I started with some black velour fabric out of the stash that my Mom donated to her favorite charity, me, and with a fitted Tshirt out of the closet:
Added in a little help from my Mom's Westie:
And eventually got to this:
A cute little shirt for just a few hours of time.
Please excuse the blurry pic and the dirty mirror. (It's hard to photograph yourself in a dirty mirror wearing black velour when your usual photographer is at school being studious.)
I did mess up one part though. The all important hood. It's just not a hoodie without one of those, ya know? Somehow, and I don't have a clue how, it came out too small. So Widget the cat now has her witchy costume (or would that be her Widgey costume?) for tonight:
And let me tell you, she's just thrilled to pieces about it. Can't you tell?
Friday, July 18, 2008
Spinning Wheel Cozy
Yesterday was an all-time low in dealing with two year old tantrums. The whole day absolutely sucked from the time we got up until we threw the Youngest into his bed in disgust that night. Someone please tell me they grow out of this?
He was quite funny today though. We went into a used sports equipment shop and bought a bike for the Eldest. Well. The Youngest wasn't going to stand for his big brother getting one and not him, by golly. He marched himself over to the men's mountain bikes (the costly ones) and tried to get on one. He stood right there in the middle of the store and demanded one. It was a hoot. He already has a fisher-price bike, but try telling anything to an independent two year old. They don't reason well at that age.
Anyway, by the end of the day (yesterday) I was too frazzled to knit or do much that required thought. But I desperately needed something different to keep me occupied and I found it.
I made a Spinning Wheel Cozy! A few years ago when I was heavy into sewing handbags and totes, a friend gave me some beautiful upholstery fabric and that's what I used for the cozy.

I googled up a basic tea cozy pattern and sorta used it. I took careful measurements of the wheel and started cutting fabric. Most of those measurements went out the window of course. It started looking way too huge. So I pinned and cut, and then pinned and cut again before I started sewing. There is no lining, but it is hemmed. I left the hem a little long so that I can tuck the fabric up under the wheel.
Why did I make one? You try having a wheel sit on the floor in plain site of a very precocious 2 year old brat and a 10 month old puppy. It'd be destroyed in no time. By covering it, it's "out of site, out of mind." It kinda blends in with the wall color I have in my dining room/office. No one has even looked at it twice since it's been covered. Yeah!
Have a great weekend!
He was quite funny today though. We went into a used sports equipment shop and bought a bike for the Eldest. Well. The Youngest wasn't going to stand for his big brother getting one and not him, by golly. He marched himself over to the men's mountain bikes (the costly ones) and tried to get on one. He stood right there in the middle of the store and demanded one. It was a hoot. He already has a fisher-price bike, but try telling anything to an independent two year old. They don't reason well at that age.
Anyway, by the end of the day (yesterday) I was too frazzled to knit or do much that required thought. But I desperately needed something different to keep me occupied and I found it.
I made a Spinning Wheel Cozy! A few years ago when I was heavy into sewing handbags and totes, a friend gave me some beautiful upholstery fabric and that's what I used for the cozy.
The new Spinning Wheel Cozy!
I googled up a basic tea cozy pattern and sorta used it. I took careful measurements of the wheel and started cutting fabric. Most of those measurements went out the window of course. It started looking way too huge. So I pinned and cut, and then pinned and cut again before I started sewing. There is no lining, but it is hemmed. I left the hem a little long so that I can tuck the fabric up under the wheel.
Why did I make one? You try having a wheel sit on the floor in plain site of a very precocious 2 year old brat and a 10 month old puppy. It'd be destroyed in no time. By covering it, it's "out of site, out of mind." It kinda blends in with the wall color I have in my dining room/office. No one has even looked at it twice since it's been covered. Yeah!
Have a great weekend!
Tuesday, March 20, 2007
couple of FO's and a score!
Several things to mention today. I have a couple of FO's and a score!
First, the score:
I found a mink stole/capelet at an estate sale this weekend and got it for $14 bucks. It needs a little tlc, so I'll have to get it to someone who specializes in fur garments. Now, I wouldn't go out and buy a brand new fur and don't necessarily condone the killing of animals for the pelts, but I figure that it's already dead and sewn and for $14 bucks, I'm not passing it up.
Now, the FO's:

This knitted summer tank is now in the blocking stage. Yeah me! It's a bit tighter than I wanted it to be. We'll hope that it stretches since it's cotton. Big thanks to everyone at Crafster for holding my hand through this one. I've already got a new project planned, but I'll have to keep it under wraps for a while since it's to be a gift. Just pray it gets done in time.

Finished a sundress! This pic absolutely doesn't do it justice. I did discover during this process that I am a terrible seamstress. Patterns are not my friend. My mom got several long distance calls during this ordeal. Not that I won't sew again, but it was a frustrating process. I hate being shaped like a pear!
We could use a little prayer here for our family. My husband is having a difficult time with work (mortgage broker) and there's not a whole lot of money coming in and we have some big bills. We're about as stress as we can be at the moment and my husband is hurting in the self-confidence department. Any prayer is much appreciated!
First, the score:
Now, the FO's:
This knitted summer tank is now in the blocking stage. Yeah me! It's a bit tighter than I wanted it to be. We'll hope that it stretches since it's cotton. Big thanks to everyone at Crafster for holding my hand through this one. I've already got a new project planned, but I'll have to keep it under wraps for a while since it's to be a gift. Just pray it gets done in time.
Finished a sundress! This pic absolutely doesn't do it justice. I did discover during this process that I am a terrible seamstress. Patterns are not my friend. My mom got several long distance calls during this ordeal. Not that I won't sew again, but it was a frustrating process. I hate being shaped like a pear!
We could use a little prayer here for our family. My husband is having a difficult time with work (mortgage broker) and there's not a whole lot of money coming in and we have some big bills. We're about as stress as we can be at the moment and my husband is hurting in the self-confidence department. Any prayer is much appreciated!
Wednesday, March 14, 2007
Ebay, Sundresses and Widgets
Well, I started an Ebay store today. We'll see how things go. I've only got about 5 things listed so far and it's taken me all day to get that done. Who says that stay at home moms have tons of time on their hands? I named my store SasShea, just thought it'd be a fun play on my name and the word sashay. I'm such a dork.
I started on a new sundress last night. I desperately need some new clothes that can be worn to church and I have a tight budget. So, me and the cat started cutting up cloth last night. This took forever too. I'm not an experienced sewer and I ended up triple checking everthing I did. Not to mention the help that I had from the cat. Tissue paper and loose pins are very enticing, trust me on this. Tonight, if I can manage to get everyone in bed on time, I'll start sewing that puppy together.
Nothing gets done around here without Supervisor Widget being on top of things!
Thursday, January 04, 2007
It's been a while...
Yes, it's been forever since I've posted anything. But, lest you think that I've been idle, here's a little of what I've been up to:
To combat being cold, I made a "Snuglet". It's a blanket that you wear over you that has sleeves in it so that you can be warm and still have your hands free. I used the leftover fleece to make draft stoppers for our doors. It's made a huge difference in the temperature of our house.
I also made a ton of reindeer ornaments. I would highly recommend these at Christmas if you work with preschoolers or early elementary age children. I had about 70 kids make these in an hour. It was pretty awesome and cheap too! I hit a thrift store, bought three puzzles (100 piece size) and spray painted them brown. The whole project, including the spray paint, tiny red pompoms, small googly eyes, yarn and puzzles was around seven dollars. I used the leftovers that I had and made about twenty more for my son's kindergarten class and still had more leftover. You can get about 100 ornaments made for around $7.00 or less. You can get the directions on how to make these here. Personally, these are cuter without the legs and much easier on everyone if you leave them off. If you're in a hurry and are using regular school glue, the pieces tend to slide off. If you add the legs to the ornament, that's just more pieces to have fall off and you'll end up with some really upset children.
We've dealt with a bout of the flu with our oldest child. He had to miss his class party, so I went for him and took the ornaments with me and got his goody bag and gifts from classmates.
During this time, I managed to finish my youngest son's sweater! The first sweater that I've ever knitted! Kinda proud of myself, since this is only my second ever knitting project. Here's a pic of the little guy modeling it:

We also made it through his first birthday party. He was born on New Year's Eve, so we held his party in the evening and combined it with a New Year's party. We called it "Reece's New Year Jammy Jam" and asked that everyone bring their children in their pjs so we could put the kids to bed and the adults could ring in the New Year. It was pretty fun. Here's the cake that I made (he's really into Blue's Clues) and a pic of him and his brother with the presents.

To combat being cold, I made a "Snuglet". It's a blanket that you wear over you that has sleeves in it so that you can be warm and still have your hands free. I used the leftover fleece to make draft stoppers for our doors. It's made a huge difference in the temperature of our house.
I also made a ton of reindeer ornaments. I would highly recommend these at Christmas if you work with preschoolers or early elementary age children. I had about 70 kids make these in an hour. It was pretty awesome and cheap too! I hit a thrift store, bought three puzzles (100 piece size) and spray painted them brown. The whole project, including the spray paint, tiny red pompoms, small googly eyes, yarn and puzzles was around seven dollars. I used the leftovers that I had and made about twenty more for my son's kindergarten class and still had more leftover. You can get about 100 ornaments made for around $7.00 or less. You can get the directions on how to make these here. Personally, these are cuter without the legs and much easier on everyone if you leave them off. If you're in a hurry and are using regular school glue, the pieces tend to slide off. If you add the legs to the ornament, that's just more pieces to have fall off and you'll end up with some really upset children.
We've dealt with a bout of the flu with our oldest child. He had to miss his class party, so I went for him and took the ornaments with me and got his goody bag and gifts from classmates.
During this time, I managed to finish my youngest son's sweater! The first sweater that I've ever knitted! Kinda proud of myself, since this is only my second ever knitting project. Here's a pic of the little guy modeling it:
We also made it through his first birthday party. He was born on New Year's Eve, so we held his party in the evening and combined it with a New Year's party. We called it "Reece's New Year Jammy Jam" and asked that everyone bring their children in their pjs so we could put the kids to bed and the adults could ring in the New Year. It was pretty fun. Here's the cake that I made (he's really into Blue's Clues) and a pic of him and his brother with the presents.
Tuesday, August 08, 2006
Socks and Bags
Yeah! My first knitting project is complete! Not bad for a beginner huh? Although the cuffs make my ankles look huge in the picture, it's not so bad in person. I got the pattern from Bev's Really Quick Knit SocksSooner or later I will try making socks with dpns or circular needles, but for now I'm just too chicken. I am trying to make my brother's upcoming new son a baby blanket, but will have to post on that later.
I also managed to finish a new purse a few weekends ago. The embroidery was so cute with the fabrics that I picked out for it. It's now in someone else's hands, but I wish I could have kept it.
Subscribe to:
Posts (Atom)