I really need to stop watching home improvement style shows. It makes me itchy for paint brushes and paint rollers. I found that I needed to scratch that itch this afternoon and ended up with primer on walls, trim and my hands.
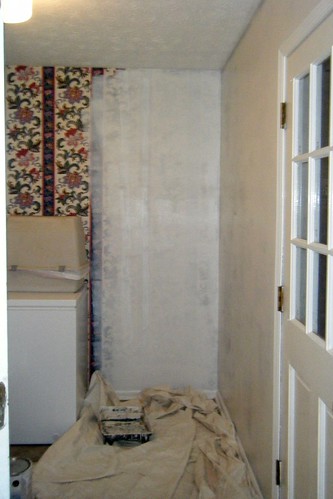
The room that is much in need of restoration is my laundry room and it attaches directly to my kitchen. It's been clashing with the updated kitchen (well, almost updated - I still need to do one more countertop) and it's been driving me nuts to look at it. With the freezer dying crisis of last week and our subsequent purchase of one a little smaller, I found myself able to see much more of the wall and the pressure to paint began to build up. It came to a head while I was at the folks' house this past weekend and was watching diy channels. I was doomed from that point on.
This, of course, will naturally send the spouse's blood pressure skyrocketing as it always does whenever I get near paint or power tools. He'll get over it. I'm following the rule of thumb that says "It's better to ask forgiveness than permission." I never told him I was going to start painting. He'll find out when he gets home tonight. :)
Here's the before pic (check out the hideous wallpaper):
After Priming part of the walls:
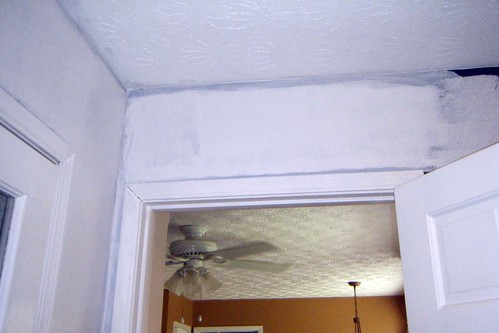
And another shot above the door that goes into the kitchen:
You can see the color of my kitchen walls in the last pic. It really doesn't go well with dark blue and hideous wallpaper does it? The primer may be spotty right now, but I already love it better than what was in there.
This is the point where I stopped for the day. I'm going to have to rearrange the laundry room to get to the rest of the walls and that will require some help to move the appliances. Everything will need at least two coats of primer and then two coats of the paint. I'm priming the trim as I go along now to save some time later. There's a lot of prep work to be done to the walls before the paint can be applied. The primer has really highlighted a lot of stuff that I missed before.
The idiots that lived here before us left some real problems for me to deal with. One of those being the wallpaper. They didn't prime the walls before applying it. So, in order to save an incredible amount of trouble, I'm painting over it and hoping for the best. They also bolted some stuff into the walls and then tore them off when they left, leaving the anchors in the walls. So I get to patch those holes as well. Sometimes I really wish I had those people in rock throwing distance, I really do.
Have a great weekend!
Friday, June 04, 2010
Thursday, June 03, 2010
Thunderstorms and Outages
Thunderstorms and power outages are not very conducive to blogging are they? Yesterday a series of storms swept through our area. Lightening, thunder and rain appeared off and on all day. In the late afternoon/evening though we got a doozy that took out our power for quite a while. Just as I was about to sit down at the pc and start writing, everything went down. But I'm here today and writing quickly before the afternoon storms are scheduled to blow through again.
In my baking excitement on Tuesday, I forgot to mention the prayer shawl progress. I did not get it finished over the holiday, but it wasn't for lack of trying. I knit on that sucker until my elbow started hurting and had to quit. My wrists had already been aching from it, but the elbow pain was the deal breaker. I have about four more inches to knit and the fringe to add. It should go fairly quick once I start on it again. I have a new deadline and that's Monday. My Mom will be coming to town then and can pick it up for me so I don't have to deal with mailing it.
I tried to get some new pictures of it, but I'm having a heck of a time photographing this shawl in a way that shows it off. I'll keep playing around with it until I get something acceptable to put up here and on Ravelry. This was the best of the last lot of pics and it's not much to write home about:
I need some photography for knitters classes. Do they even have those?
Tuesday, June 01, 2010
Baking Day!
Today was baking day at the House O' Shea!
Here's the totals of everything made: 20 tortillas, 24 Chocolate-Chocolate Chip muffins, Pizza Dough for two pizzas, 6 "Cheesy-illas" (that's 4 year old speak for quesadillas), 1lb. Venison sausage cooked up, and one large Vidalia onion. The onion and sausage were cooked up at the same time; some to go on pizza and some to go in the freezer for a later date.
PHEW!
This was the first time that I had made tortillas. I always thought that this would be difficult, but it was so easy. Here's the recipe that I used:
Flour Tortillas:
3 cups all purpose flour
1/3 shortening
Pinch of Salt
1 cup warm water
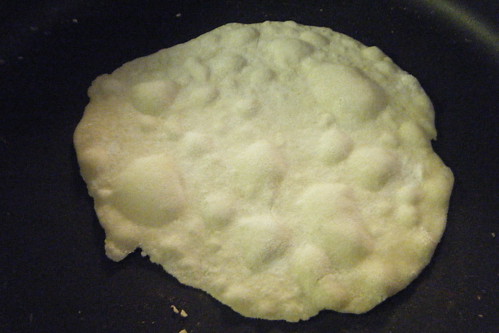
Combine all ingredients, kneading until dough forms. Divided it all into 20 golf ball size balls. Gave a light coating to all of them and then let them rest for about 20 minutes covered. Then, roll out dough on a floured surface. I was really surprised how thin these could roll out. The dough was really easy to work with. Stack all with wax paper between each until ready to cook. Preheat a large griddle or frying pan. Cook each until it begins to puff up like this:
Then flip and press firmly on the tortilla to remove the bubbles. Cook another minute and remove from pan. Here's the finished results:
I stacked these (again) as they finished cooking with the same waxed paper between each.
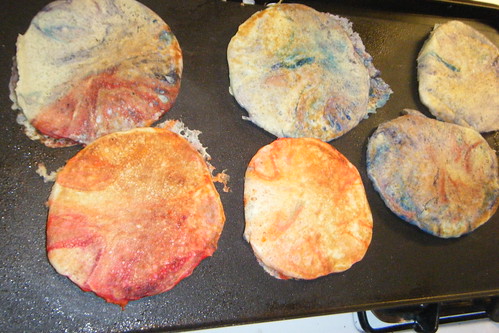
Oh, and I should mention some pancakes that got made a few days ago. You haven't lived until you've eaten tye-dyed pancakes!
The kids loved them.
Tye Dyed Pancakes:
2 cups self rising flour
2 eggs
2 to 2.5 cups buttermilk (you don't want the batter too thick so add more if necessary)
1 Tbsp baking powder
1 tsp vanilla (optional)
Various Wilton food coloring pastes
Combine first 5 ingredients in bowl. Then, if you are going to have several different colored pancakes, separate the batter into a few other bowls. *Take a toothpick and dip it into the first color. It takes only a drop! Swirl the color into the batter and then discard the toothpick.* Repeat that step for as many colors as you choose to have. My boys chose three colors each, your mileage may vary. Make sure that you don't blend the batter so much that you no longer have swirls. You are better off swirling less than more. Next, carefully ladle the batter into a very hot griddle sprayed lightly with cooking spray. I use an electric griddle that I dearly love that was set to 400 degrees. Cooking the pancakes until you see big holes form, then flip with spatula and cook until done. These turned out so pretty it was almost a shame to cut them up!


